

Moving the great pyramid... by myself
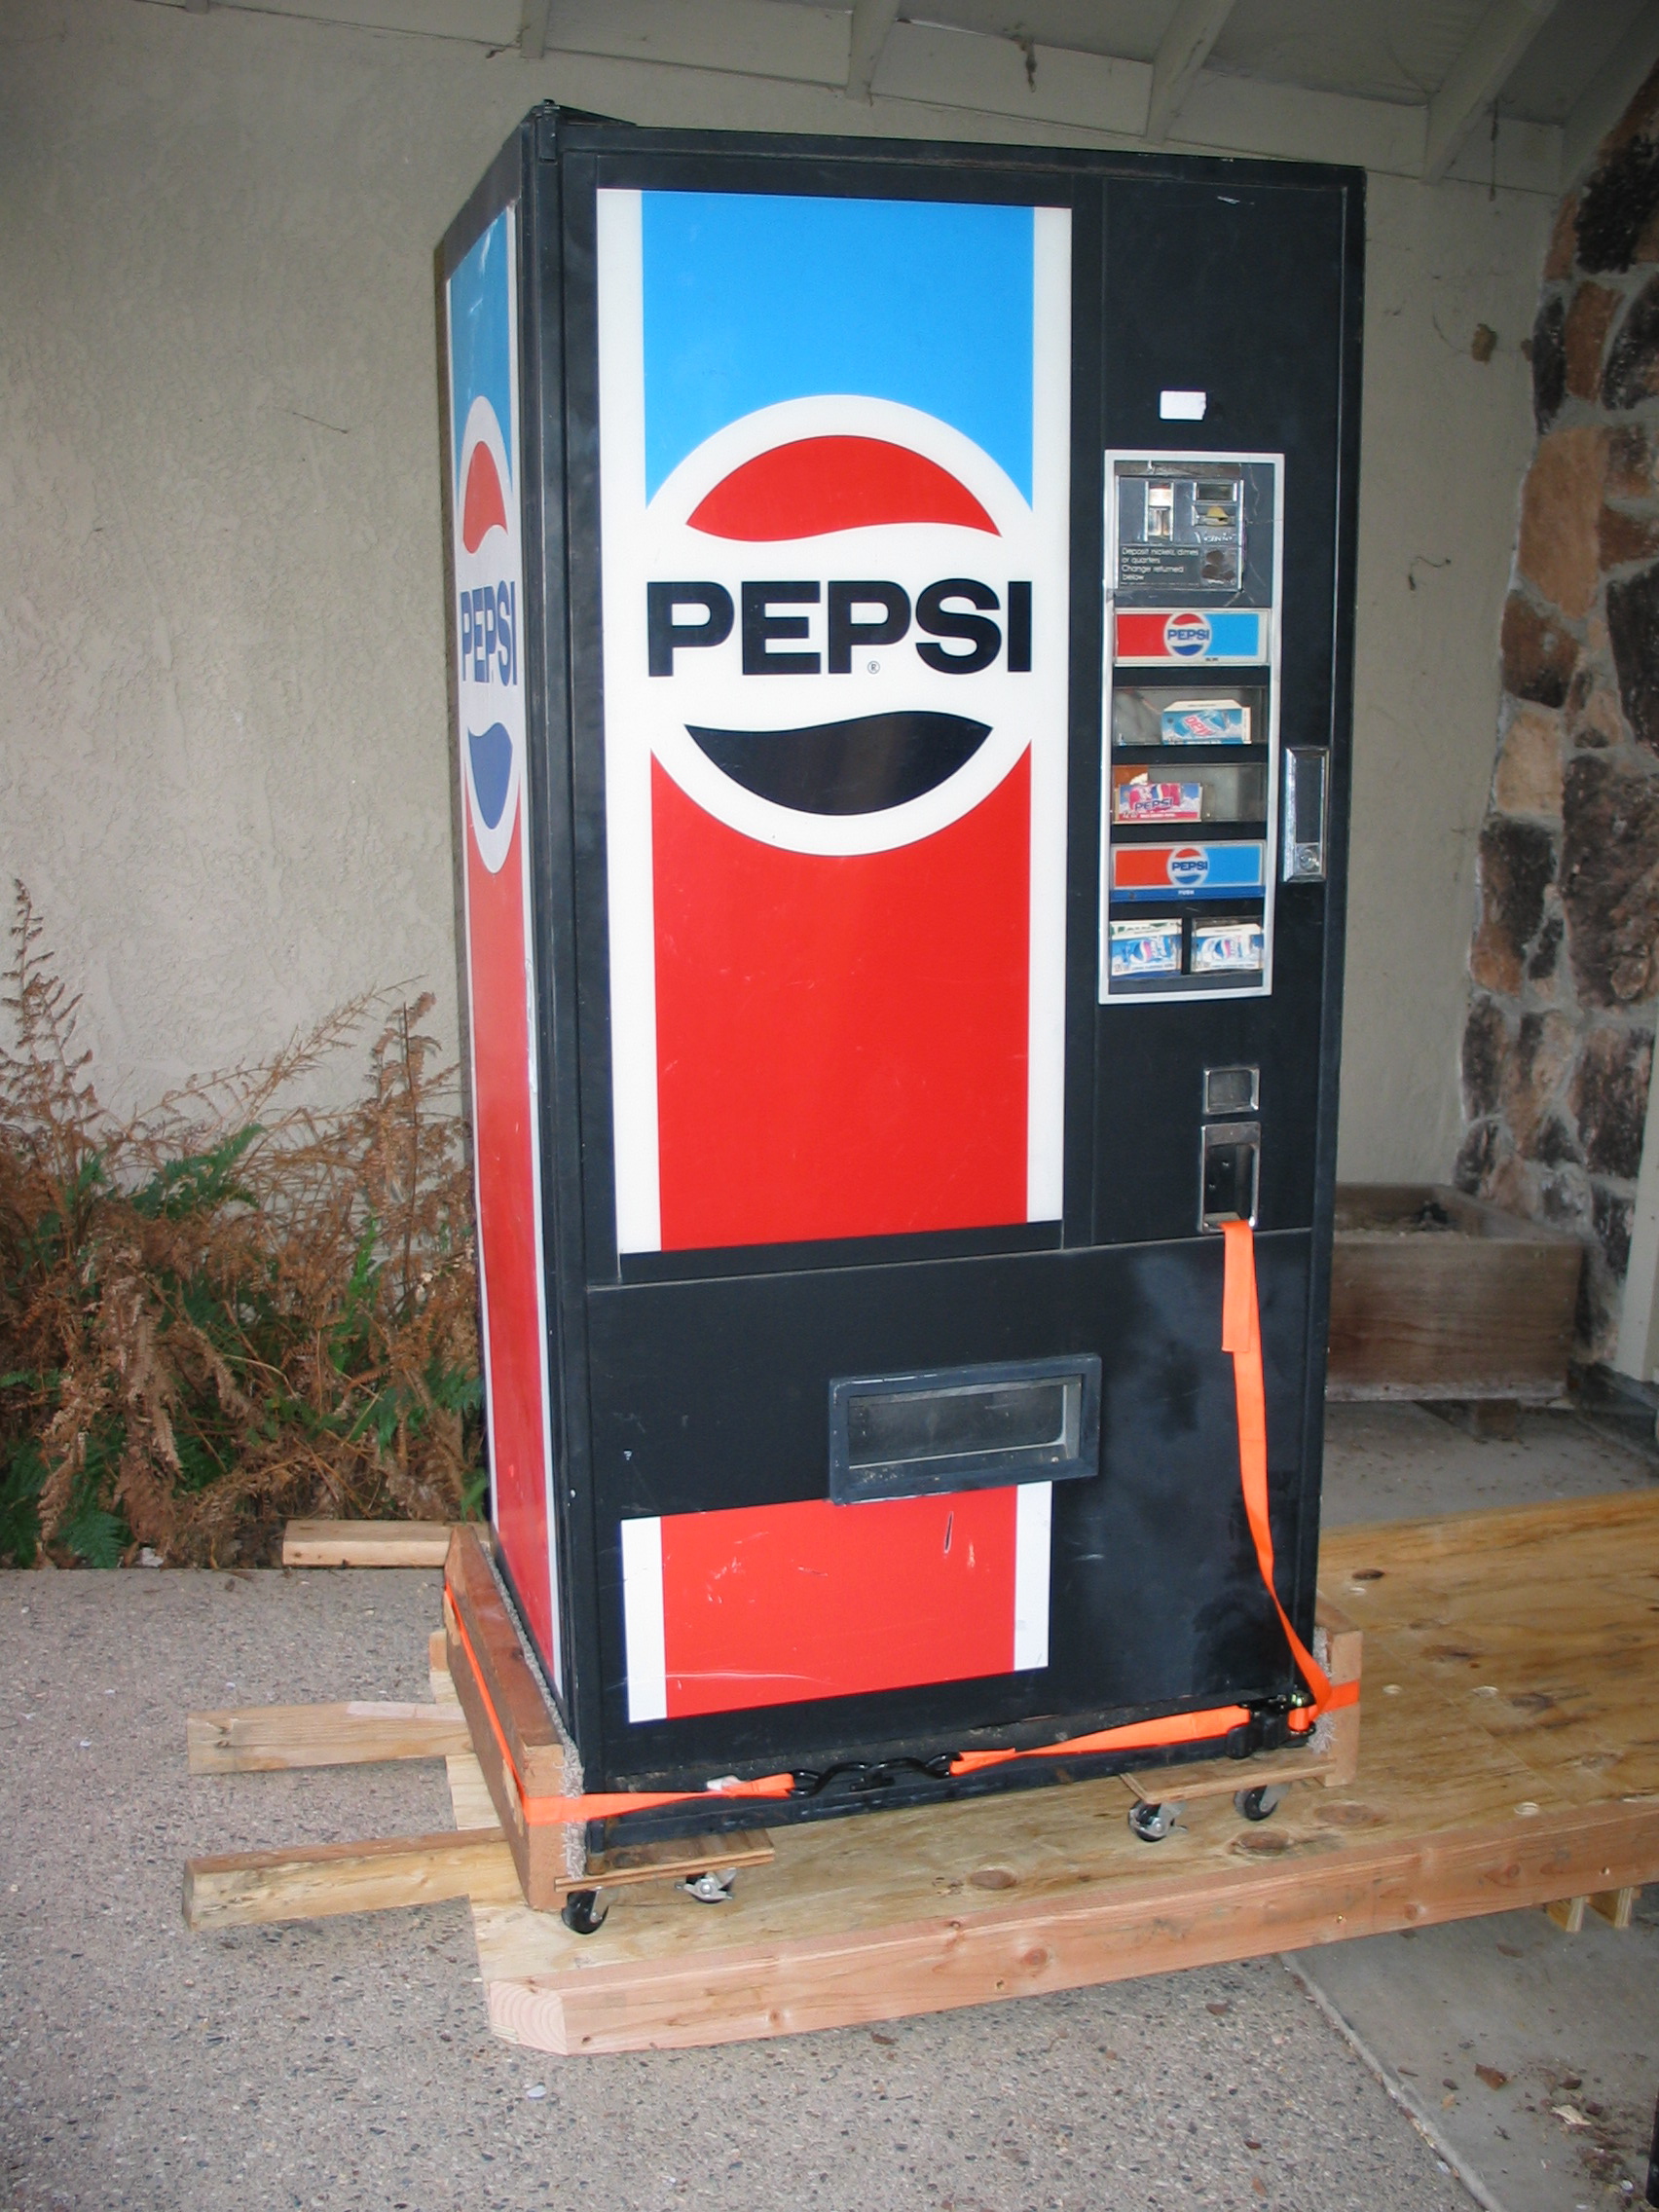
Ok, so it's a Pepsi machine and not a great pyramid. But it must weigh at least half as much. Did I mention that soda machines are really, really heavy?
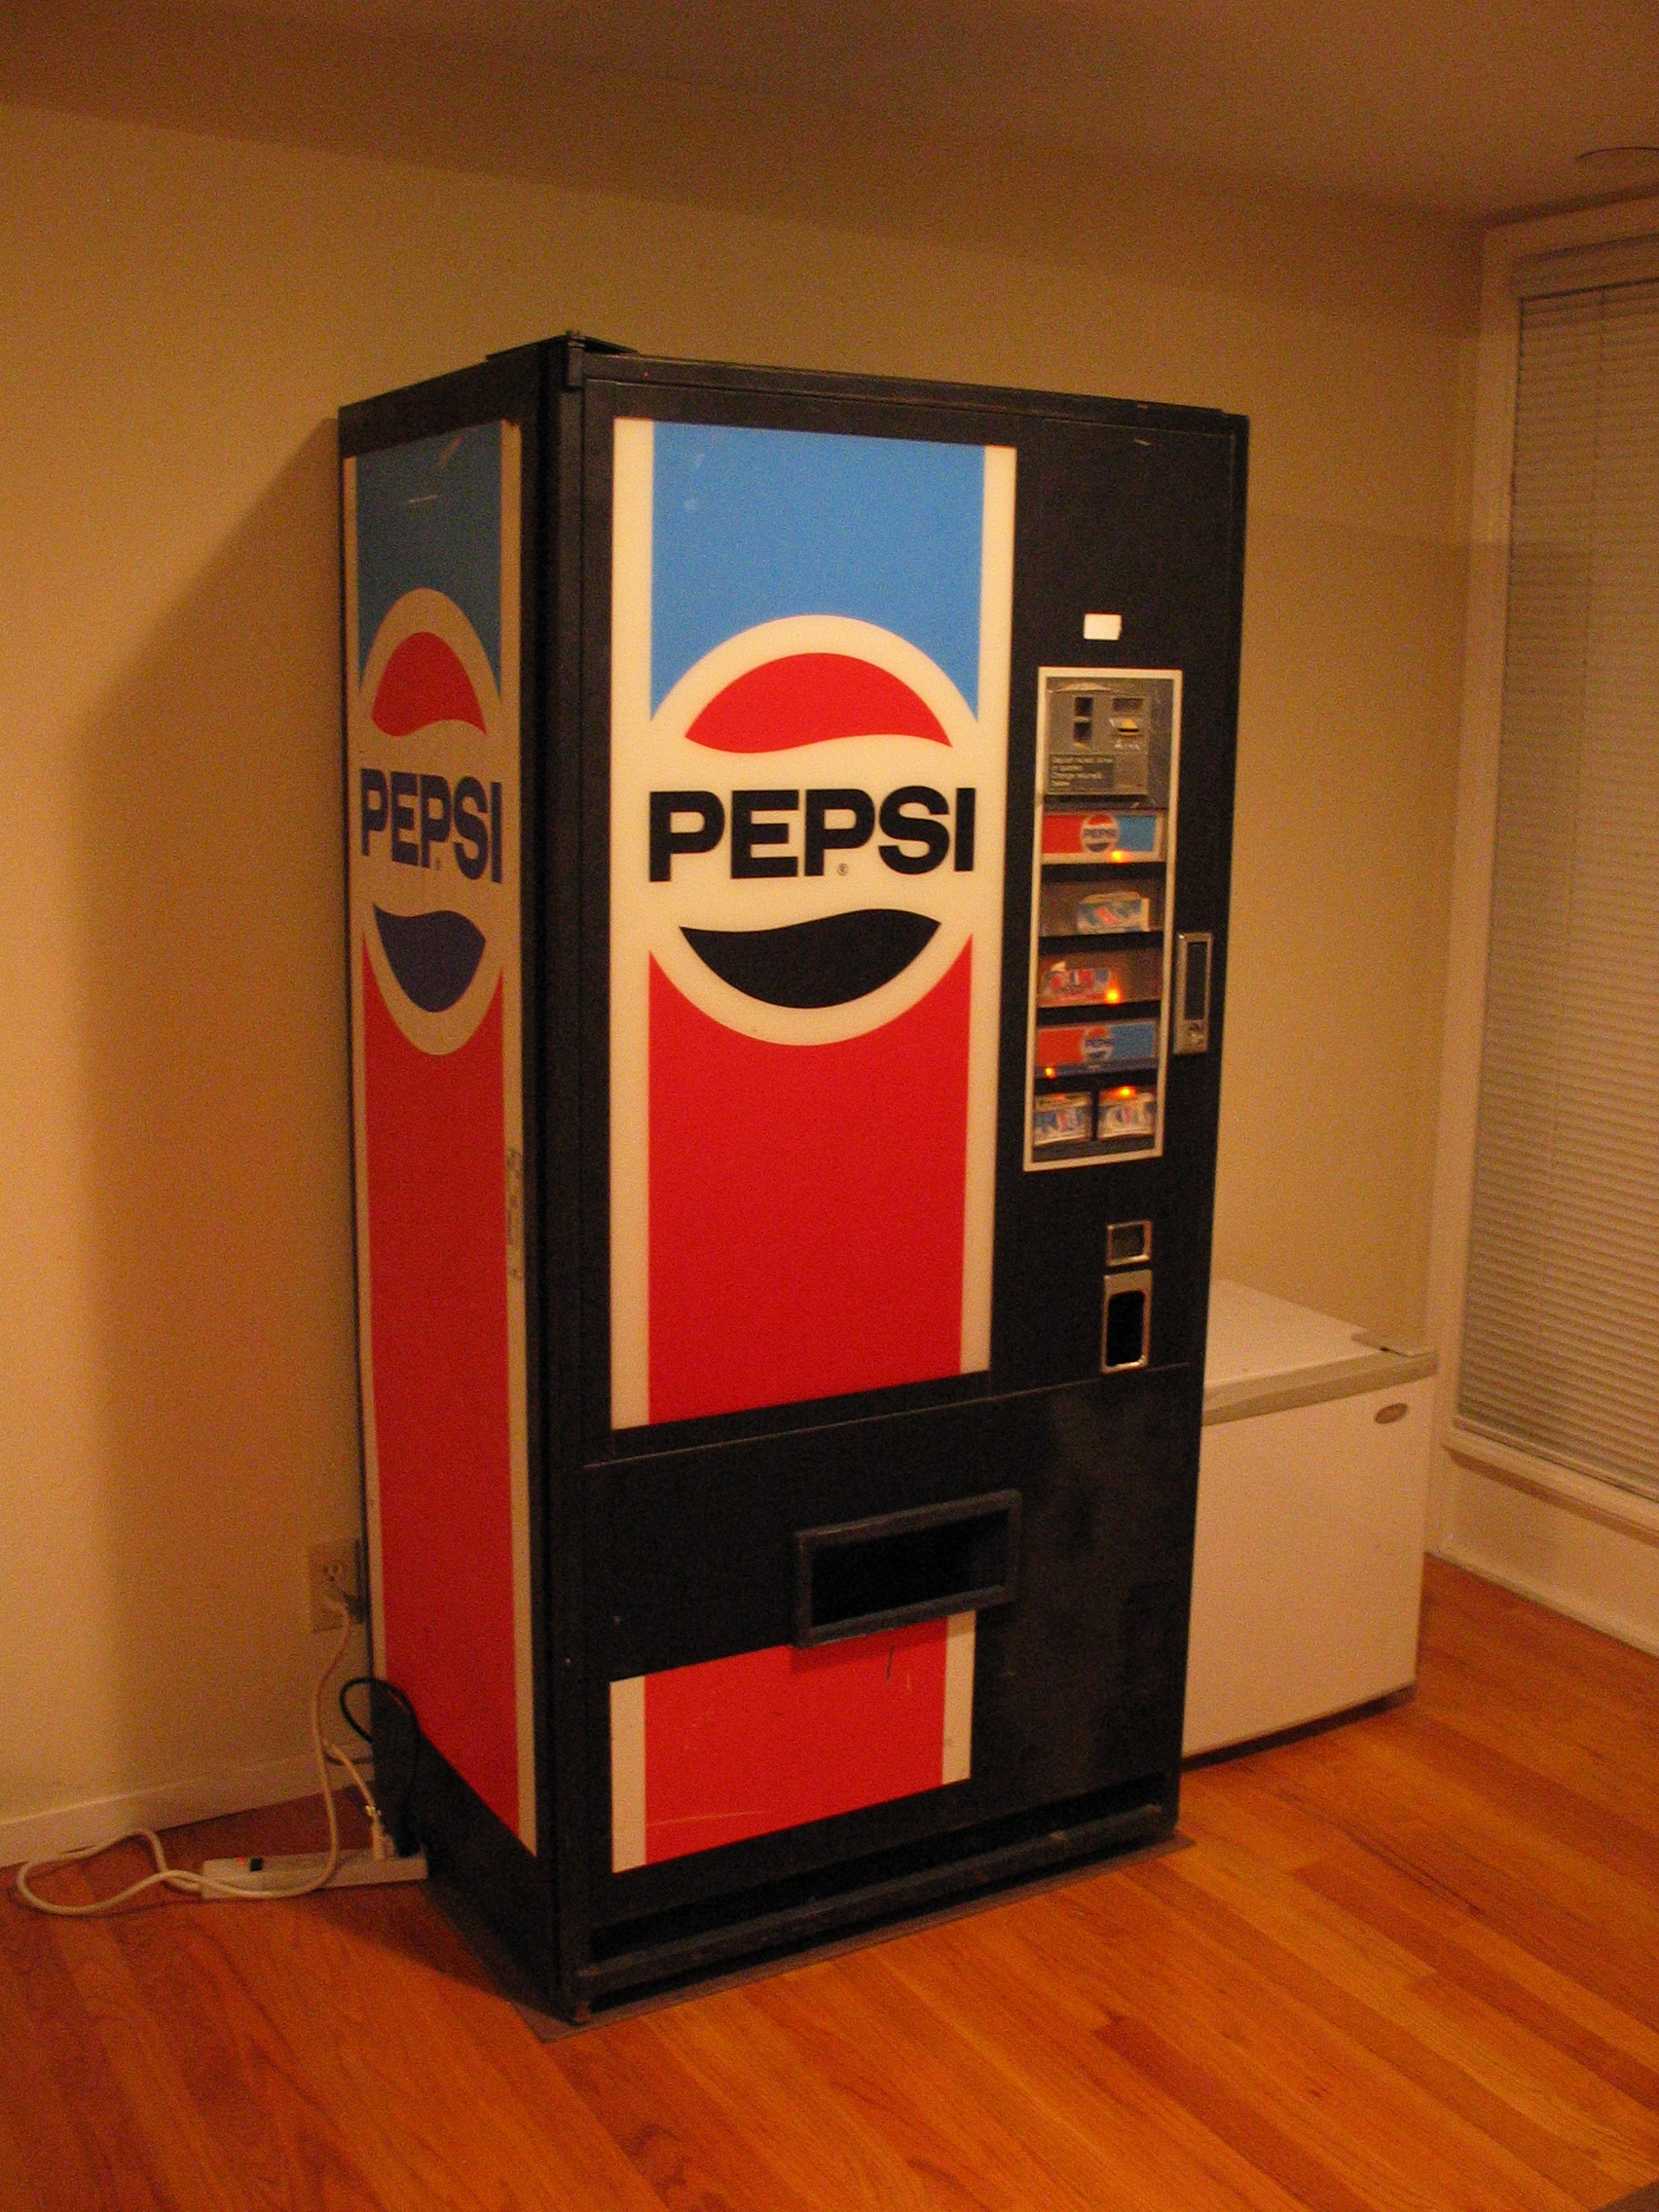 In the house!
Yes, it's in the house now. Yes, I need to start keeping my eye out for sales on soda. Yes, I did it by myself. And no Mom, I didn't hurt myself.
In the house!
Yes, it's in the house now. Yes, I need to start keeping my eye out for sales on soda. Yes, I did it by myself. And no Mom, I didn't hurt myself.
This is definitely an exercise in the use of mechanical advantage and simple machines: wheels, ramps, and wedges. Before we get started though, let's take a moment to talk about shop safety. Whenever moving heavy objects, be sure to wear your steel toe boots. Trust me, your toes will thank you.
First off, let's talk about wheels. If I couldn't find a way to get it up on wheels, there was no way I was going to move it. I have a pair of dollies that I made for moving around long arcade cabinets, like Gauntlet or some of the 4-player Konami cabinets. With arcade cabinets I can grab the cabinet and lift while kicking the dolly under, then go around to the other end and do the same thing. The Pepsi machine however was much too heavy to do this.
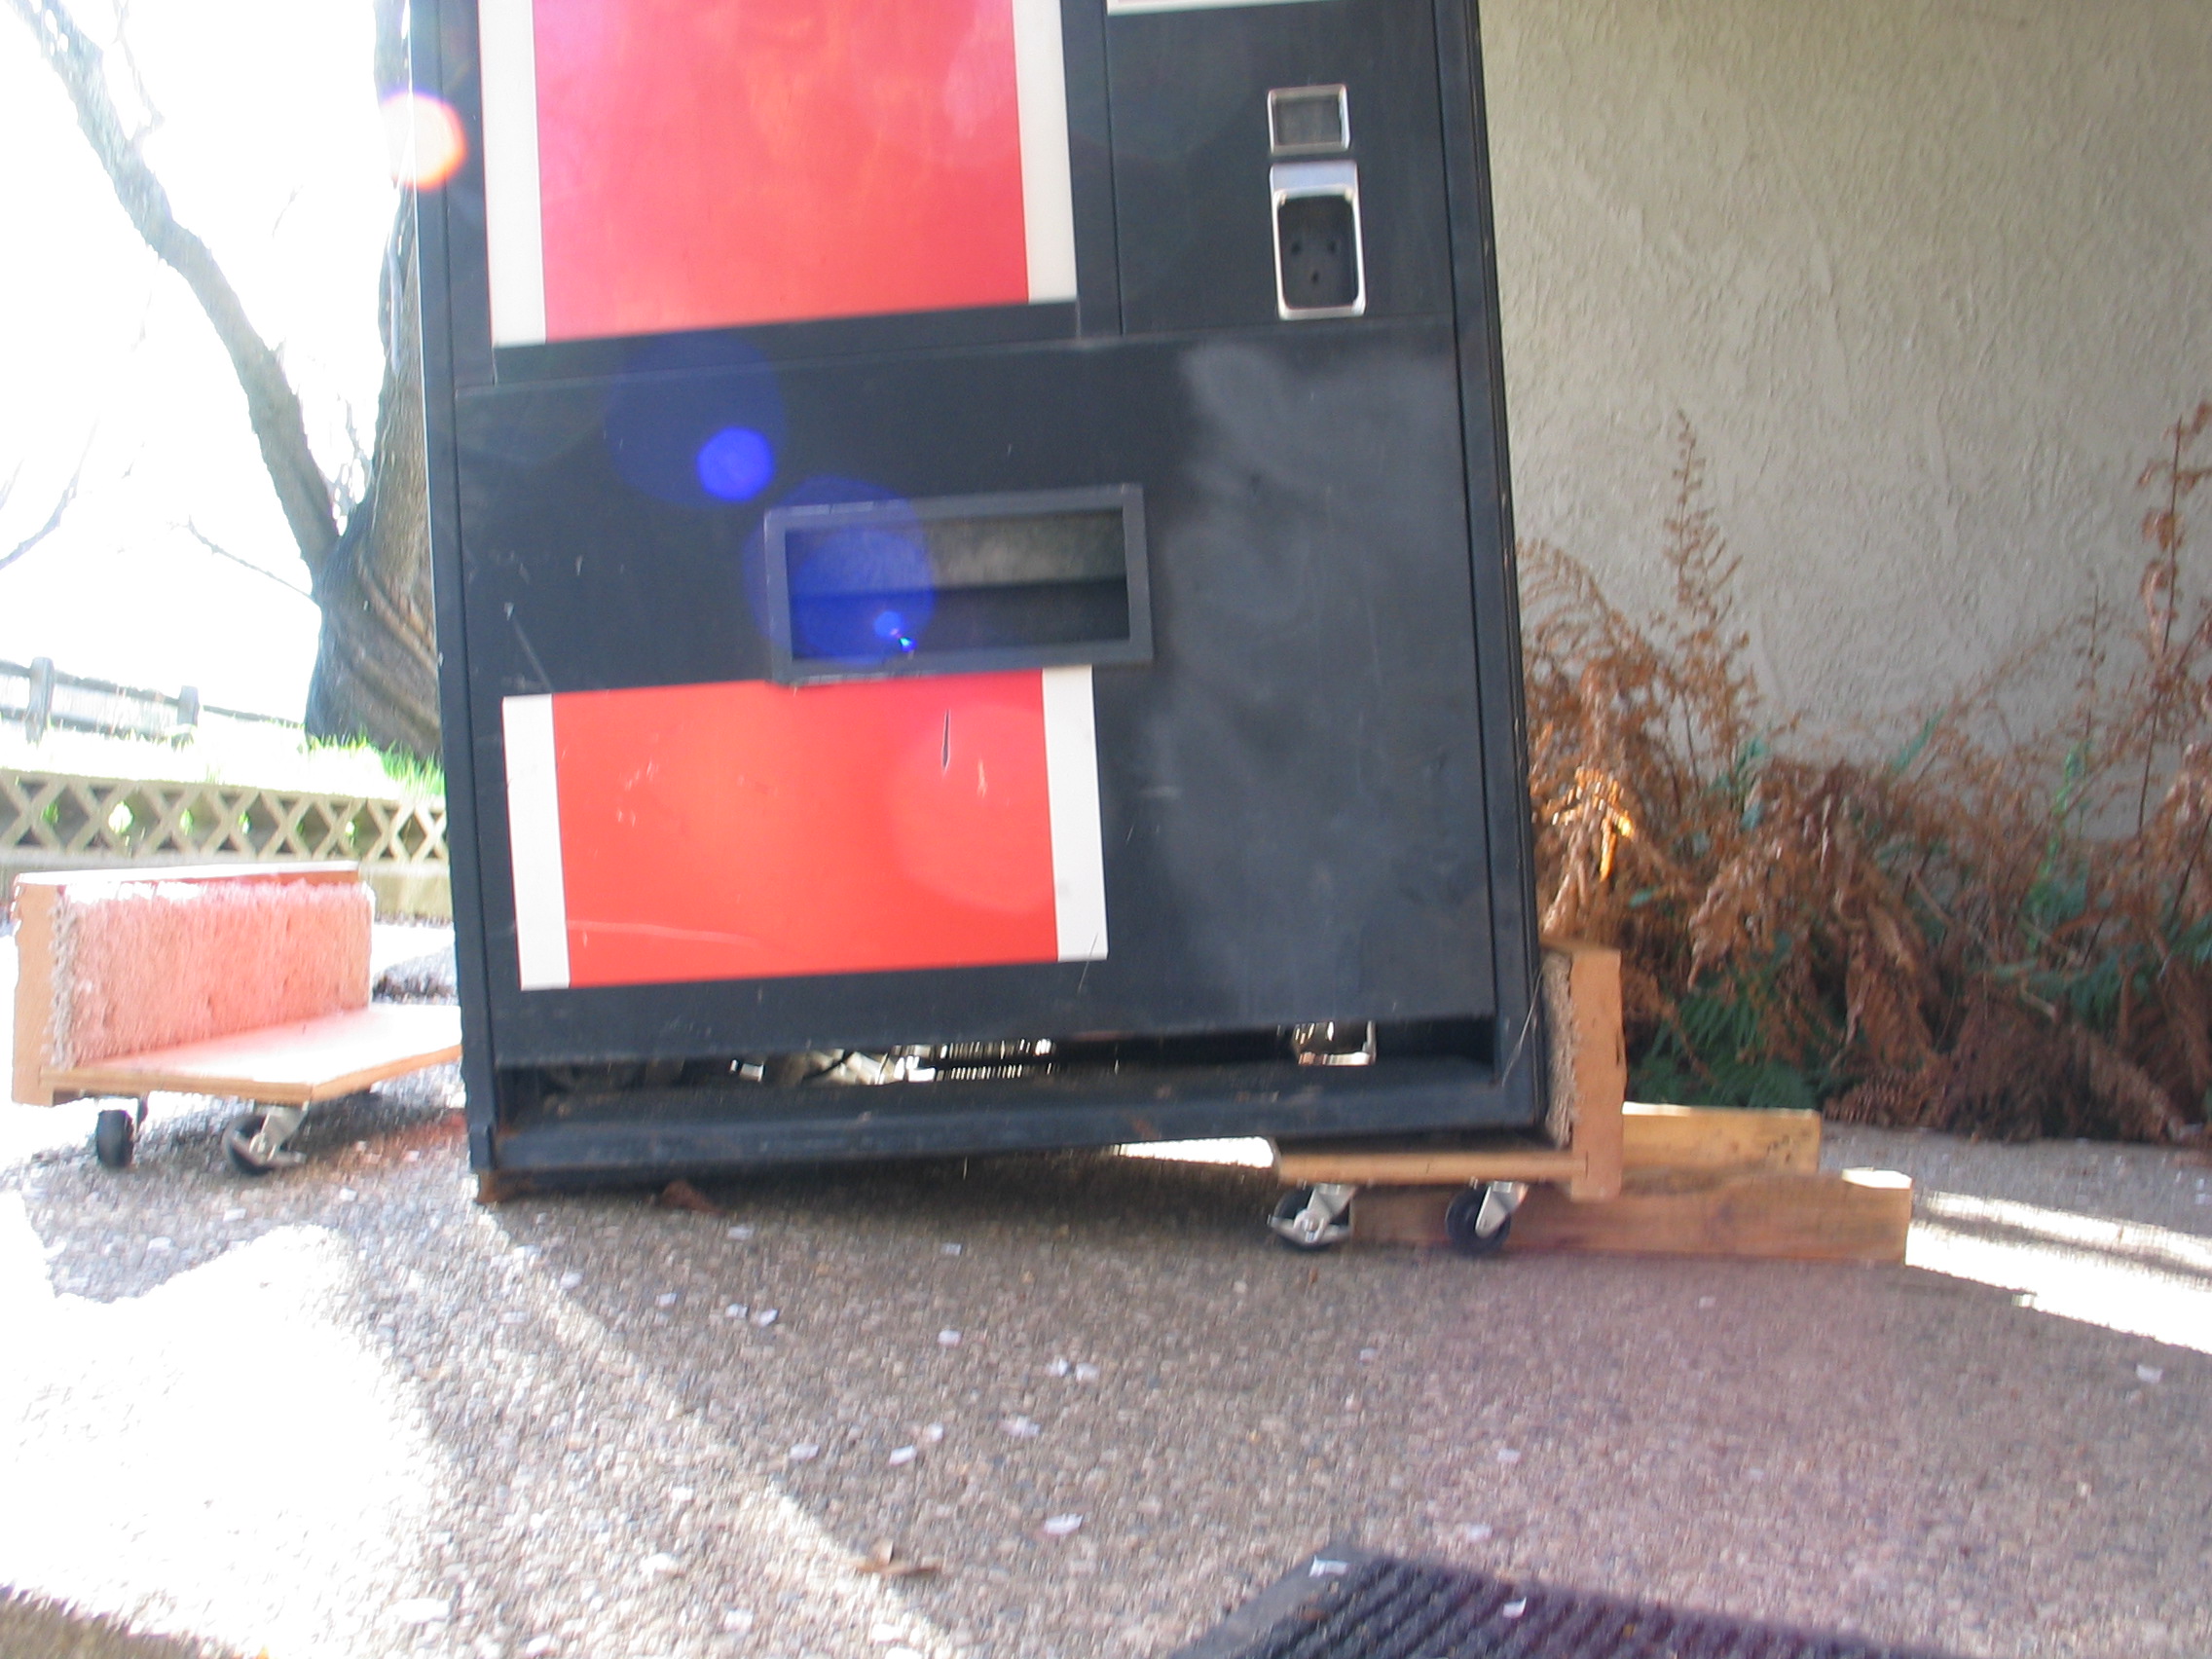 Getting wheels under
I was able to gently tip the machine to kick under the first dolly, but in order to get the second one under I was going to have to lift nearly the entire weight of the machine. That wasn't going to happen. Instead I found that if I opened the front door, it acted as a counter weight and I could tip the machine forward slightly and kick a 2x4 under. Then I could go around to the front and do the same thing. After doing this a few times, first with the 2x4s flat and slowly working towards the outer edge, then with the 2x4s on edge, I got it up high enough that I could slide the dolly under.
Getting wheels under
I was able to gently tip the machine to kick under the first dolly, but in order to get the second one under I was going to have to lift nearly the entire weight of the machine. That wasn't going to happen. Instead I found that if I opened the front door, it acted as a counter weight and I could tip the machine forward slightly and kick a 2x4 under. Then I could go around to the front and do the same thing. After doing this a few times, first with the 2x4s flat and slowly working towards the outer edge, then with the 2x4s on edge, I got it up high enough that I could slide the dolly under.
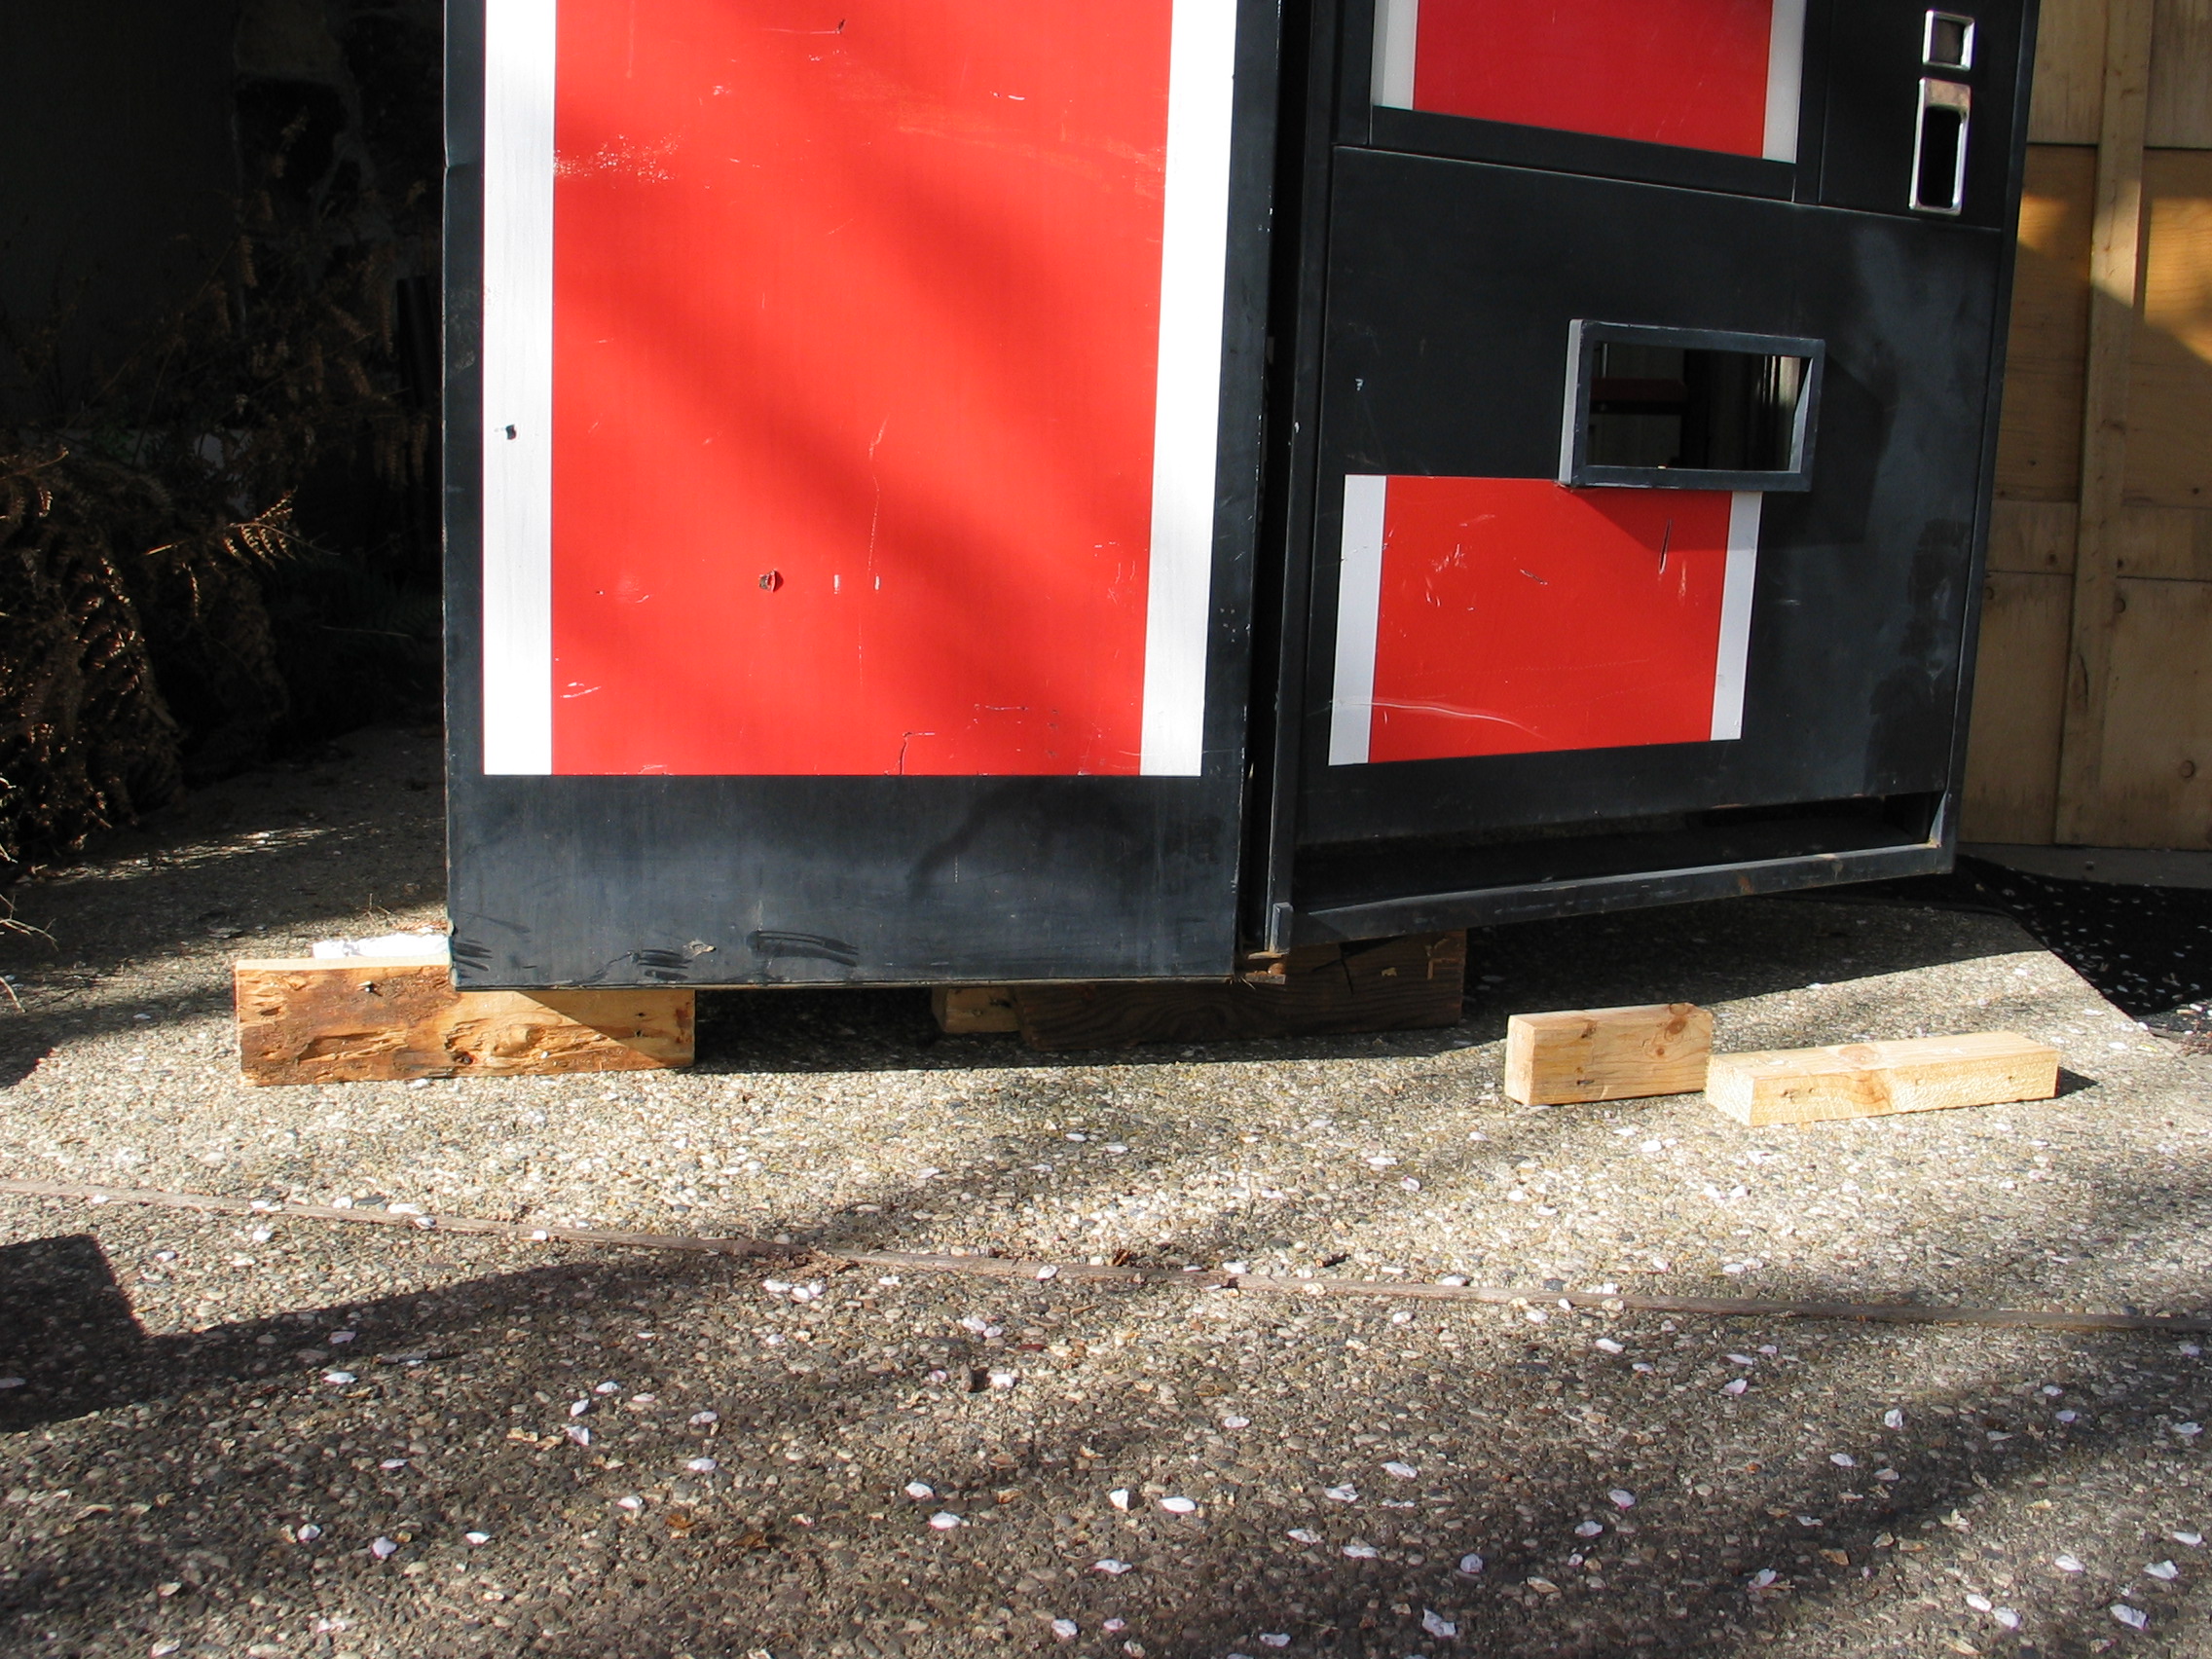 Wedging the back
Once I got it up on wheels I found it wasn't too hard to push around on the concrete.
Wedging the back
Once I got it up on wheels I found it wasn't too hard to push around on the concrete.
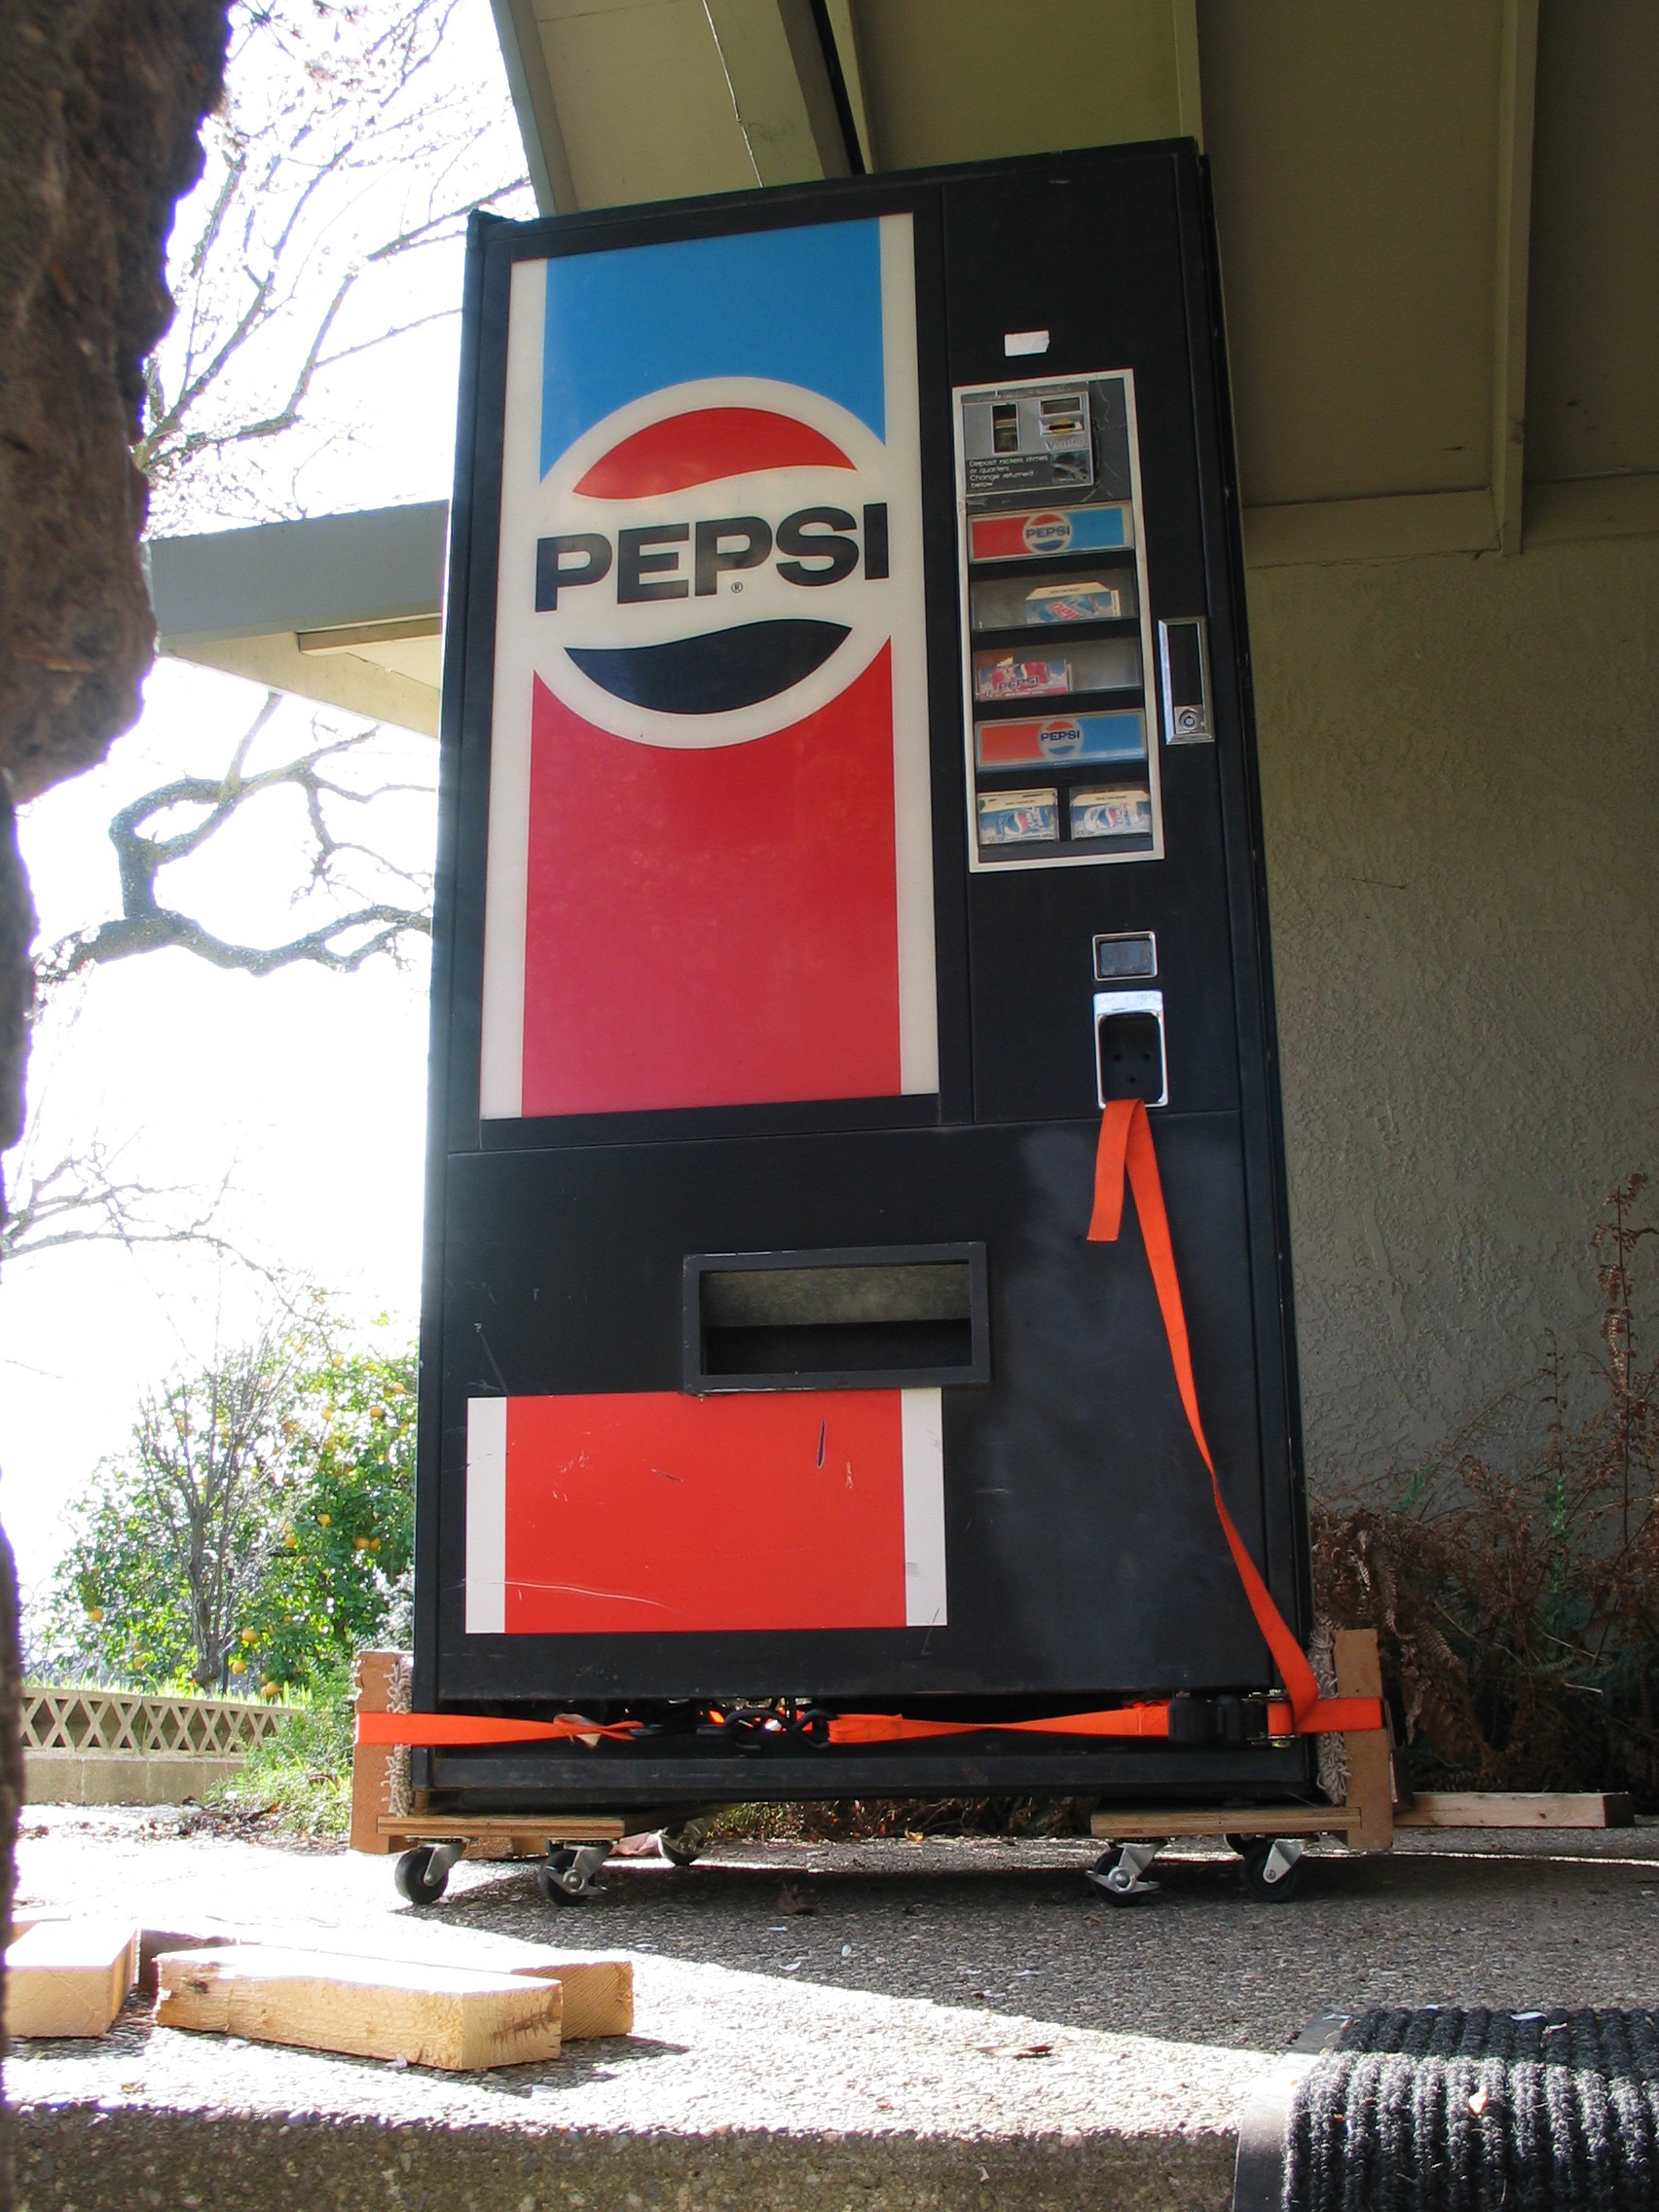 Up on wheels
Next comes the ramp. The ramp I've been using to get arcade and pinball machines in the house was a 3-foot long piece of plywood. Solid and sturdy enough, but somewhat steep. With pinball machines on a hand truck I had to sort of run at the ramp to get enough speed to make it up. Arcade machines on four wheels were a little tough and required lots and lots of effort to push. No way that was going to work for this job.
Up on wheels
Next comes the ramp. The ramp I've been using to get arcade and pinball machines in the house was a 3-foot long piece of plywood. Solid and sturdy enough, but somewhat steep. With pinball machines on a hand truck I had to sort of run at the ramp to get enough speed to make it up. Arcade machines on four wheels were a little tough and required lots and lots of effort to push. No way that was going to work for this job.
After taking some measurements and calculating a few angles, I decided to build an 8-foot ramp. At 8 feet long the angle would be 5 degrees. The ramp would have to be built in sections, a single piece would be much too heavy to move around. I also wanted to try to make it modular, just in case I needed to extend it. I also made it so I could use the top section alone as a 4 foot ramp at 10 degrees, which would be fine for lighter things.
In order to get the angle I put a 2x4 down where the ramp would go and used my large square to determine the rise and run. I would need the angle to cut bevels in the ends of the ramps so they would sit flush, as well as to cut the halfway support so the ramp sections would sit solid on it.
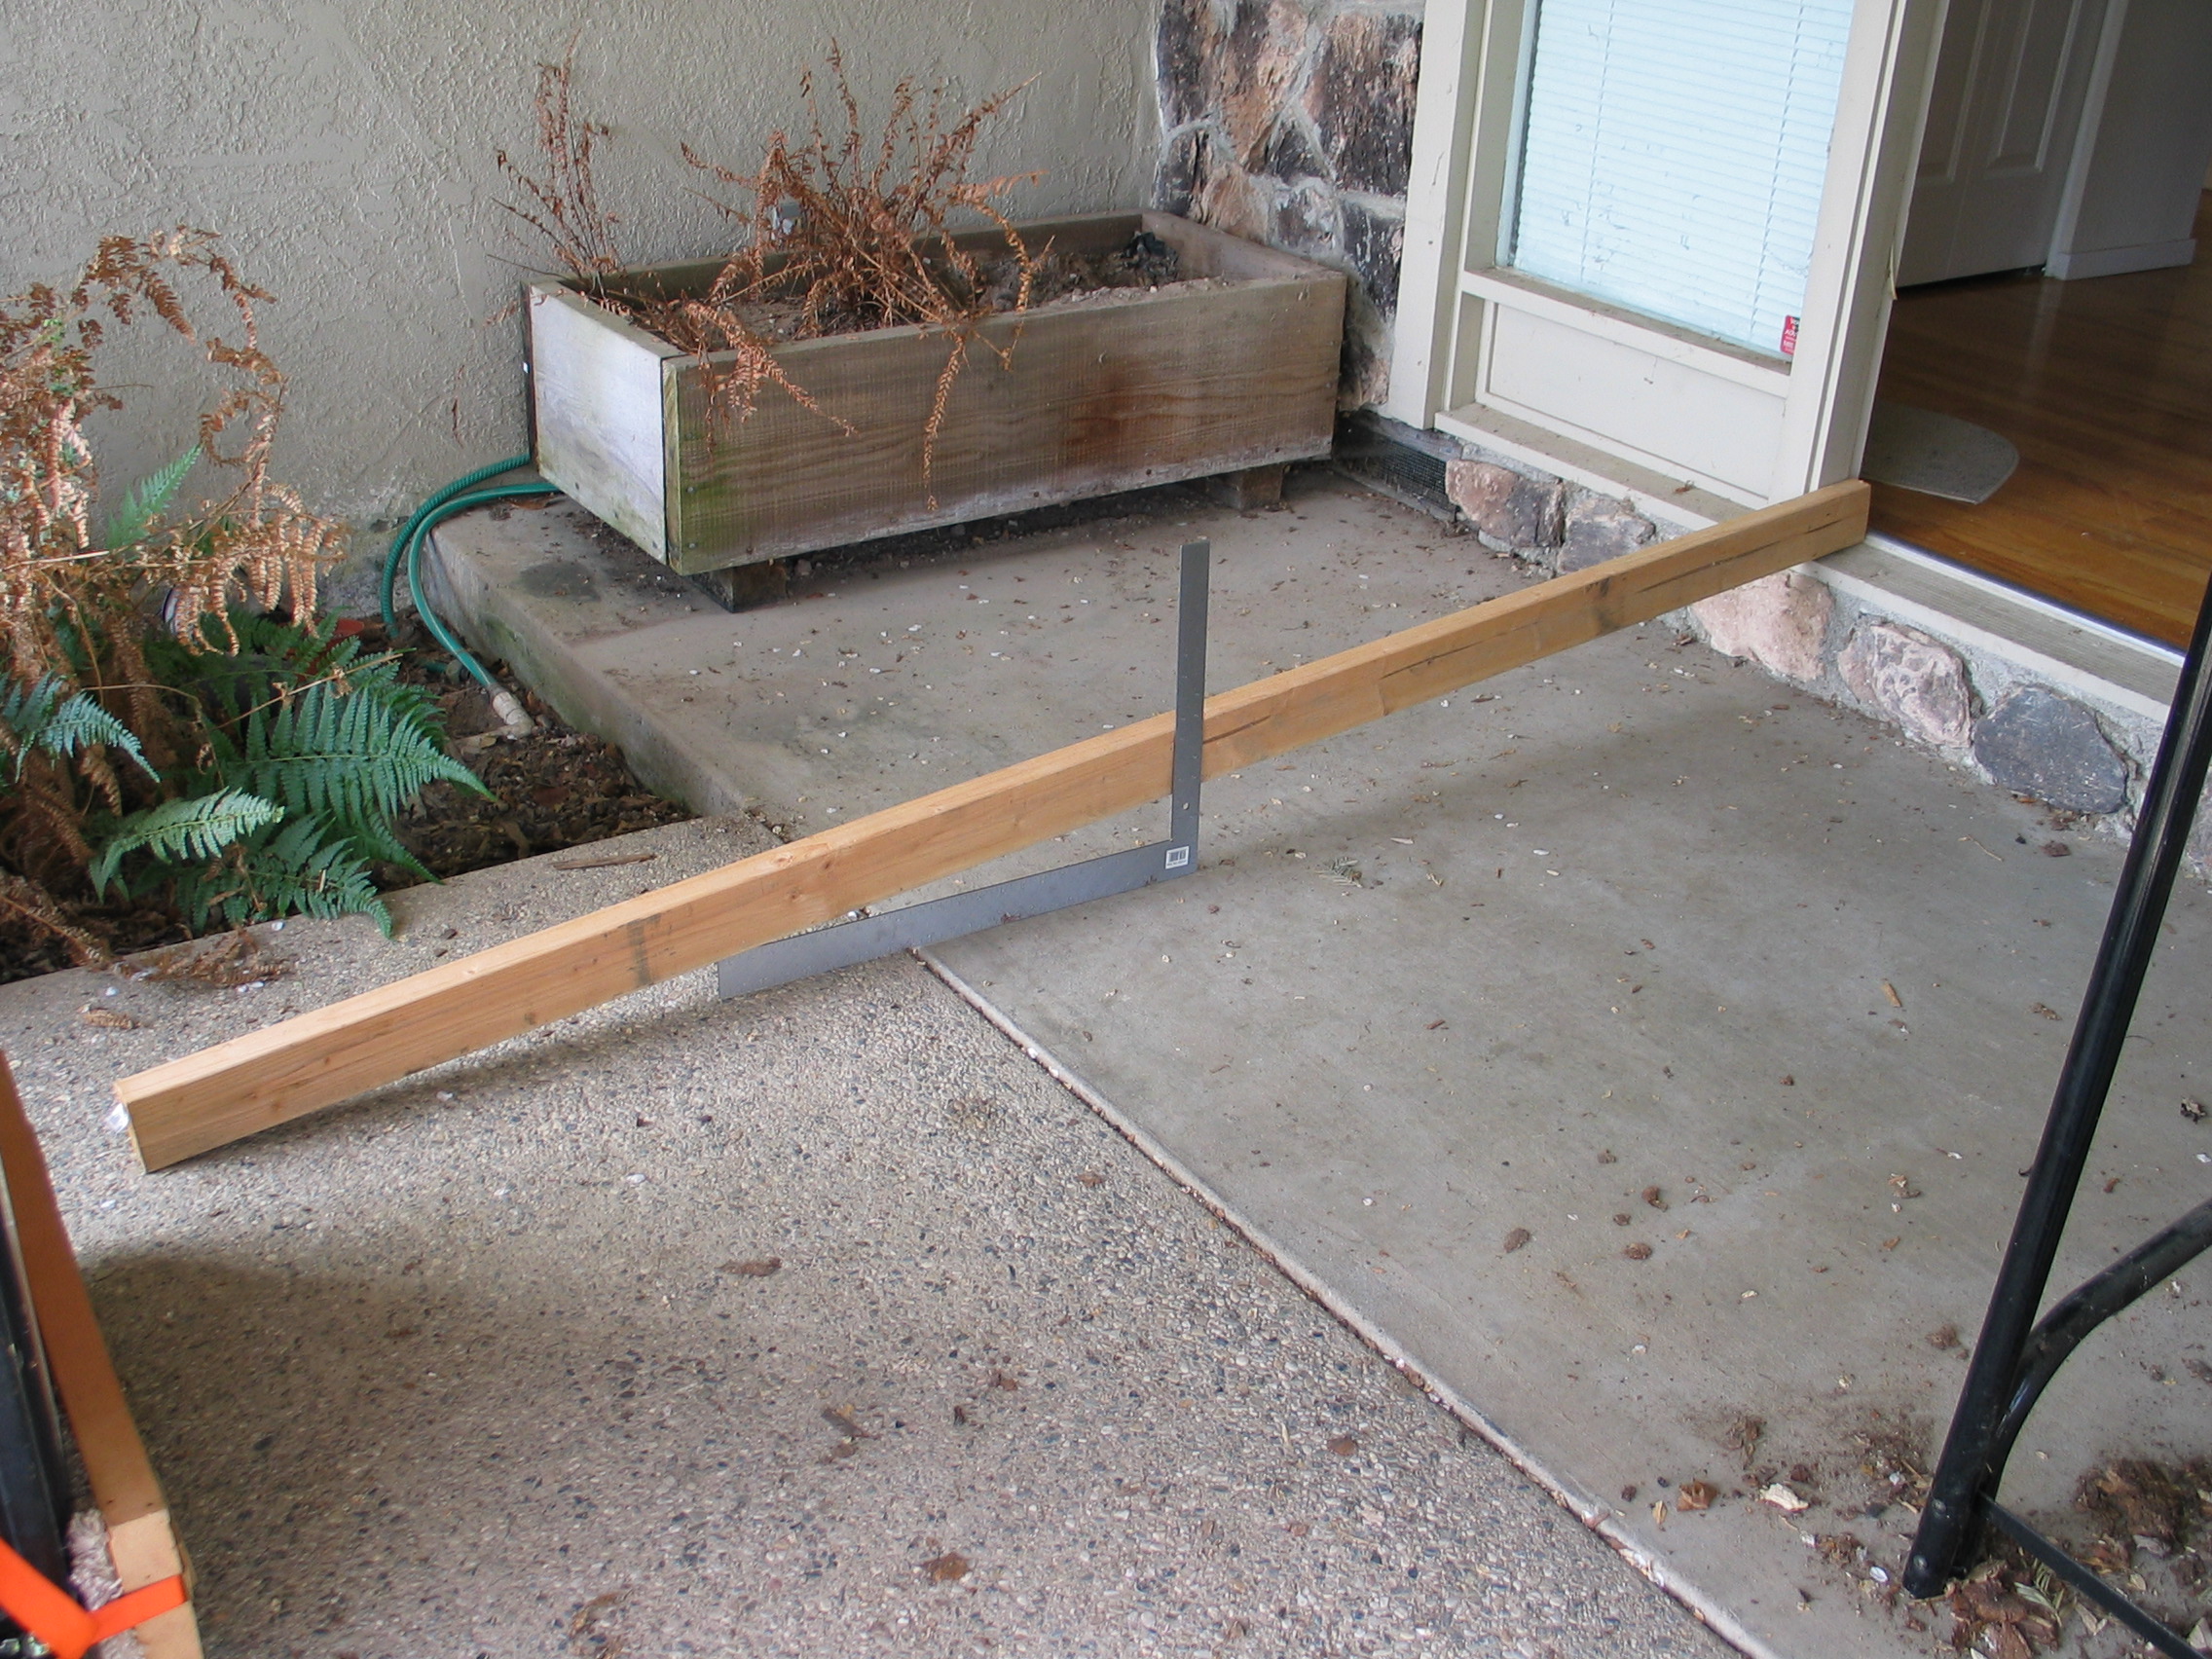 Getting ramp angle
The ramp is made of a sheet of plywood with 2x4 edging. The 2x4s have a half-inch dado cut in them which the plywood is inserted into. I then screwed the 2x4 into the edge of the plywood. No glue, I might want to take them apart someday. The ends of the 2x4s were cut at 60 degrees so the top section would nest into the bottom one. I was originally planning to have some kind of system where the center support would have posts that would go into holes in the ends of the sections to keep them together, but it turned out to be too messy. Instead I temporarily screwed the sections together through the 60 degree miter.
Getting ramp angle
The ramp is made of a sheet of plywood with 2x4 edging. The 2x4s have a half-inch dado cut in them which the plywood is inserted into. I then screwed the 2x4 into the edge of the plywood. No glue, I might want to take them apart someday. The ends of the 2x4s were cut at 60 degrees so the top section would nest into the bottom one. I was originally planning to have some kind of system where the center support would have posts that would go into holes in the ends of the sections to keep them together, but it turned out to be too messy. Instead I temporarily screwed the sections together through the 60 degree miter.
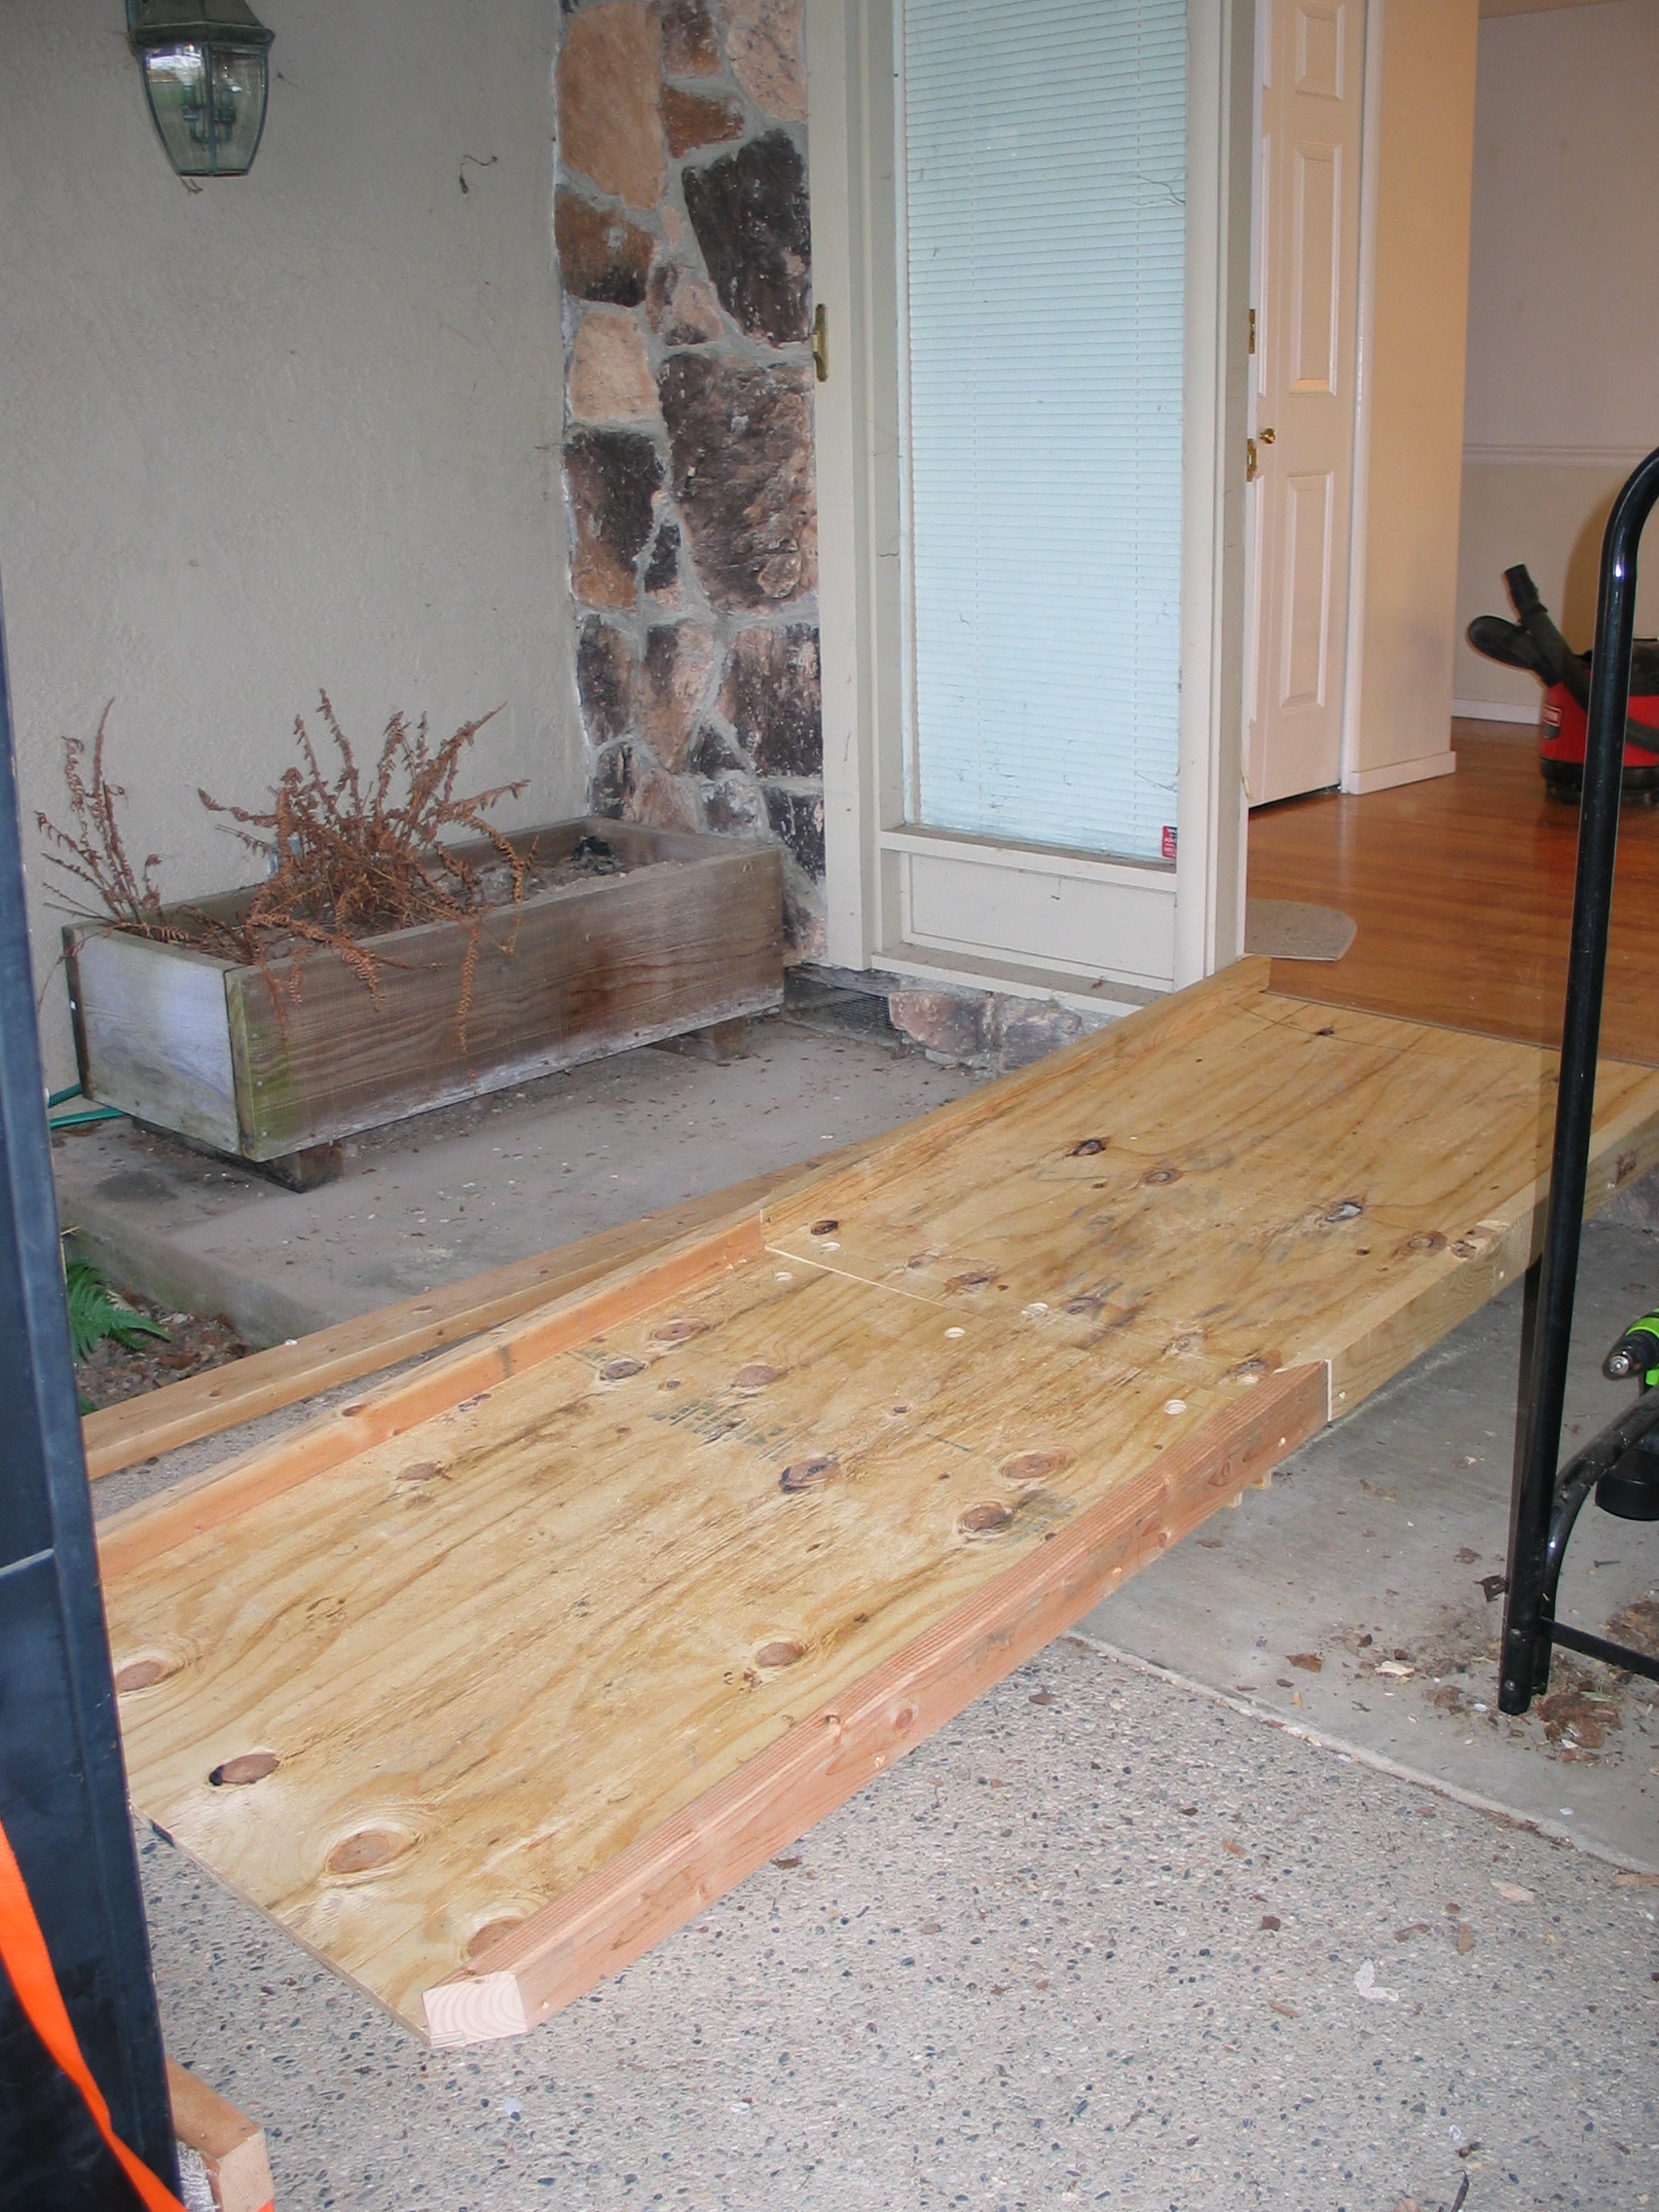 Ramp built and in place
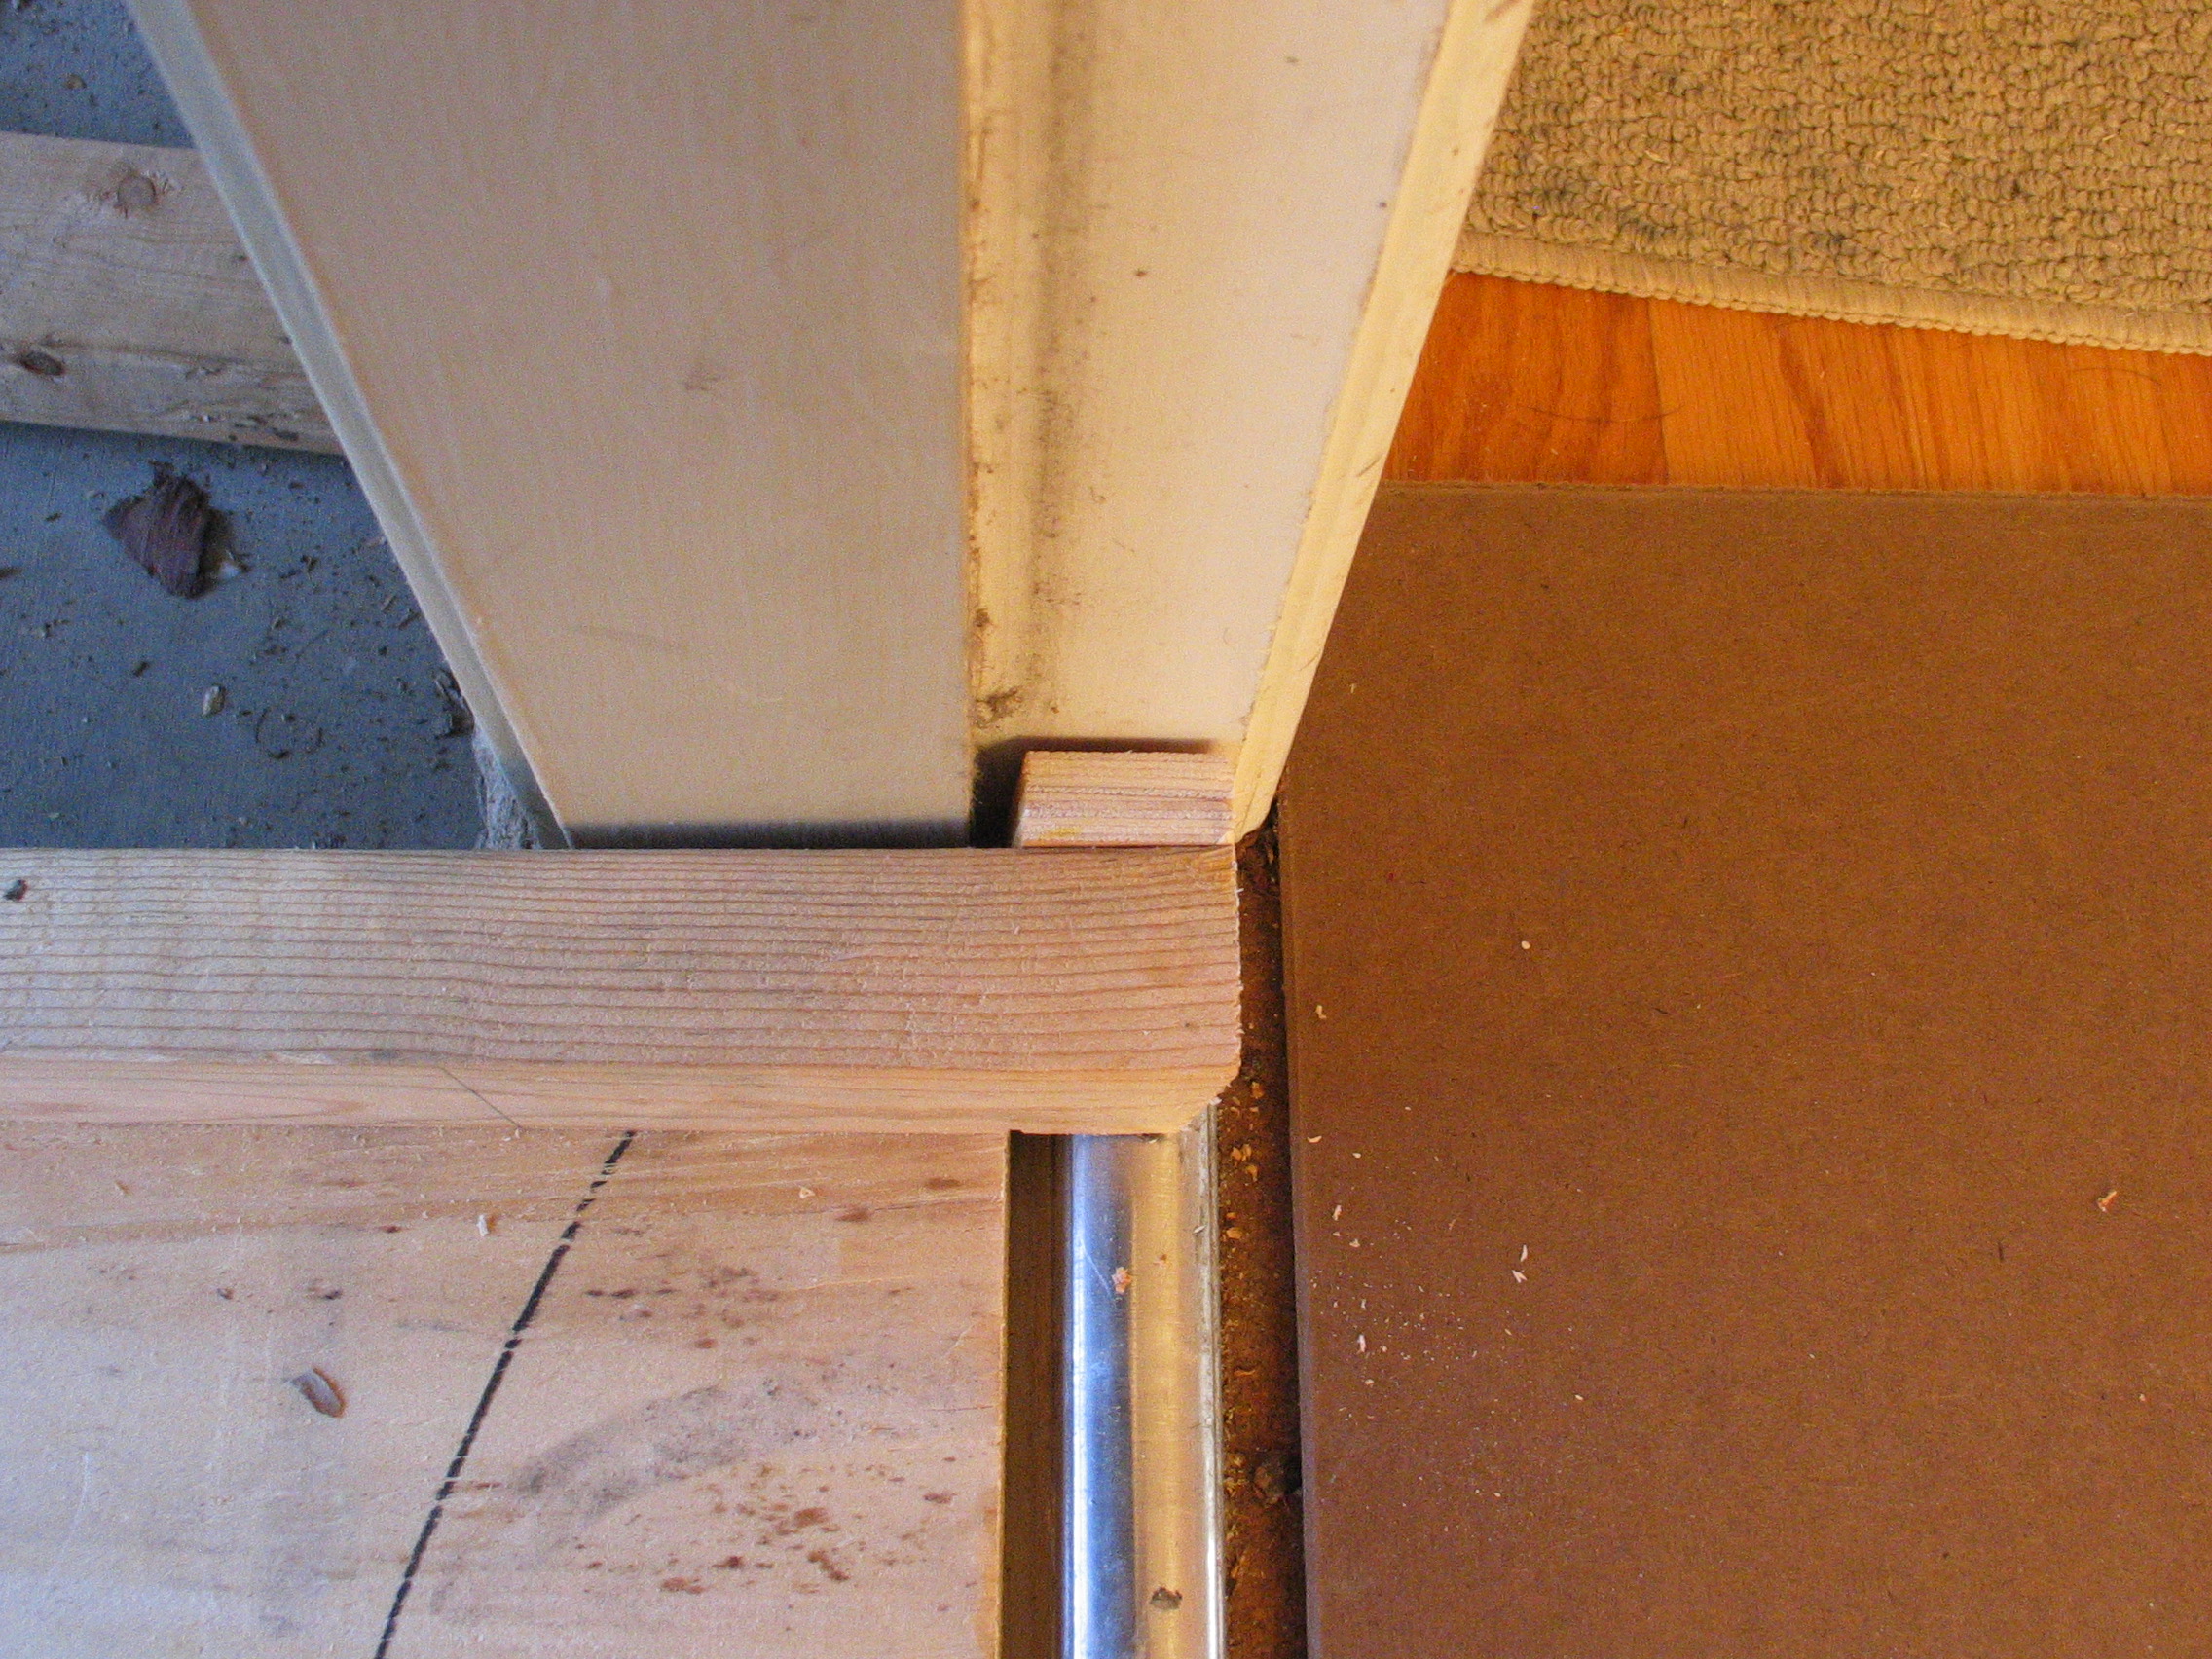
I also put in a "safety" at the top of the ramp to keep the ramp from sliding out of the door when in use. The blocks are permanently attached to the sides of the ramp. I didn't want to get part way up the ramp and find the thing I'm pushing going nowhere while I walk the ramp right out from under it.
Ramp built and in place
I also put in a "safety" at the top of the ramp to keep the ramp from sliding out of the door when in use. The blocks are permanently attached to the sides of the ramp. I didn't want to get part way up the ramp and find the thing I'm pushing going nowhere while I walk the ramp right out from under it.
 Blocks to keep ramp from sliding out
With the ramp built the next challenge was getting the first set of wheels up onto it. The ramp is 3/4" thick, and the wheels are only 1.5" in diameter. It took a bit of rocking and twisting, but I was able to get them up.
Blocks to keep ramp from sliding out
With the ramp built the next challenge was getting the first set of wheels up onto it. The ramp is 3/4" thick, and the wheels are only 1.5" in diameter. It took a bit of rocking and twisting, but I was able to get them up.
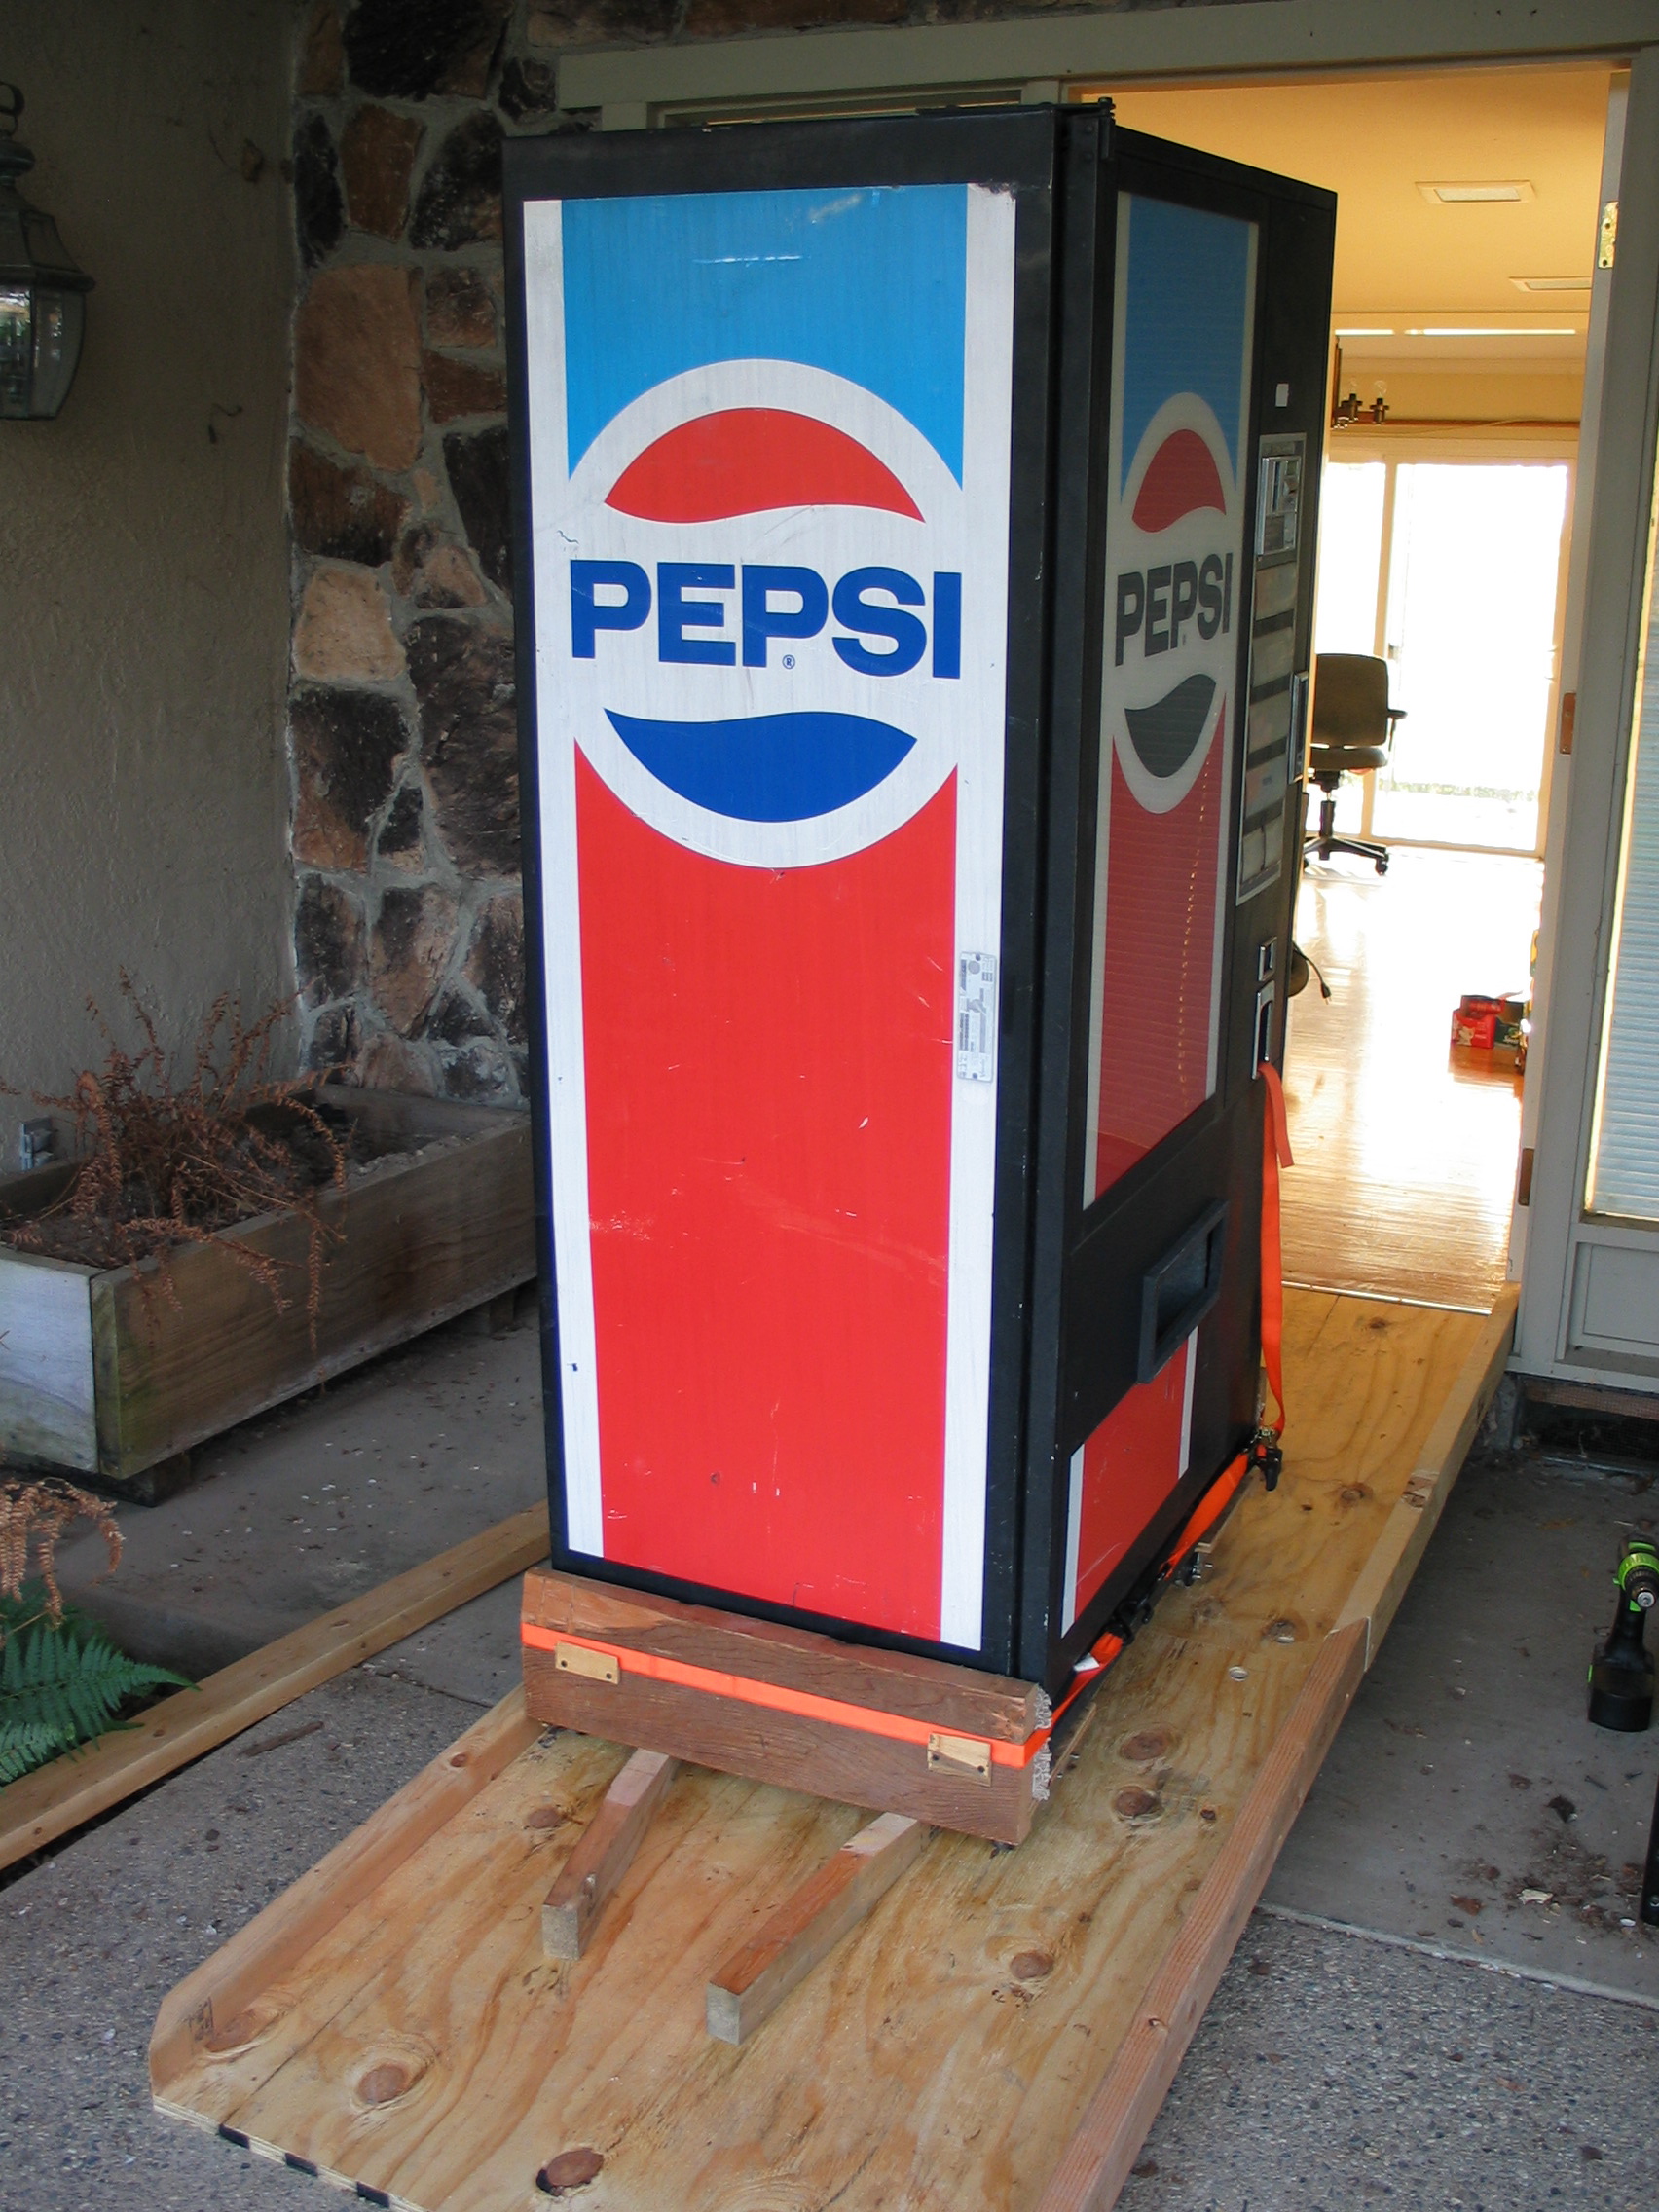
Now it's time for wedges. Before going any further with pushing the machine up the ramp, I made myself a couple of wedges that I could kick under the machine to keep it from sliding back down.
 Heading in
The wedges were extremely useful. I was able to push the machine a foot or so, then kick the wedges up to stop the machine from coming down while I repositioned to push it again. They held it so well that part way up the ramp I was able to stop and take a picture!
Heading in
The wedges were extremely useful. I was able to push the machine a foot or so, then kick the wedges up to stop the machine from coming down while I repositioned to push it again. They held it so well that part way up the ramp I was able to stop and take a picture!
 Wedges keep it from coming back down
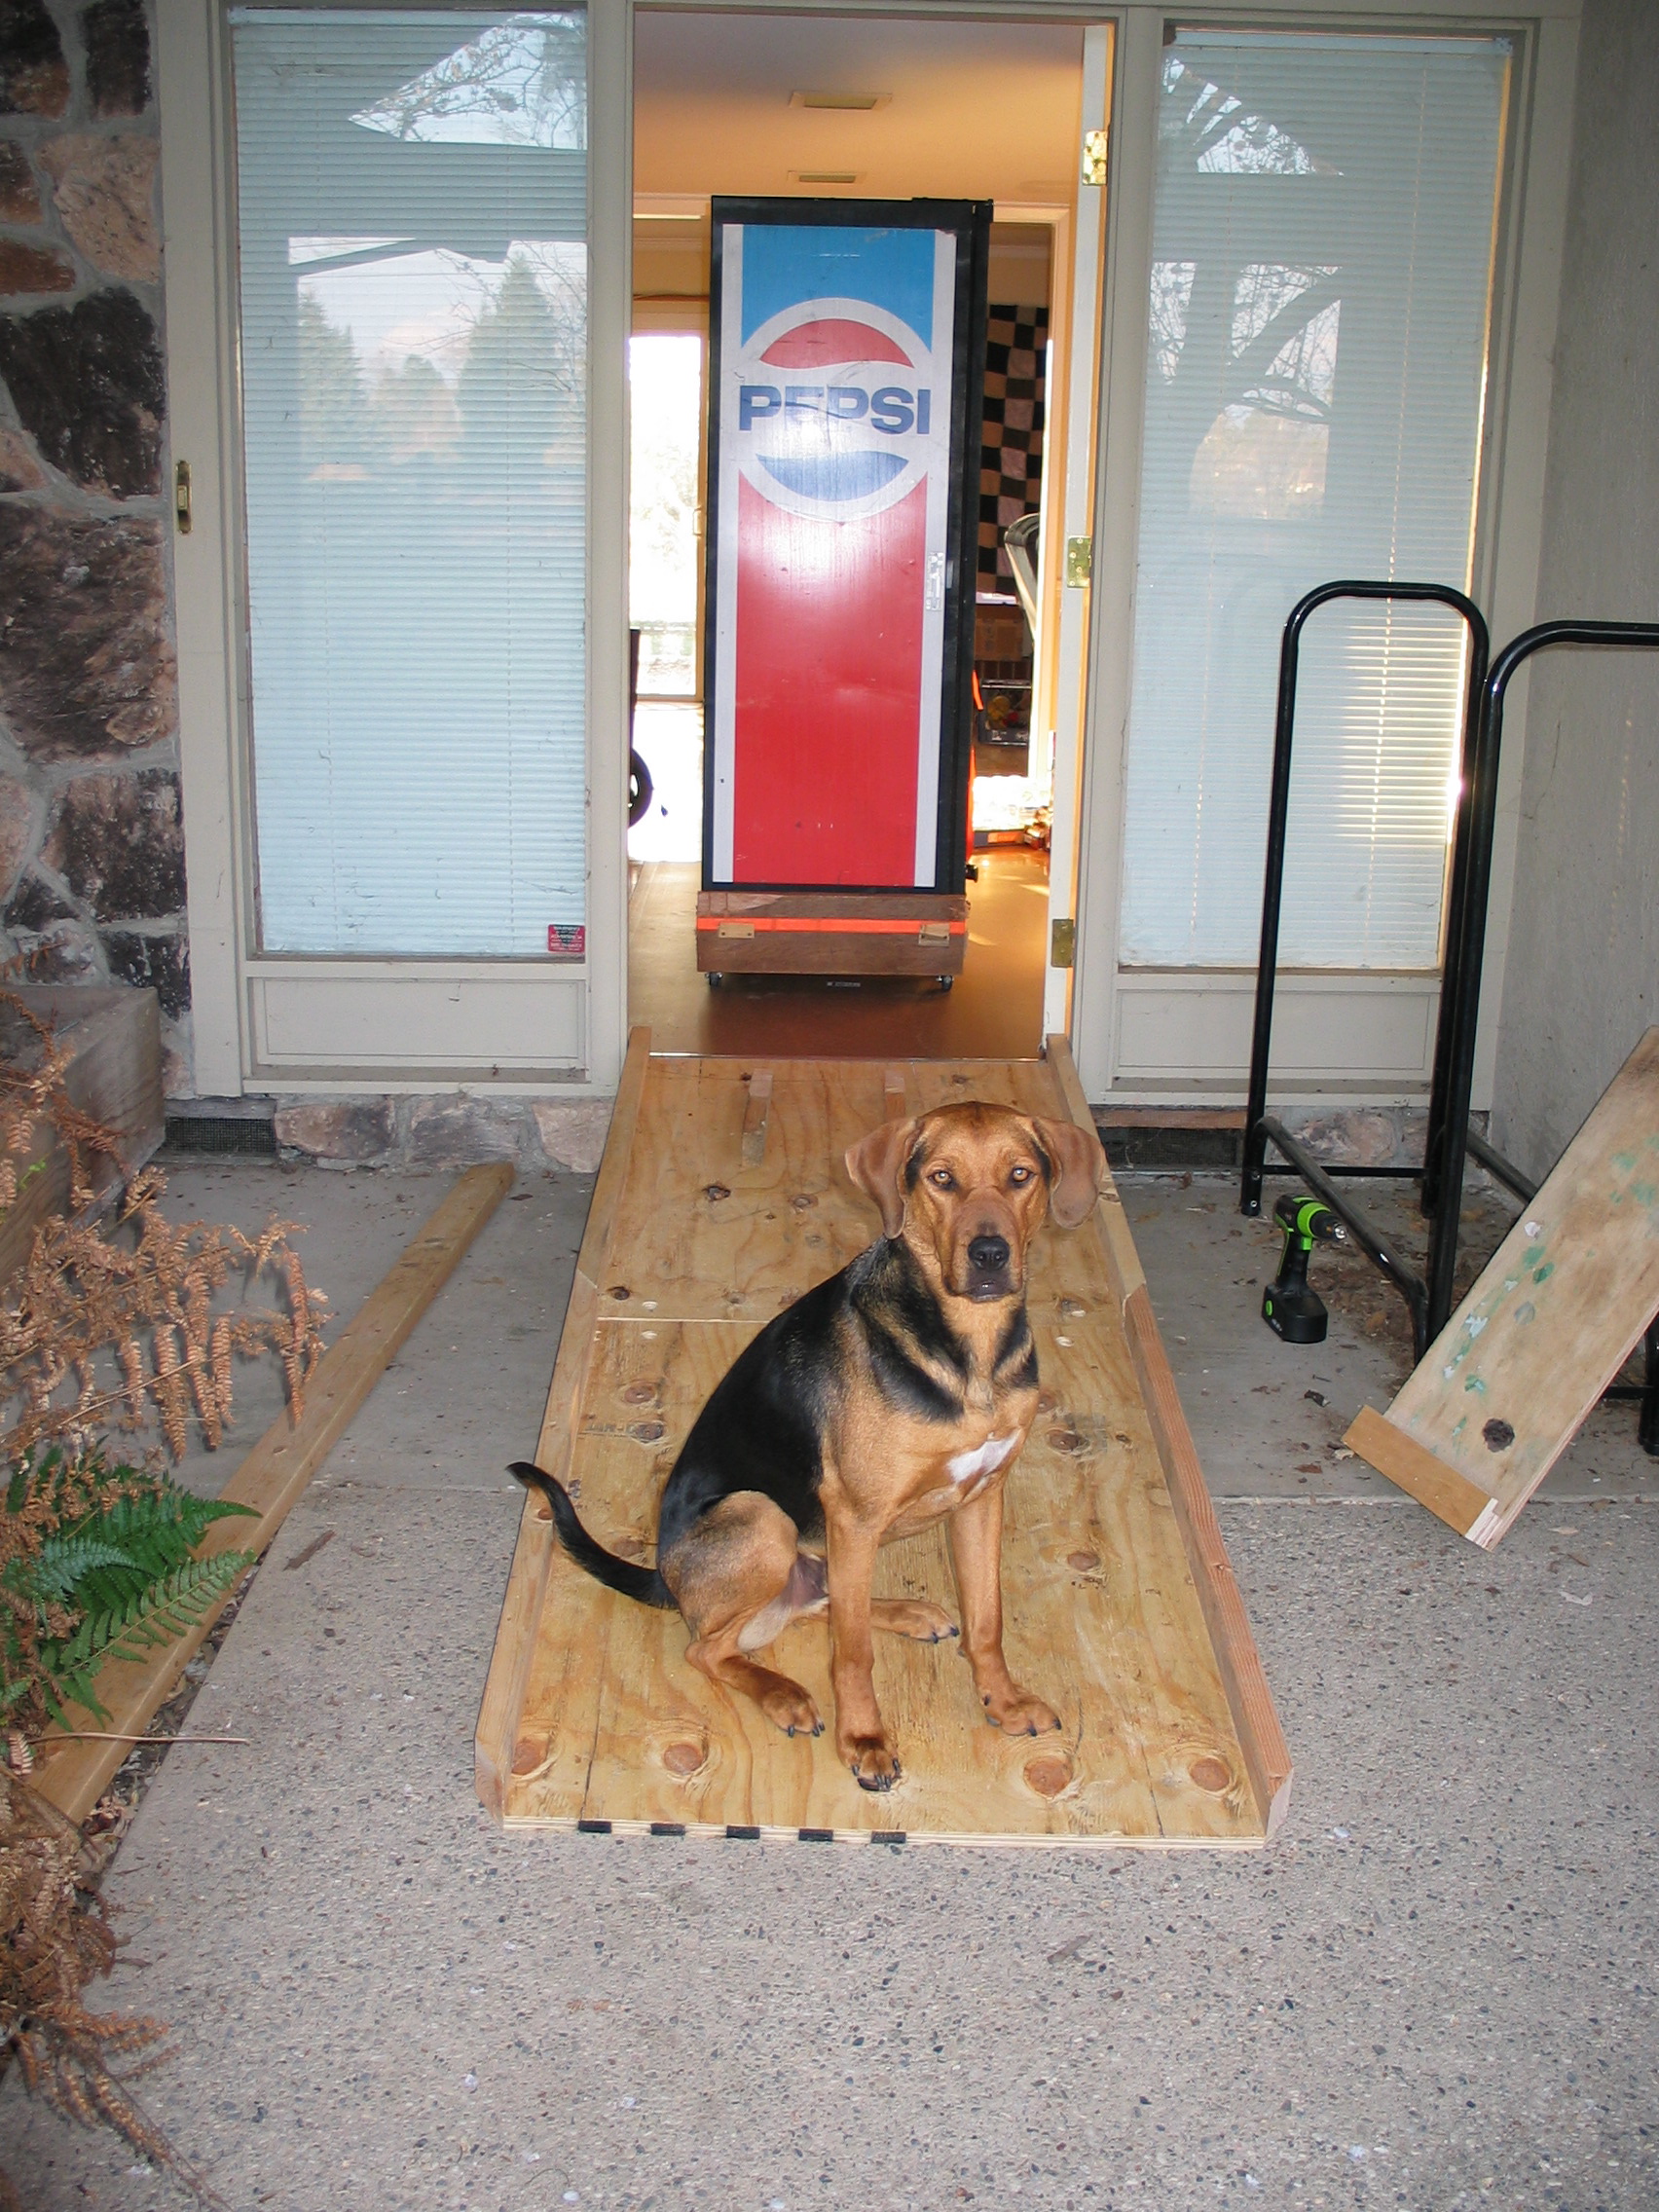 Made it to the top!


+1 Posted by Haddicus • Jul.09.2014 at 21.36 • Reply
I would have cemented in the wooden ramp when i was done, lol...