

Adding Solid-State Storage to an Original IBM PC
After CGA Weekend it became pretty obvious I needed to do something about getting some kind of permanent mass storage installed in my IBM PC. I can't simply add an IDE hard drive controller since the slots are only 8-bit and in general IDE controllers are designed for 286 computers and up which have 16-bit ISA slots. 8-bit SCSI cards are uncommon and ones that can be used to boot from even more so. I've messed around with using the XT-IDE BIOS over serial, but it was very slow.
The IBM PC only has five slots, and I have every one of them filled with something. I have the floppy controller in one slot, the CGA card in another, a 3COM Etherlink II, and an AST SixPakPlus which takes up two slots. Well, almost. The SixPakPlus actually just uses two of the openings on the back, but there's still a free slot inside.
What I was really looking for was an XT-IDE card that had no bracket on it and would sit entirely inside the computer so that I could leave the AST SixPakPlus using two openings. Ideally the XT-IDE card would have a 44-pin notebook IDE interface on it along the inside edge so that I could stick on a 2.5" notebook drive pointing into the computer, sort of like a hard card. Or in my case a notebook to SD card adapter.
Looking around at what's currently available I found that The Glitch Works has a design which was very close to what I was thinking of. On top of that the PCB layout had been done entirely in KiCad and the design was available on github. A kit with all the needed parts and the PCB was also available for a good price so it made more sense to just buy the whole kit to get all the parts instead of having to later source them all myself.
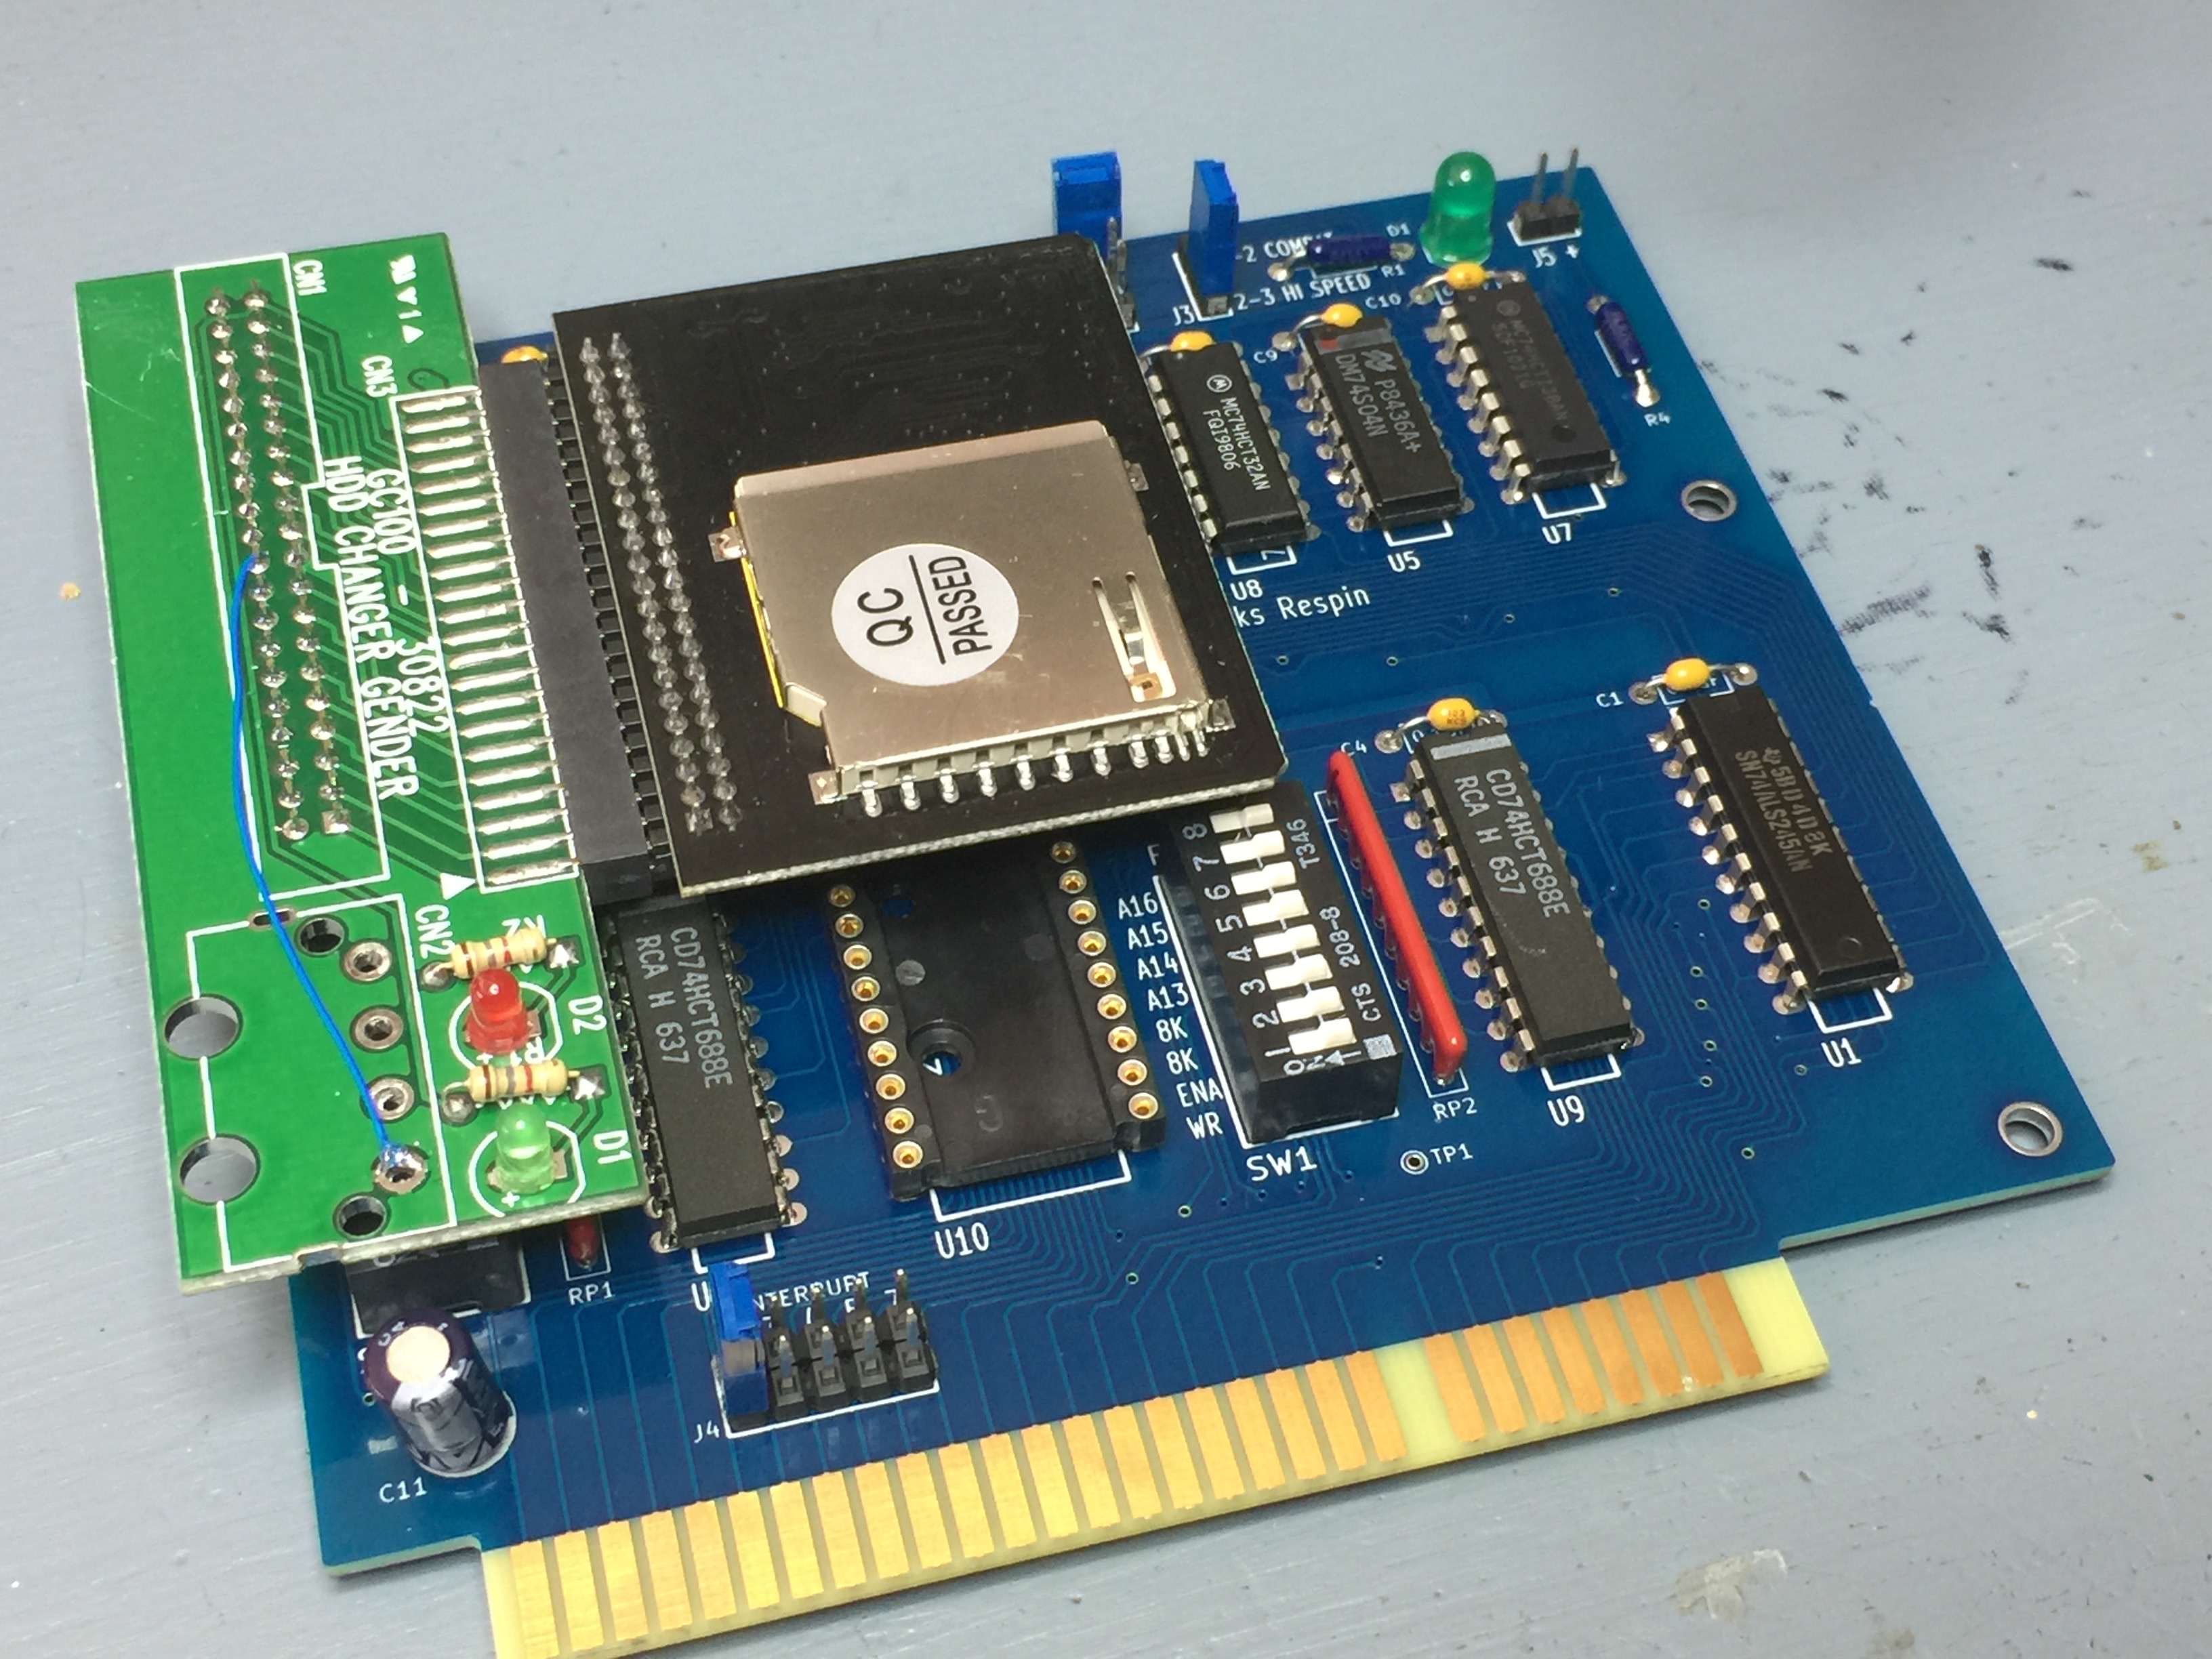 XT-IDE card with SD card adapter
I bought two kits with the plan to put one together and try it out and use the other one for parts when I make my own design. As I looked over the kit it seemed though that I might be able to make it work for my situation by replacing the 40 pin connector and not attaching the bracket. Then I modified a 40 pin to 44 pin adapter by replacing the 40 pin male connector with a 40 pin female one on the back and added a jumper to get power from pin 20. That allowed me to essentially stack the SD card adapter on top of the XT-IDE board as a sort of daughter board.
XT-IDE card with SD card adapter
I bought two kits with the plan to put one together and try it out and use the other one for parts when I make my own design. As I looked over the kit it seemed though that I might be able to make it work for my situation by replacing the 40 pin connector and not attaching the bracket. Then I modified a 40 pin to 44 pin adapter by replacing the 40 pin male connector with a 40 pin female one on the back and added a jumper to get power from pin 20. That allowed me to essentially stack the SD card adapter on top of the XT-IDE board as a sort of daughter board.
The EEPROM that comes with the kit is blank, so the first thing you need to do is get the XT-IDE firmware and utility and use it to flash the EEPROM directly on the card. No external programmer needed!
Once the XT-IDE firmware is installed and the PC is seeing it, it's time to format the SD card and set it up to boot. If you're re-using an old SD card I recommend wiping out the first few sectors of the card by using dd on a Linux box to remove any existing partition tables which may confuse DOS.
 There's not that much space in the entire world!
After booting DOS 6.22 from a floppy the first thing you'll want to do is FDISK /MBR to add the boot block to the partition table. Then you can use FDISK to setup partitioning. I had grabbed an 8GB SD card and FDISK had no problem seeing the entire available space, even on this original PC! Partition size is limited to 2GB, but you can make multiple partitions so you don't have to lose any space. Although it doesn't really matter, SD cards are cheap and for a computer of this age even a few hundred megabytes of space is like a wide open plain with no end in sight!
There's not that much space in the entire world!
After booting DOS 6.22 from a floppy the first thing you'll want to do is FDISK /MBR to add the boot block to the partition table. Then you can use FDISK to setup partitioning. I had grabbed an 8GB SD card and FDISK had no problem seeing the entire available space, even on this original PC! Partition size is limited to 2GB, but you can make multiple partitions so you don't have to lose any space. Although it doesn't really matter, SD cards are cheap and for a computer of this age even a few hundred megabytes of space is like a wide open plain with no end in sight!
Once FDISK is done and has forced you to reboot you'll need to boot from floppy once more and then run FORMAT C: /S to both get the partition formatted and to make it bootable. Once it's completed you can reboot the computer and it should boot from the C: drive. From there it's just a matter of getting all your software installed! You can either SneakerNet™ software over slowly with a floppy, or do the reverse and SneakerNet™ your entire hard drive over to another computer and copy software directly to it! I think it's pretty amazing how it's actually easier to move the entire hard drive over to a foreign computer like a Mac and copy files on it than it is to do it the traditional way. Since I have an Ethernet card in my PC I actually just copied the packet driver and mTCP to it and then copied the rest over using ftp. Since I didn't even have a file editor at first I also used ftp to move my AUTOEXEC.BAT up to the "mainframe" and then I'd telnet in to edit it with emacs, then pull it back down to the PC!


