

Give Me a 3D Printer and Calipers and I Will Fix Everything
I’ve been watching 3D printer progress since I saw the first RepRaps a decade ago. They seemed interesting but very crude at the time. The few times I encountered an inexpensive 3D printer in person the creations seemed like they were very brittle. When I saw a video that was using NinjaFlex my interest in 3D printers increased quite a bit. The idea of being able to make flexible things and not just hard blocks of plastic was something I had been wanting to do.
Several months ago I was doing a contract job that involved making and modifying all kinds of things, including RC cars that the client was using to give a demonstration. While doing that job I could see that having a 3D printer to create new internal structures on the RC cars would have been very handy. At that point getting a 3D printer shot way up on my list so I subscribed to a bunch of 3D printer forums to start doing my research and find out what features might be important to me and see what people struggle with.
 FlashForge Creator Pro
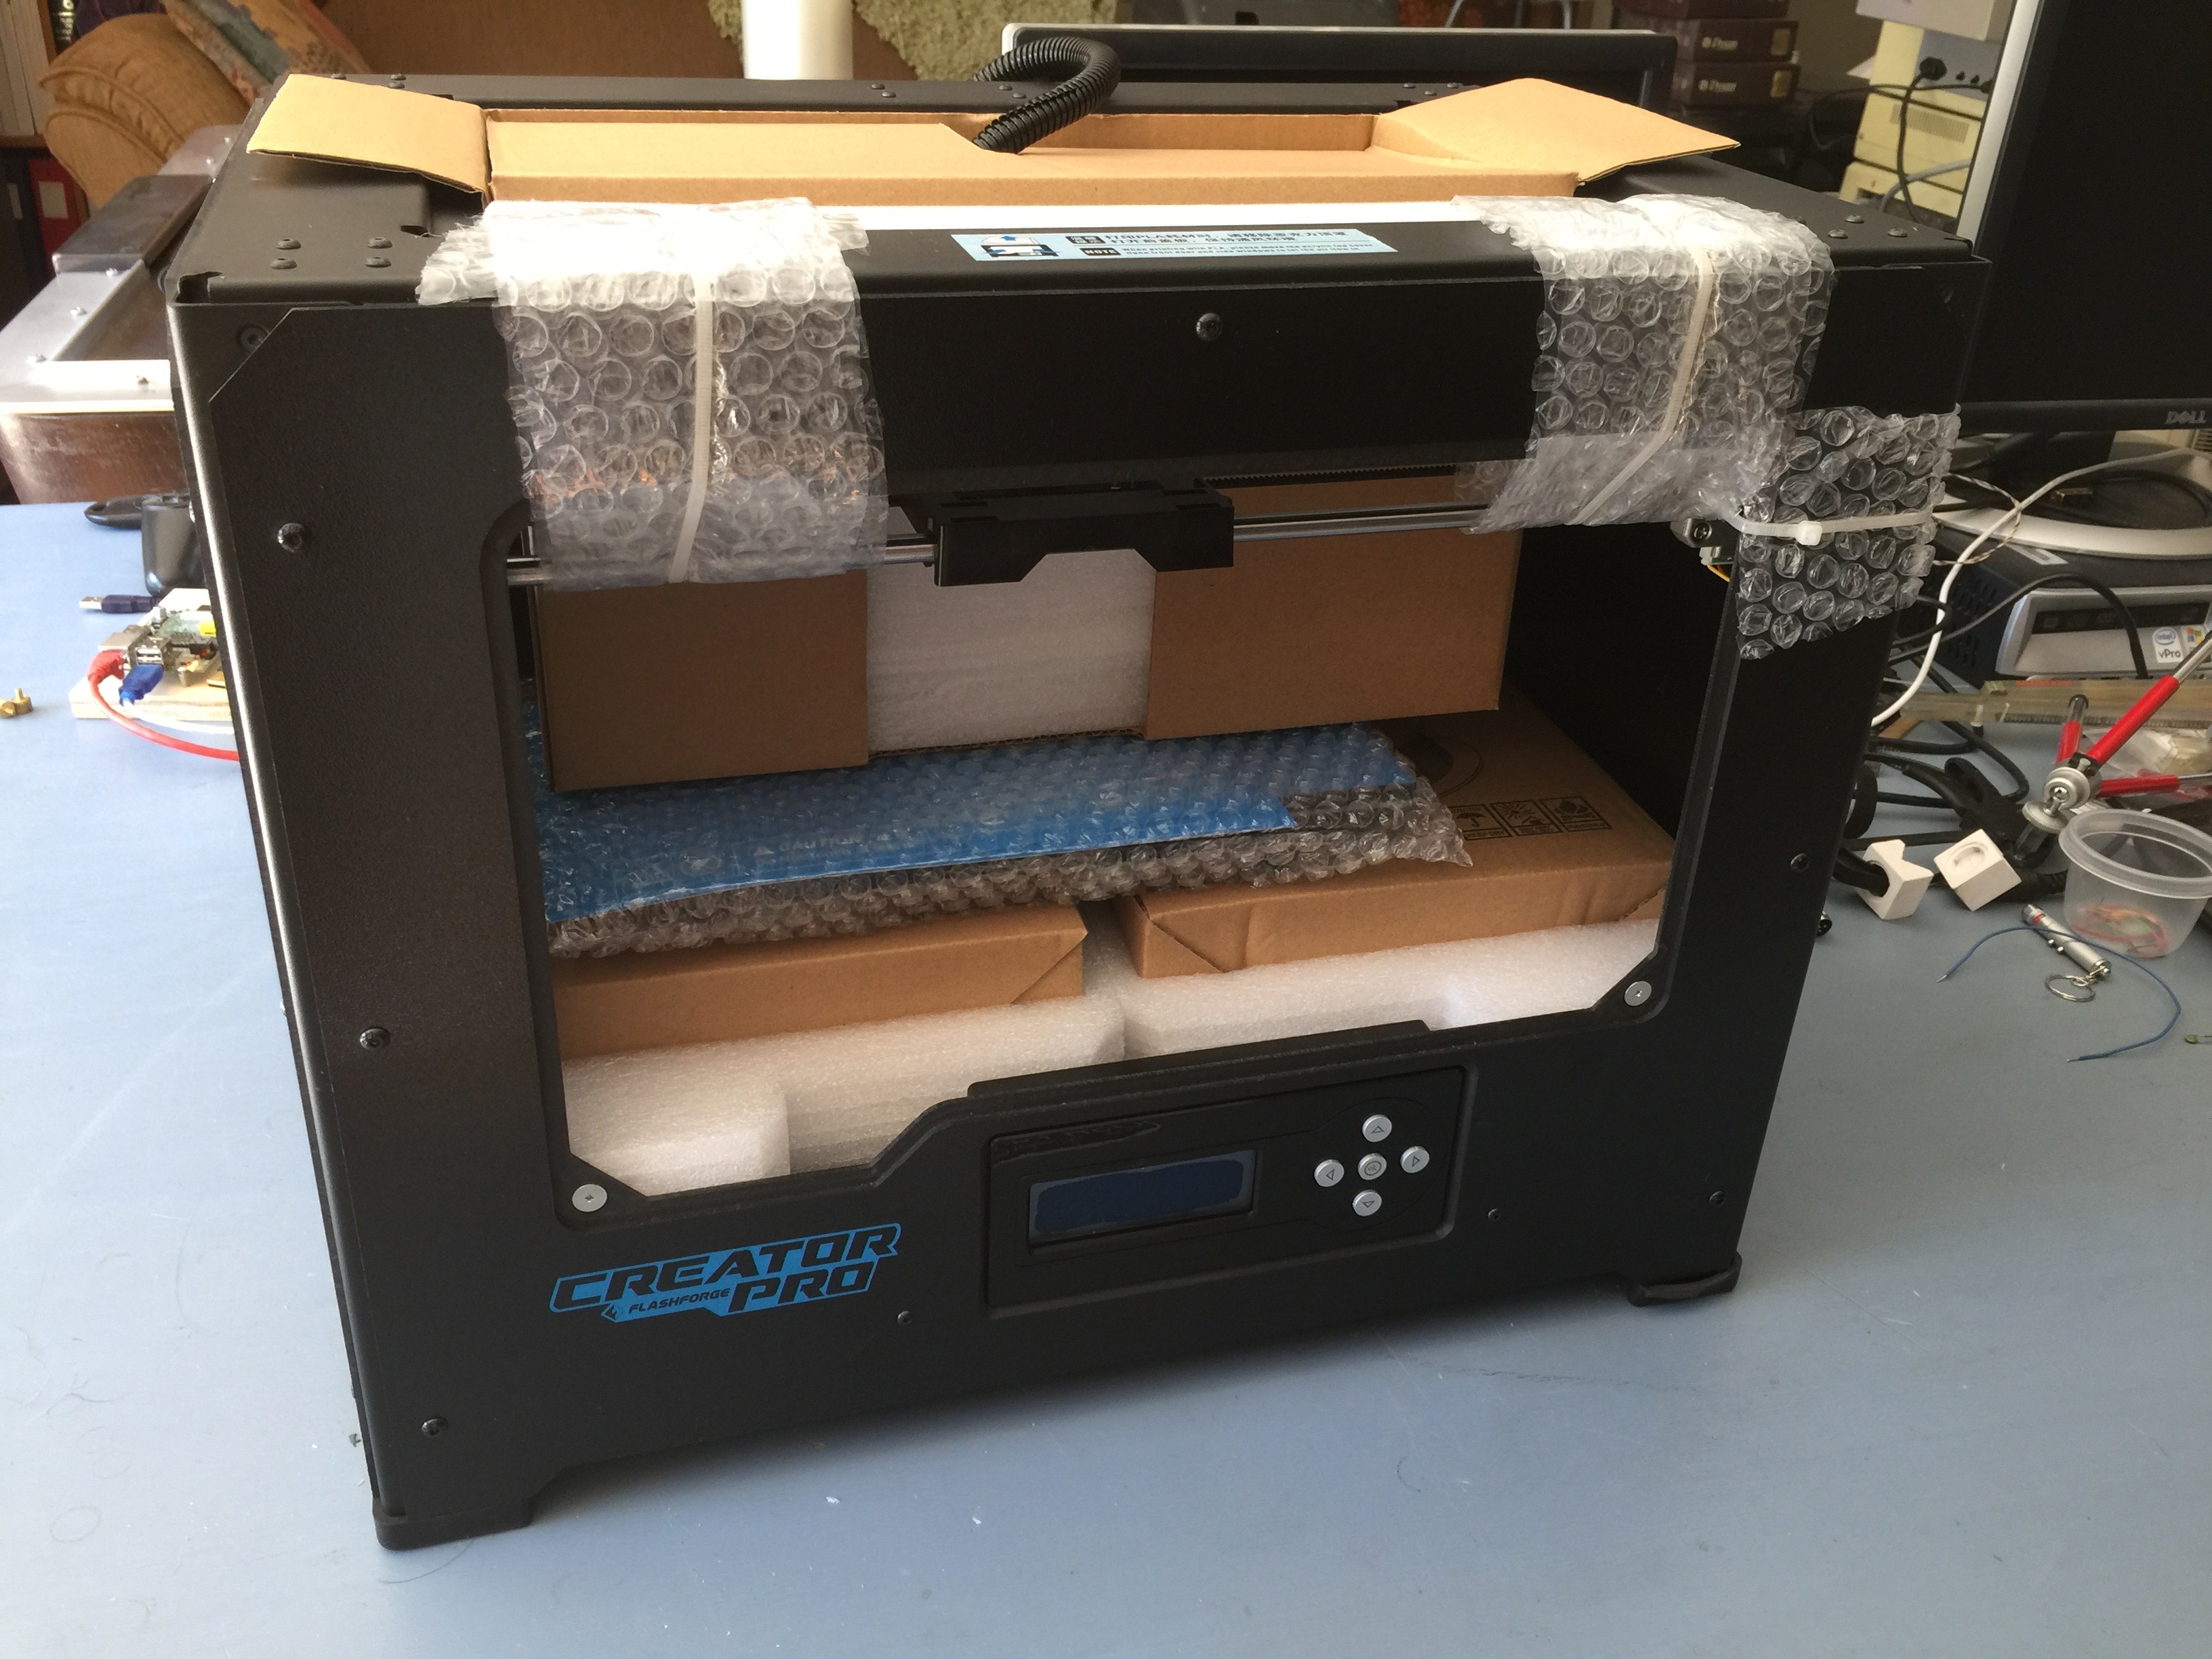
Two weeks ago I took the plunge and bought a FlashForge Creator Pro. It has dual extruders, a heated bed, the frame and the bed supports are made of metal, and it’s enclosed to keep the heat in when printing ABS. The bed is also extremely easy to level with three wing nuts.
FlashForge Creator Pro
Two weeks ago I took the plunge and bought a FlashForge Creator Pro. It has dual extruders, a heated bed, the frame and the bed supports are made of metal, and it’s enclosed to keep the heat in when printing ABS. The bed is also extremely easy to level with three wing nuts.
The printer came almost completely assembled, you only needed to secure the extruder head and assemble the clear acrylic covers. Getting up and running with the included filament took no effort at all. I was able to download models from Thingiverse and print them out immediately with no trouble. I didn’t really like how crude the recommended open source software ReplicatorG is, but it worked and while the prints weren’t beautiful, they were functional.
After having fun printing a couple of things I downloaded, the next task was to design my own object. Looking around I spotted my Tektronix 453 oscilloscope and remembered that the rear feet that hold the power cord were crumbling apart. Replacement feet were ridiculously overpriced so making new feet - even if they weren’t pretty - seemed like a good first project. Since the feet are round it didn’t seem like it would be too hard to make a model of them. All I would need is a profile and then just do a turned extrusion in a 3D modeling program.
 Tektronix 453 foot
I designed my foot in by drawing the outline in Adobe Illustrator and exported the it as an SVG and imported it into 123D Design. When 123D Design loaded the part was completely the wrong size! Doing some research into what was going on I found out that the units in SVG files are “pixels” and 123D Design was always treating the units as millimeters! The workaround was to reduce the size of the drawing by 35.28% and before exporting the SVG.
Tektronix 453 foot
I designed my foot in by drawing the outline in Adobe Illustrator and exported the it as an SVG and imported it into 123D Design. When 123D Design loaded the part was completely the wrong size! Doing some research into what was going on I found out that the units in SVG files are “pixels” and 123D Design was always treating the units as millimeters! The workaround was to reduce the size of the drawing by 35.28% and before exporting the SVG.
It took a few tries to get the dimensions exactly right. The feet don’t look great but they are very functional and now the power cord stays wrapped. I printed them in ABS and they are also much tougher than I expected them to be, so hopefully they will stand up to the 20kg Tektronix scope!
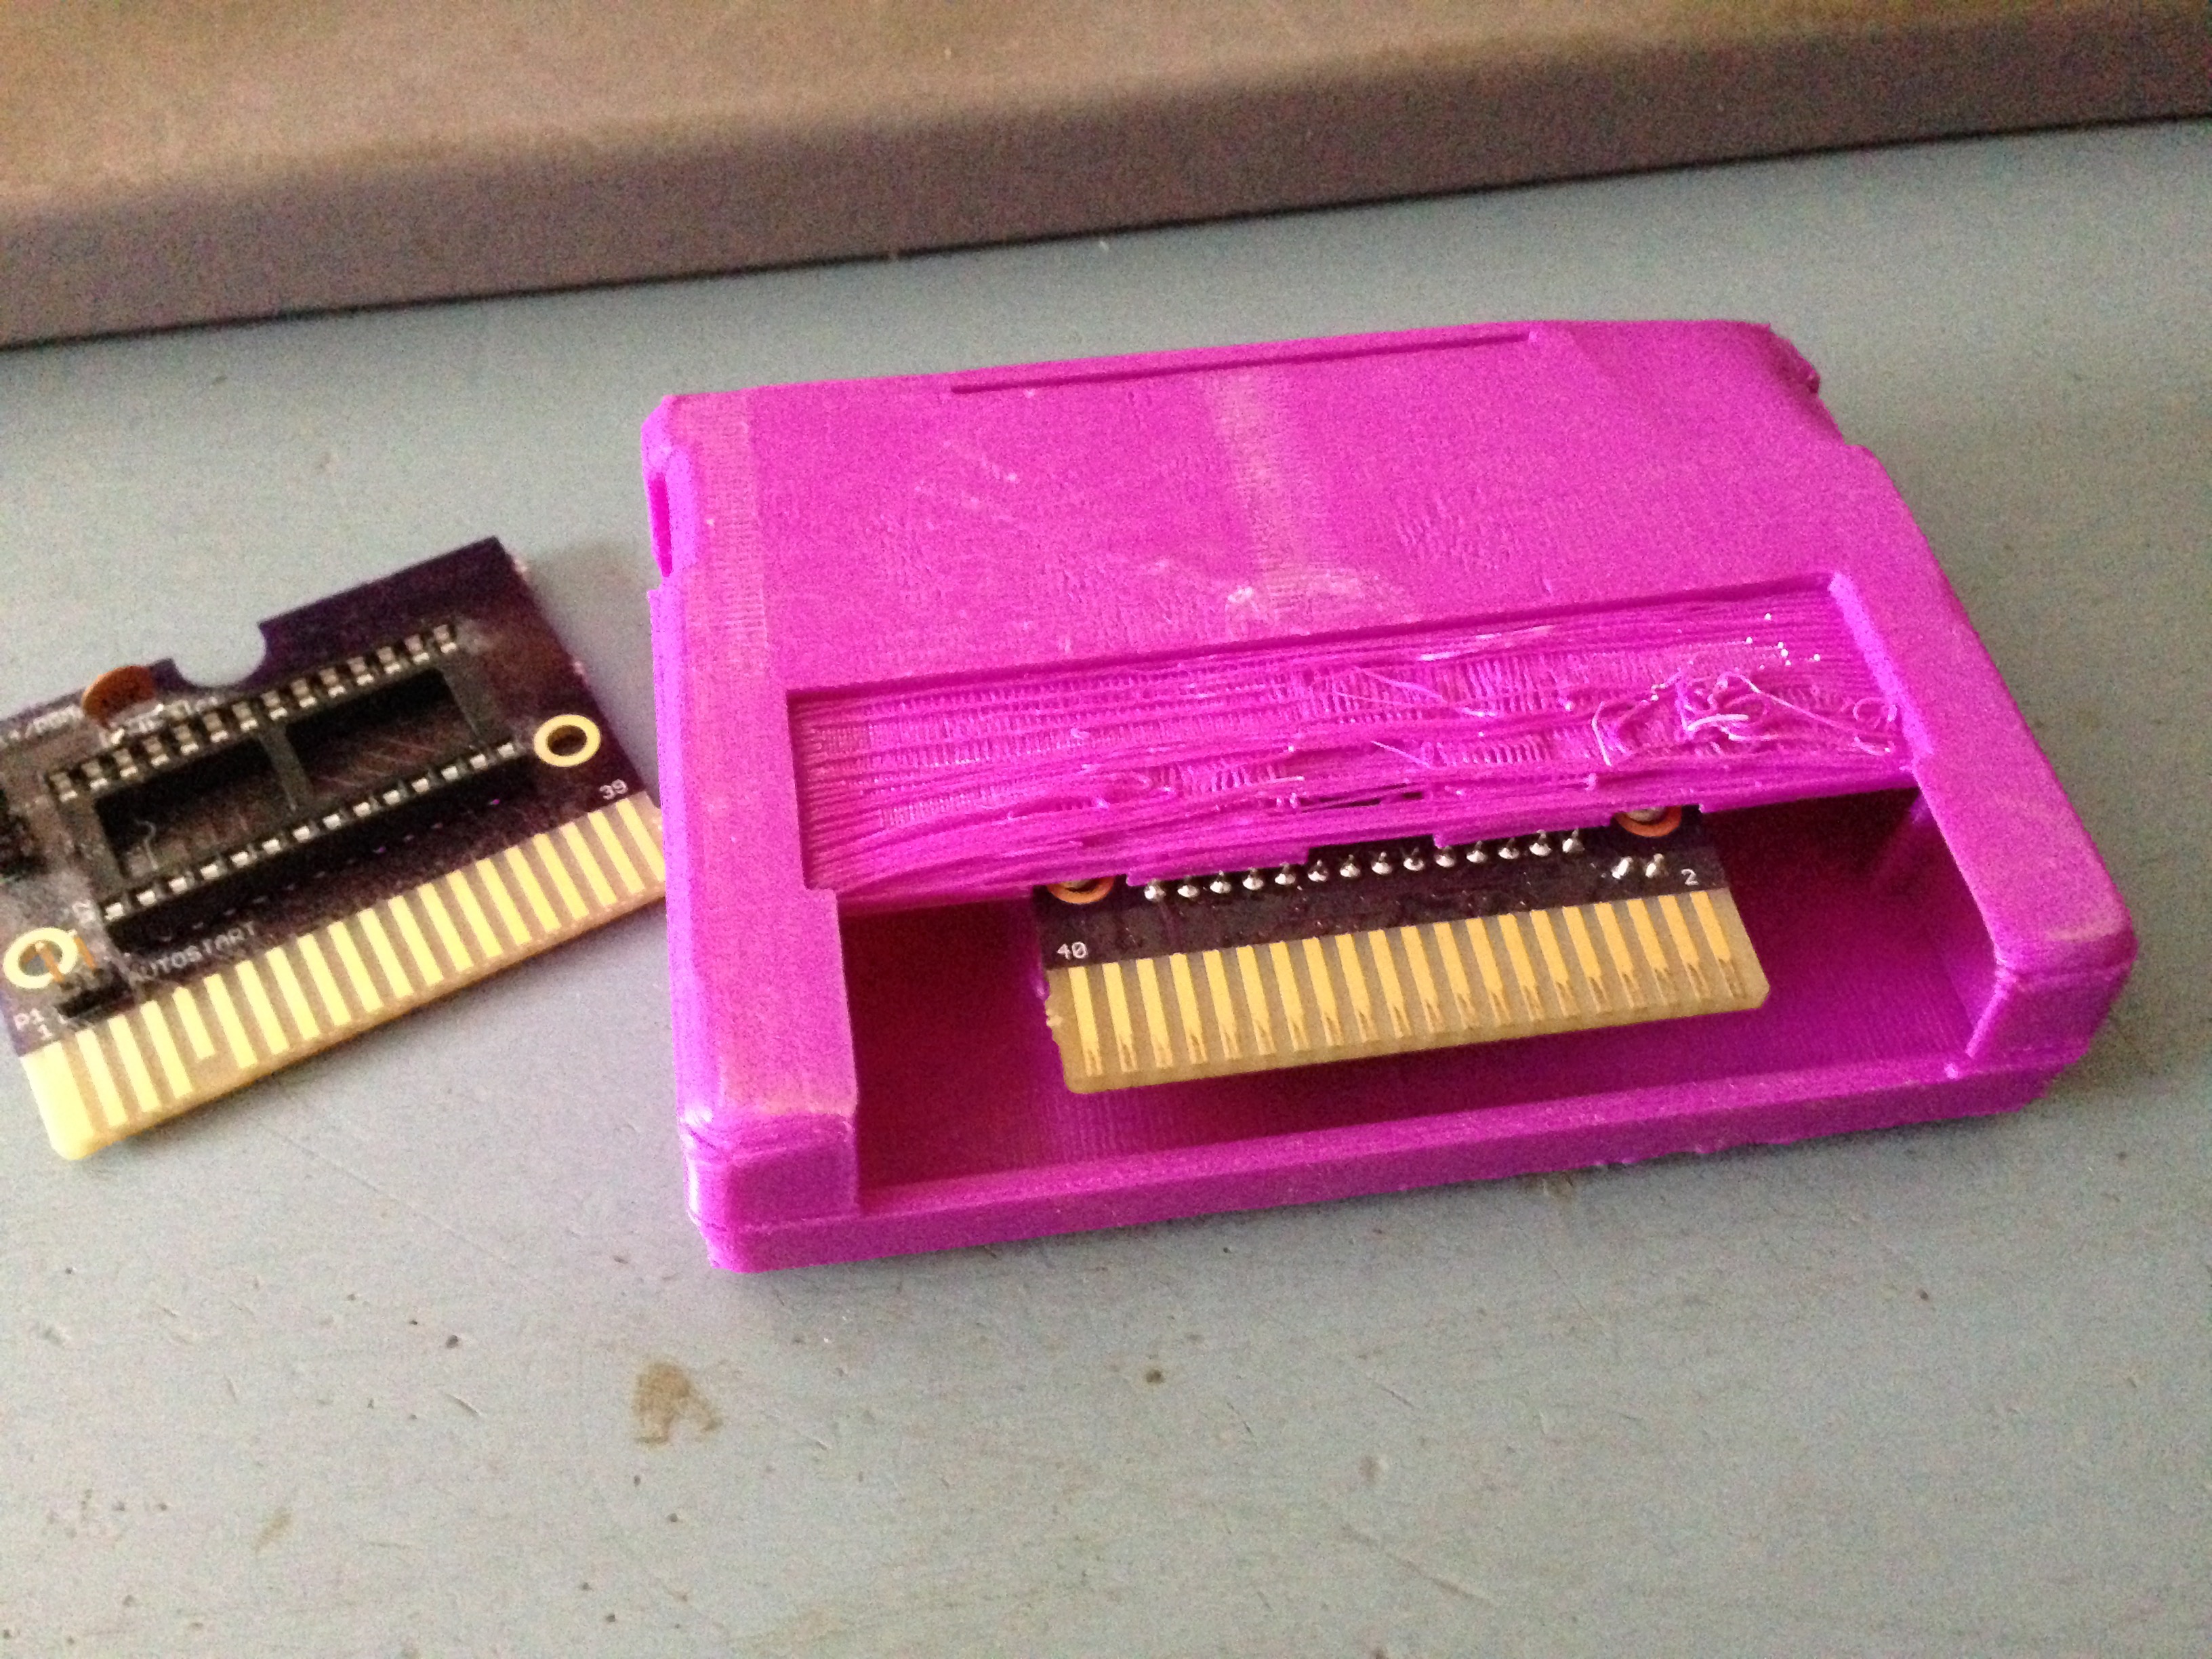 Printed CoCo cartridge
Mark Blair shared his TRS-80 Color Computer Program Pak cartridge model that contained nearly every detail of the real thing which I tried printing. It actually came out fairly well considering he had designed it to be printed on SLA printers not FDM. After printing the cartridge case it really hit me how he had essentially taken a physical object and emailed it to me and I now had one!
Printed CoCo cartridge
Mark Blair shared his TRS-80 Color Computer Program Pak cartridge model that contained nearly every detail of the real thing which I tried printing. It actually came out fairly well considering he had designed it to be printed on SLA printers not FDM. After printing the cartridge case it really hit me how he had essentially taken a physical object and emailed it to me and I now had one!
With so much success printing ABS, I decided I needed to get some NinjaFlex and try it out. Had to make a new spool holder since the ones that came with the printer would only fit the spools that were included with it. Instead of spending hours printing a holder I went out into the garage and slapped something together with wood scraps in about 15 minutes.
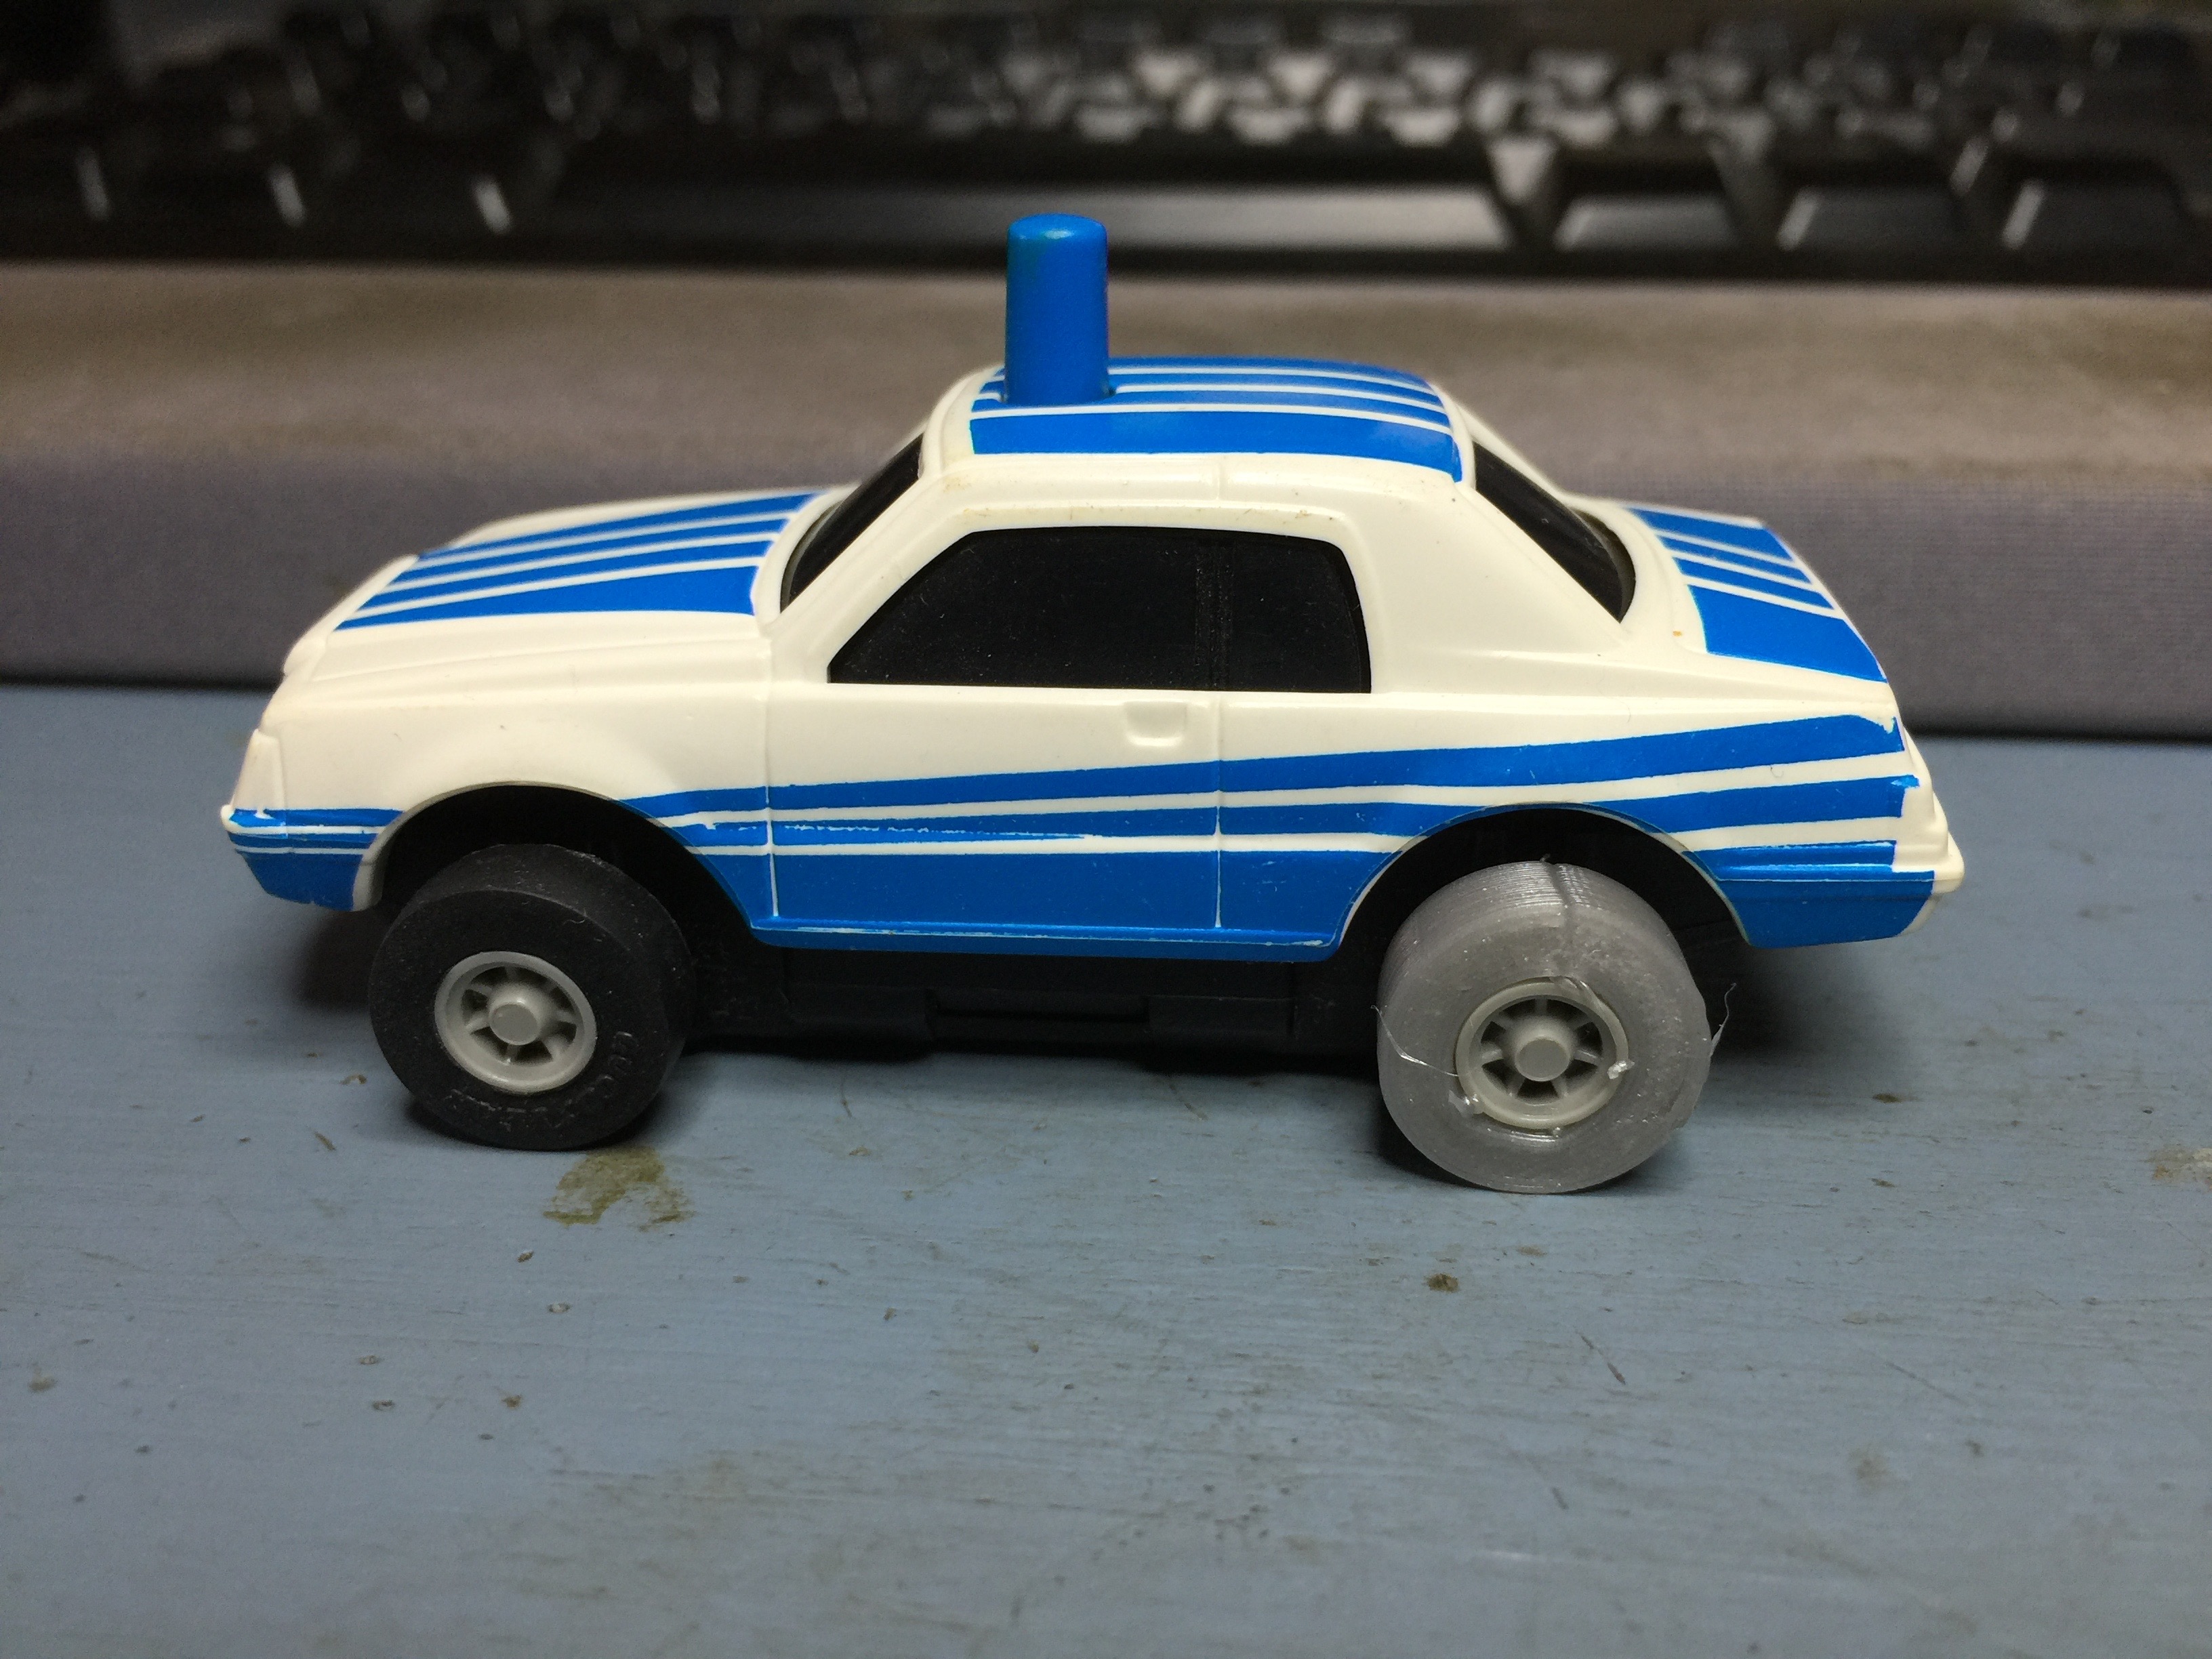 New tire for an old car
Digging through some drawers I found an old Tomy Jumpster car that was missing a tire. Seemed like the perfect thing to recreate since it was small and wouldn’t use up too much of the expensive NinjaFlex while trying to dial in the print settings, and was also a very simple object to model. Got it just right on the third try and now my little car works again!
New tire for an old car
Digging through some drawers I found an old Tomy Jumpster car that was missing a tire. Seemed like the perfect thing to recreate since it was small and wouldn’t use up too much of the expensive NinjaFlex while trying to dial in the print settings, and was also a very simple object to model. Got it just right on the third try and now my little car works again!
I can see I'm going to have a lot of fun downloading things, inventing things, and of course fixing things!
Models:
-

-
FlashForge Creator Pro
-
Test print that came with the printer
-
Dual extruders means double the things!
-
Why print one when you can print two at twice the price?
-
Bats, ghosts, and skulls
-
I can't print LEGO but I can print Mega Bloks!
-
No problem bridging the 16mm gap
-
It's got me!
-
Cool laser pointer switch from Raster on Thingiverse
-
Quick way to measure the Tektronix feet
-
Four new feet
-
Tektronix 453 foot
-
Bottom of cartridge shell
-
Top of cartridge shell
-
Never use rafts, they don't come off
-
Test fit of both halves
-
Printed CoCo cartridge
-
It actually fits!
-
Measuring the Kaypro keyboard
-
Preparing to print
-
Printed Kaypro keyboard jack adapter
-
Doesn't quite fit but I forced it anyway
-
New tire for an old car


