

A CNC makes a handy mill
 Broken clip
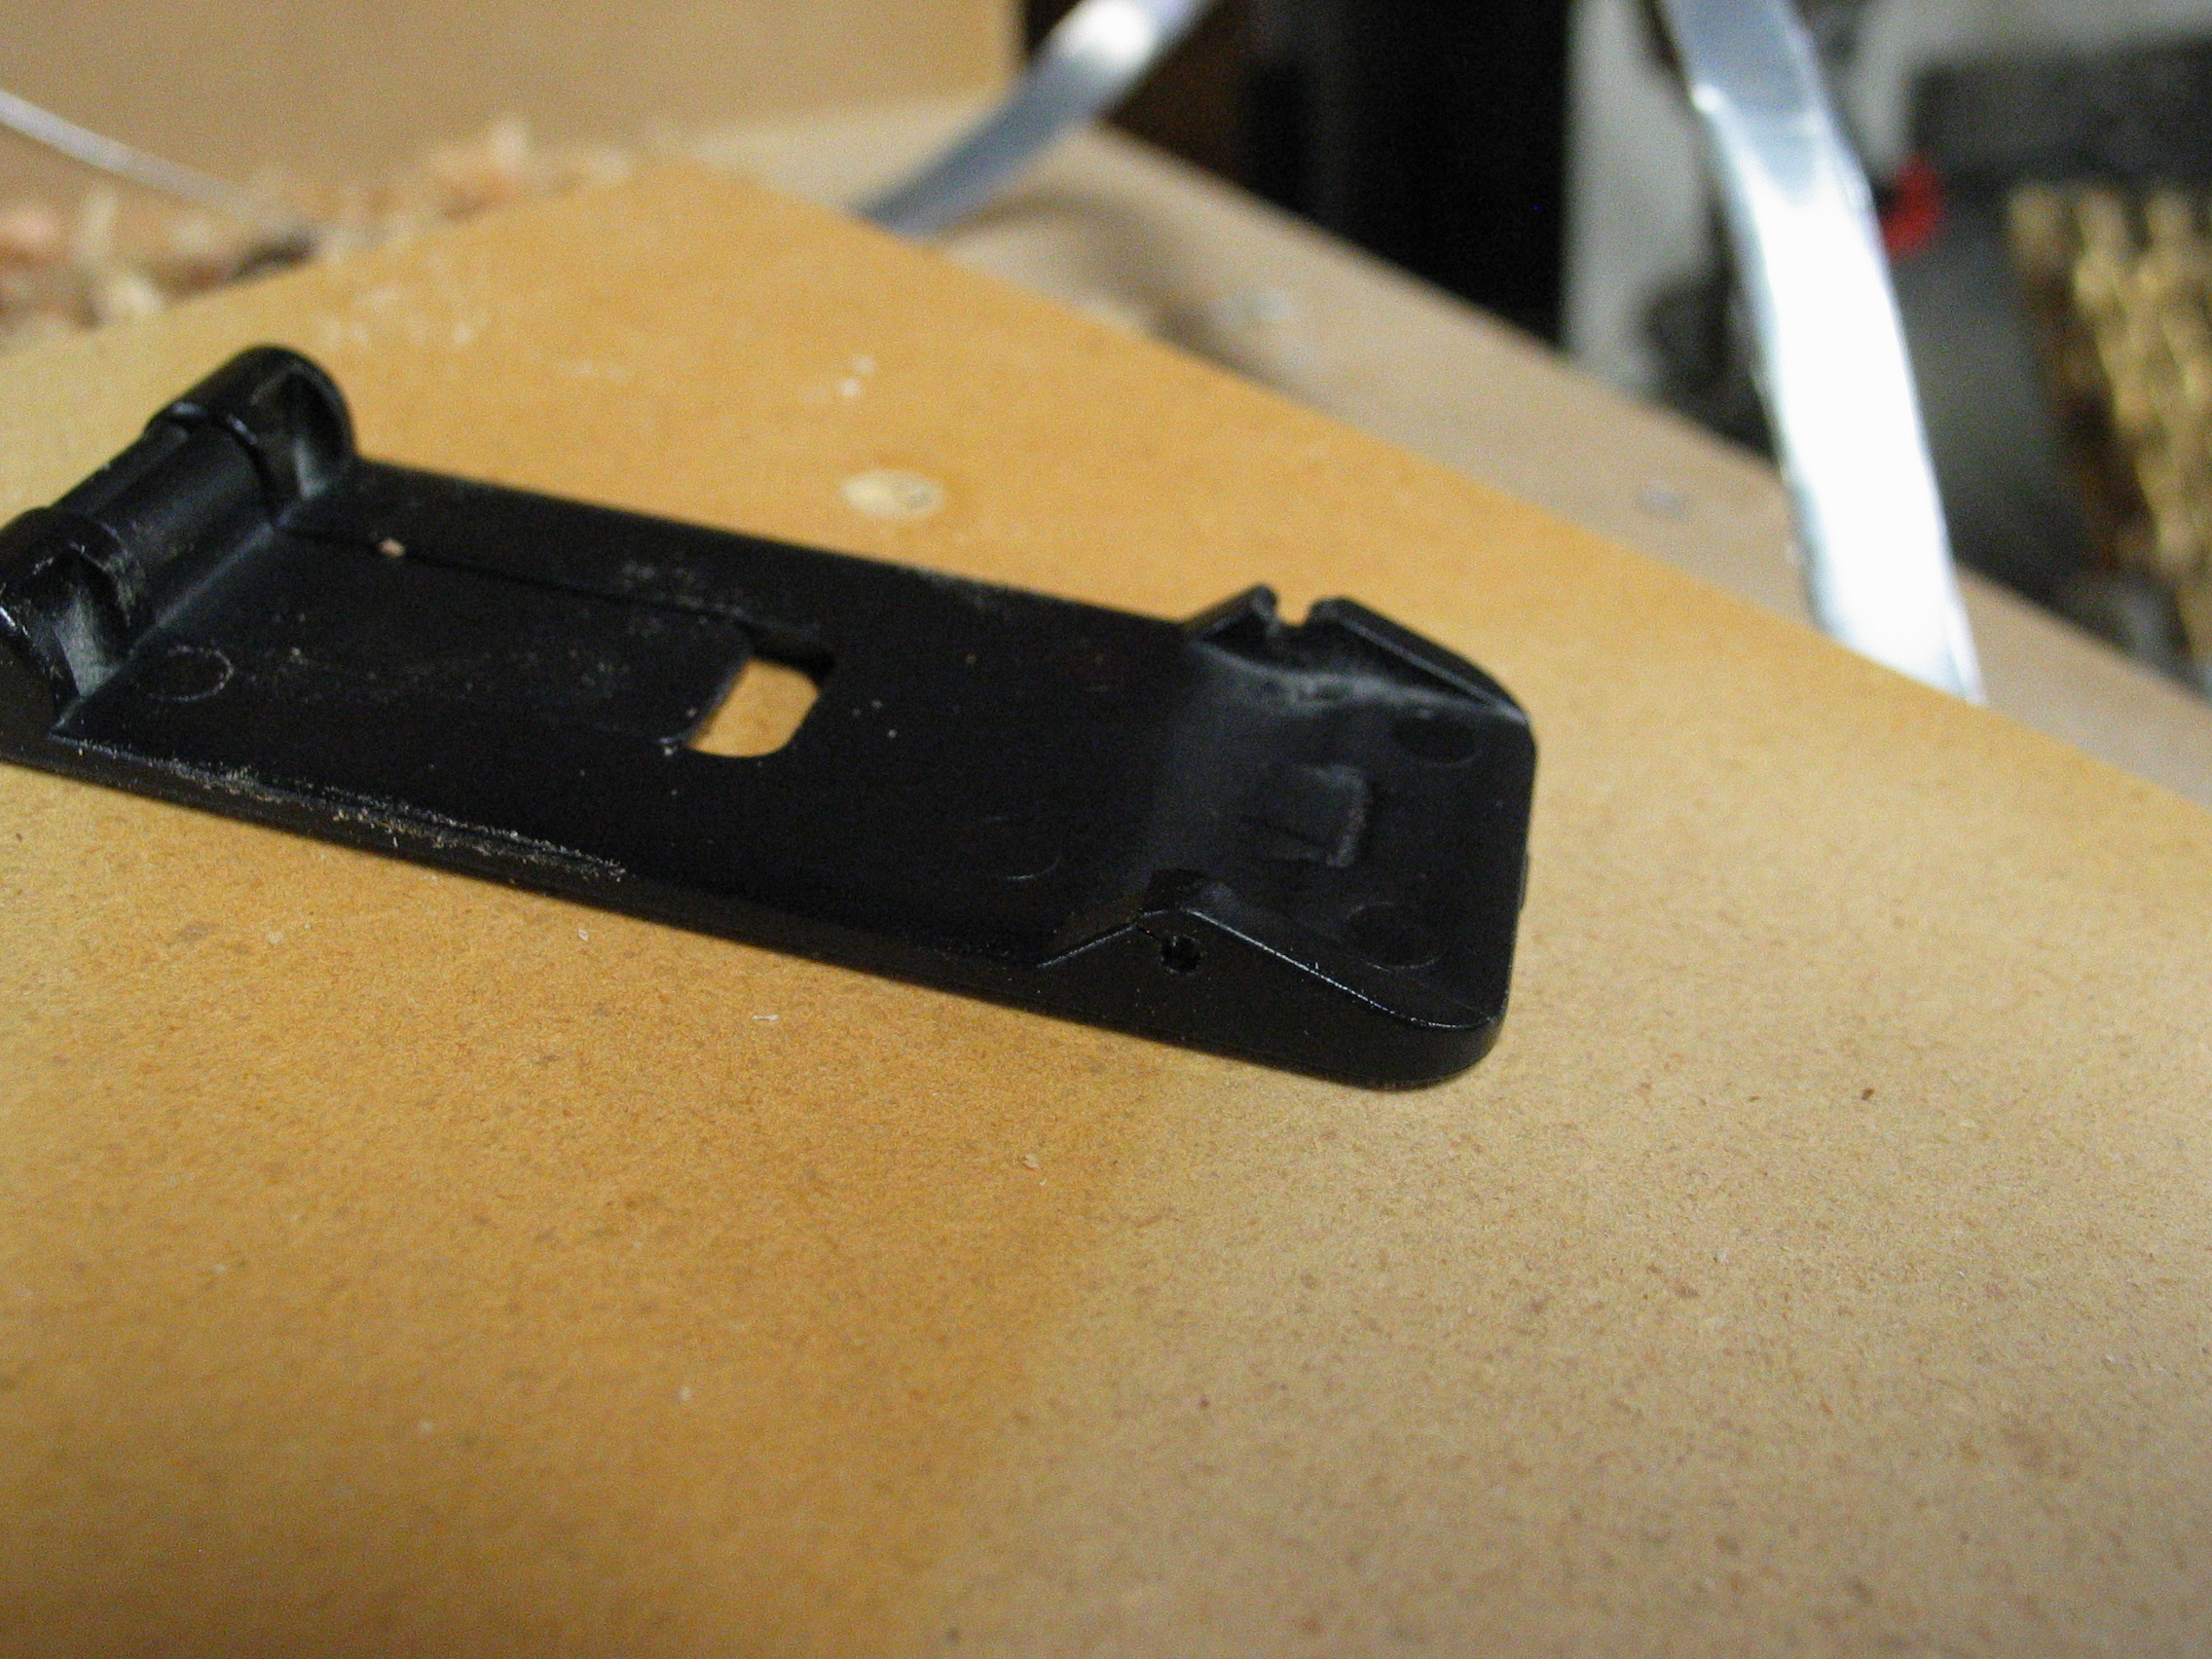
Last week when I was climbing into a car my phone caught the seatbelt buckle and broke the Contour Showcase iPhone case. It had caused the clip to twist enough that it broke the piece that holds the spring and axle in place. The little plastic piece that broke off got lost so there was no way I was going to glue it back together. Plus I don't think glue would have held very long anyway.
Broken clip
Last week when I was climbing into a car my phone caught the seatbelt buckle and broke the Contour Showcase iPhone case. It had caused the clip to twist enough that it broke the piece that holds the spring and axle in place. The little plastic piece that broke off got lost so there was no way I was going to glue it back together. Plus I don't think glue would have held very long anyway.
I considered using epoxy and making a big blob and then sanding it down and drilling a hole in it, but since I'm highly allergic to epoxy I really didn't want to do that. Looking at the belt clip I could see there was enough play between the two pieces that I could probably shove a thin strip of metal between them. All I would have to do is make a sort of "staple" that would hold the outer piece of the clip on.
In order to make the new metal piece fit I needed to make some slots in the plastic. My first thought was to just drill a lot of holes side by side using the drill press, but the tiny bit kept slipping. Not only that, the smallest drill bit I had was much larger than I needed. That wasn't going to work.
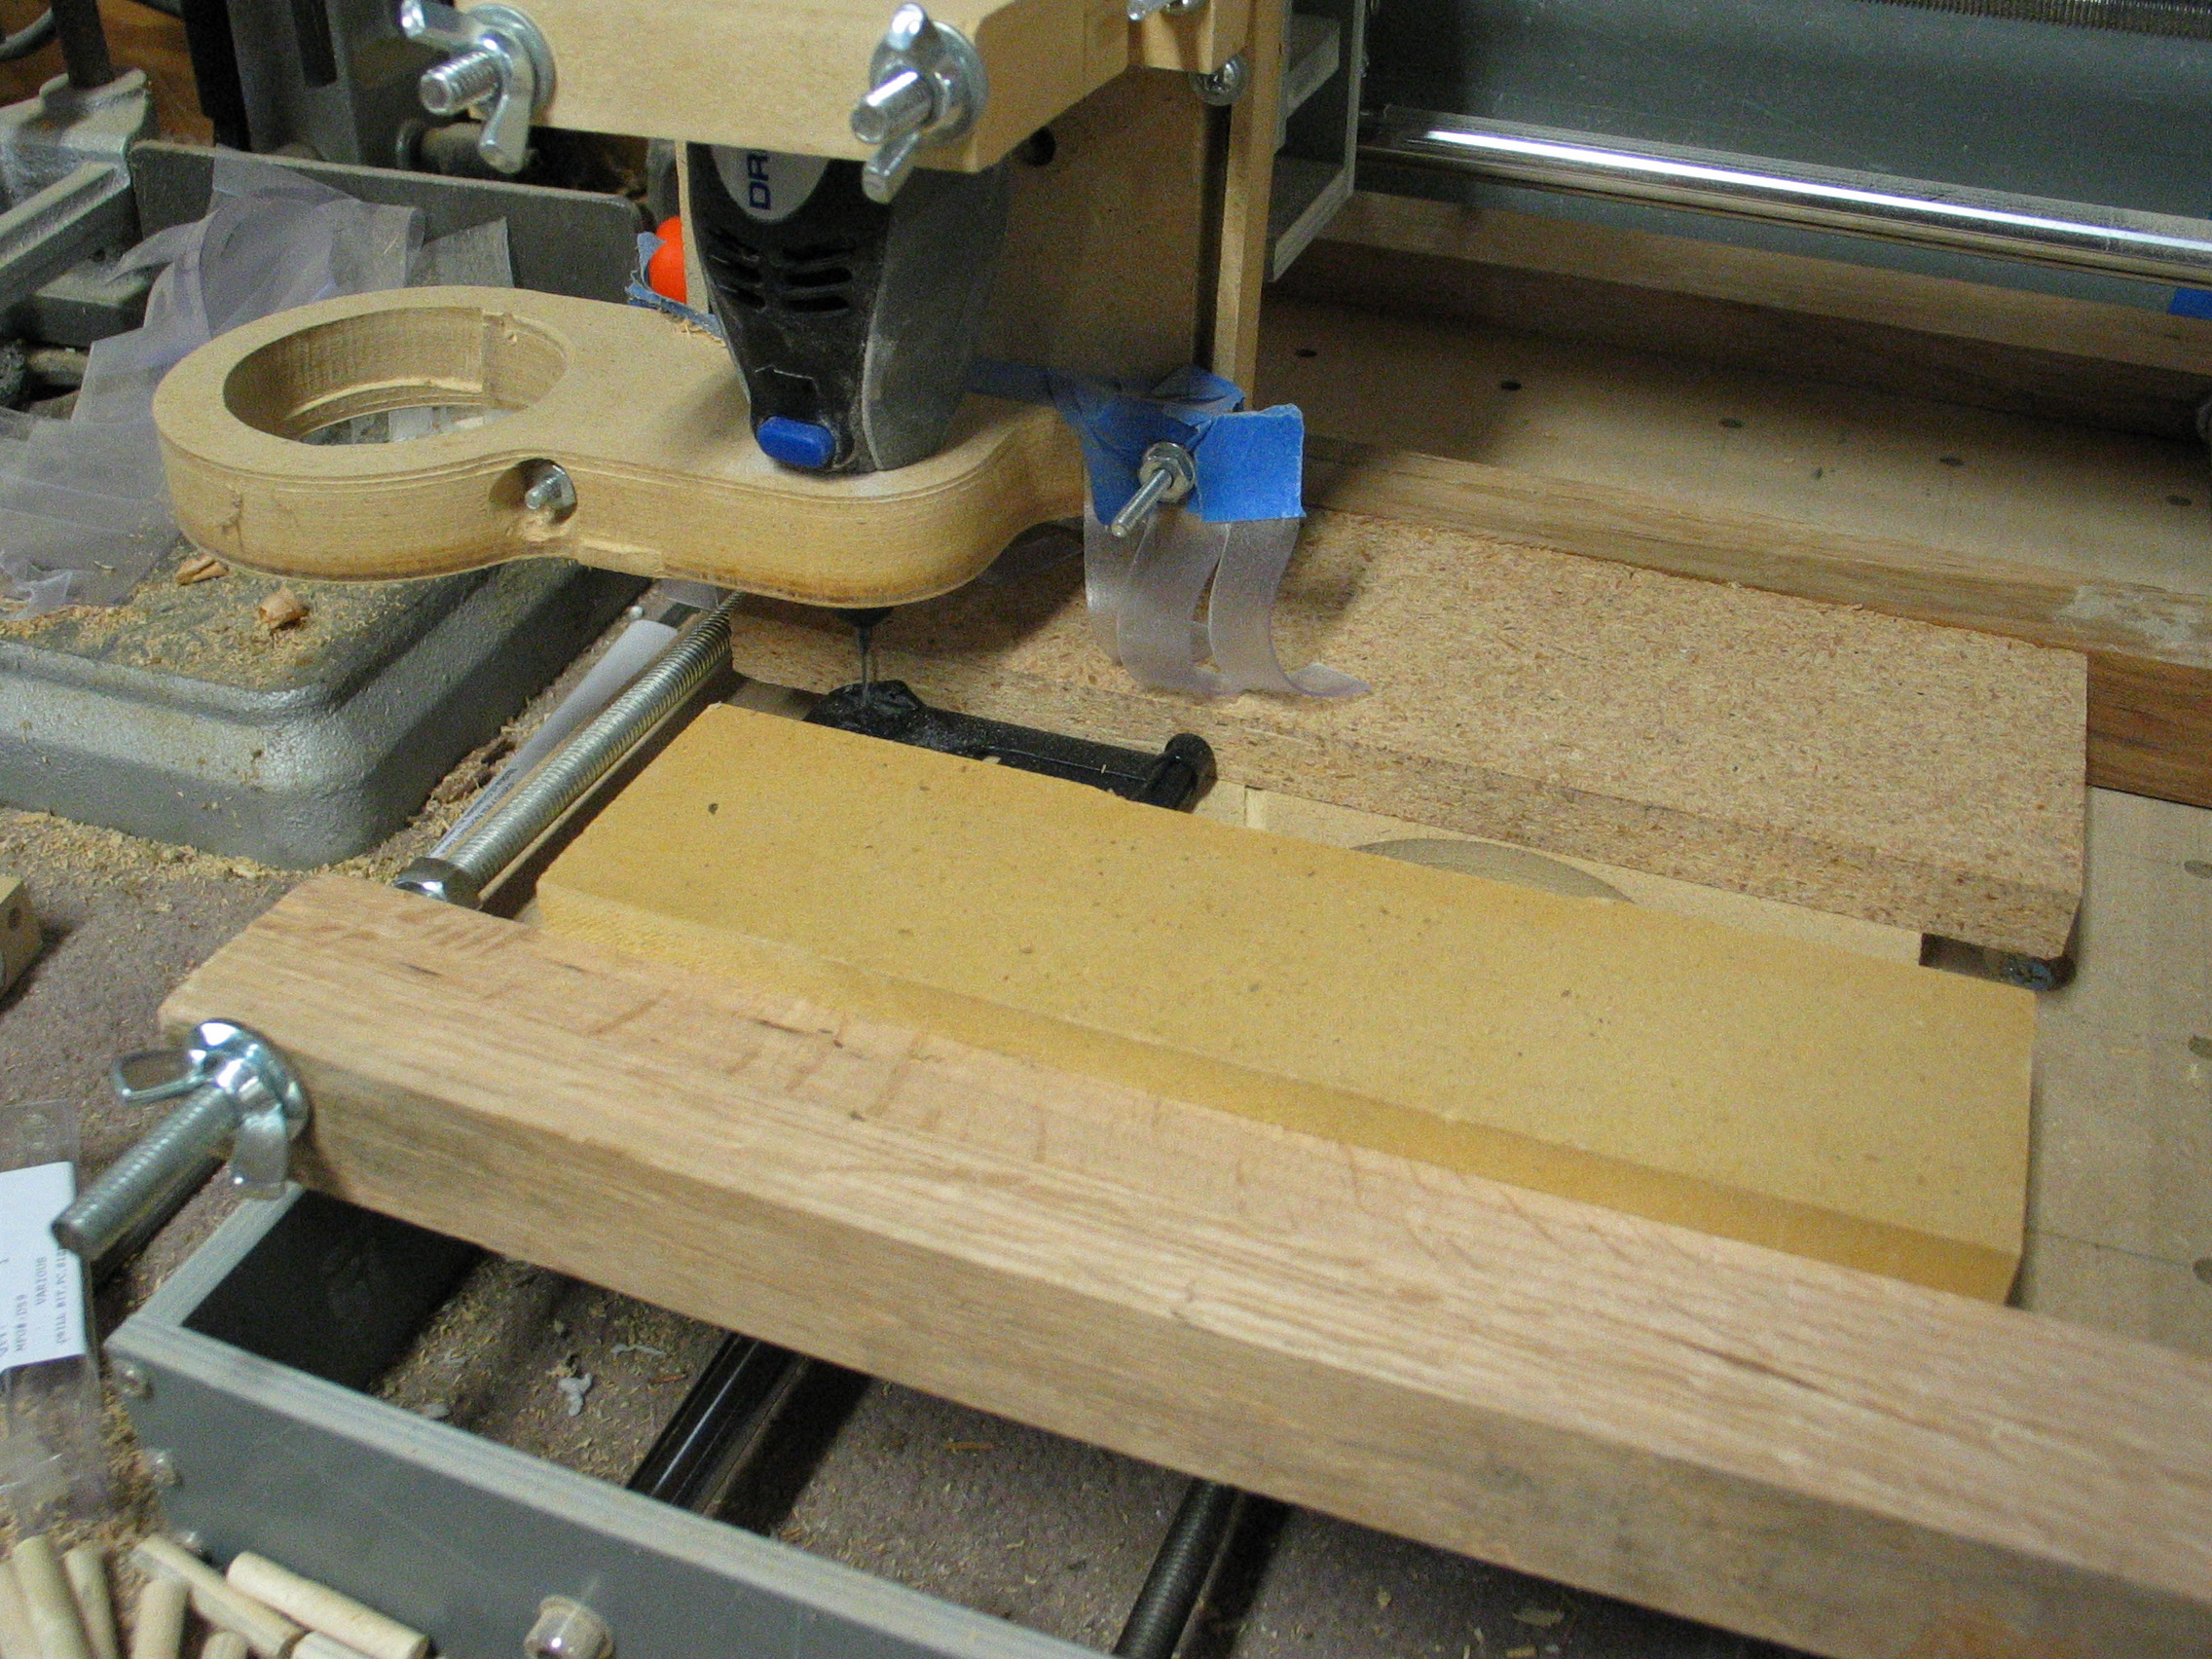
My next thought was to use the CNC as a sort of manual mill. I didn't want to go to all the trouble of drawing up a layout in CAD and then converting it to a G-Code program. Instead I would just manually position the bit and jog it back and forth and slowly creep it down. It seemed like a good idea but it was too easy to go too far.
 Cutting slots
How about slapping together a tiny little G-Code program by hand? A quick search of the internet reminded me of the basic G-Code commands, as well as finding out that I could write a simple while loop! Neat! I cobbled together a quick & dirty program that would move the head back and forth slowly and step down a little after each pass. I also found I had a bunch of very very tiny drill bits I had purchased for making PCBs. They are very fragile so I made the program move very slowly and step down just a tiny amount after each pass.
Cutting slots
How about slapping together a tiny little G-Code program by hand? A quick search of the internet reminded me of the basic G-Code commands, as well as finding out that I could write a simple while loop! Neat! I cobbled together a quick & dirty program that would move the head back and forth slowly and step down a little after each pass. I also found I had a bunch of very very tiny drill bits I had purchased for making PCBs. They are very fragile so I made the program move very slowly and step down just a tiny amount after each pass.
After manually positioning the bit where I wanted it, I let the program run. It worked perfectly. Within 10 minutes I had a nice slot exactly where I wanted it. I manually moved over to the other slot and ran the program again. Just like that I had two perfectly aligned slots!
I fit a strip of aluminum in the slots, cut it to length, and marked and drilled a hole for the axle. The bit I used to drill the hole was a little too large so I set it a little toward the outside to make sure it would hold the axle rod in about the right place. After fitting the rod I trimmed down the excess. Looks good!
 As good as new!
Took quite a bit of fiddling to fit the clip back in place, get the axle in, and get the spring in. But once everything was in it was as good as new! My only concern is that the clip on the other side may break in the same way, and because it's permanently attached to the main part of the case I may have a hard time making the same repair to it.
As good as new!
Took quite a bit of fiddling to fit the clip back in place, get the axle in, and get the spring in. But once everything was in it was as good as new! My only concern is that the clip on the other side may break in the same way, and because it's permanently attached to the main part of the case I may have a hard time making the same repair to it.
Update: The other half of the clip broke just a couple days later. I was hoping it would last longer than that. No problem though, I took some careful measurements, put it on the CNC, and milled slots in it. It was a little trickier fitting the aluminum since once I squeezed it in there was no taking it out to make adjustments. I added a couple more pictures to show the rest of the repair.


+1 Posted by J. Siefer • Sep.09.2012 at 04.24 • Reply
Interesting project. Â Would a hand controller have helped? Â I just purchased one off of eBay, but for the life of me I can't figure out how to connect it to Mach 3. Â If you get bored, you can read a post I made about it here: http://forums.zentoolworks.com/viewtopic.php?f=11&t=2399 Â Anyway, thanks for the read!Â