

Left my power supply at work, so I had to build a new one
I meant to bring home my power supply this weekend, but I forgot and left it at work. It was the motivation I finally needed to build a new one. I had been thinking about it for a long time, but since the old one still works, there wasn't any real reason to do it.
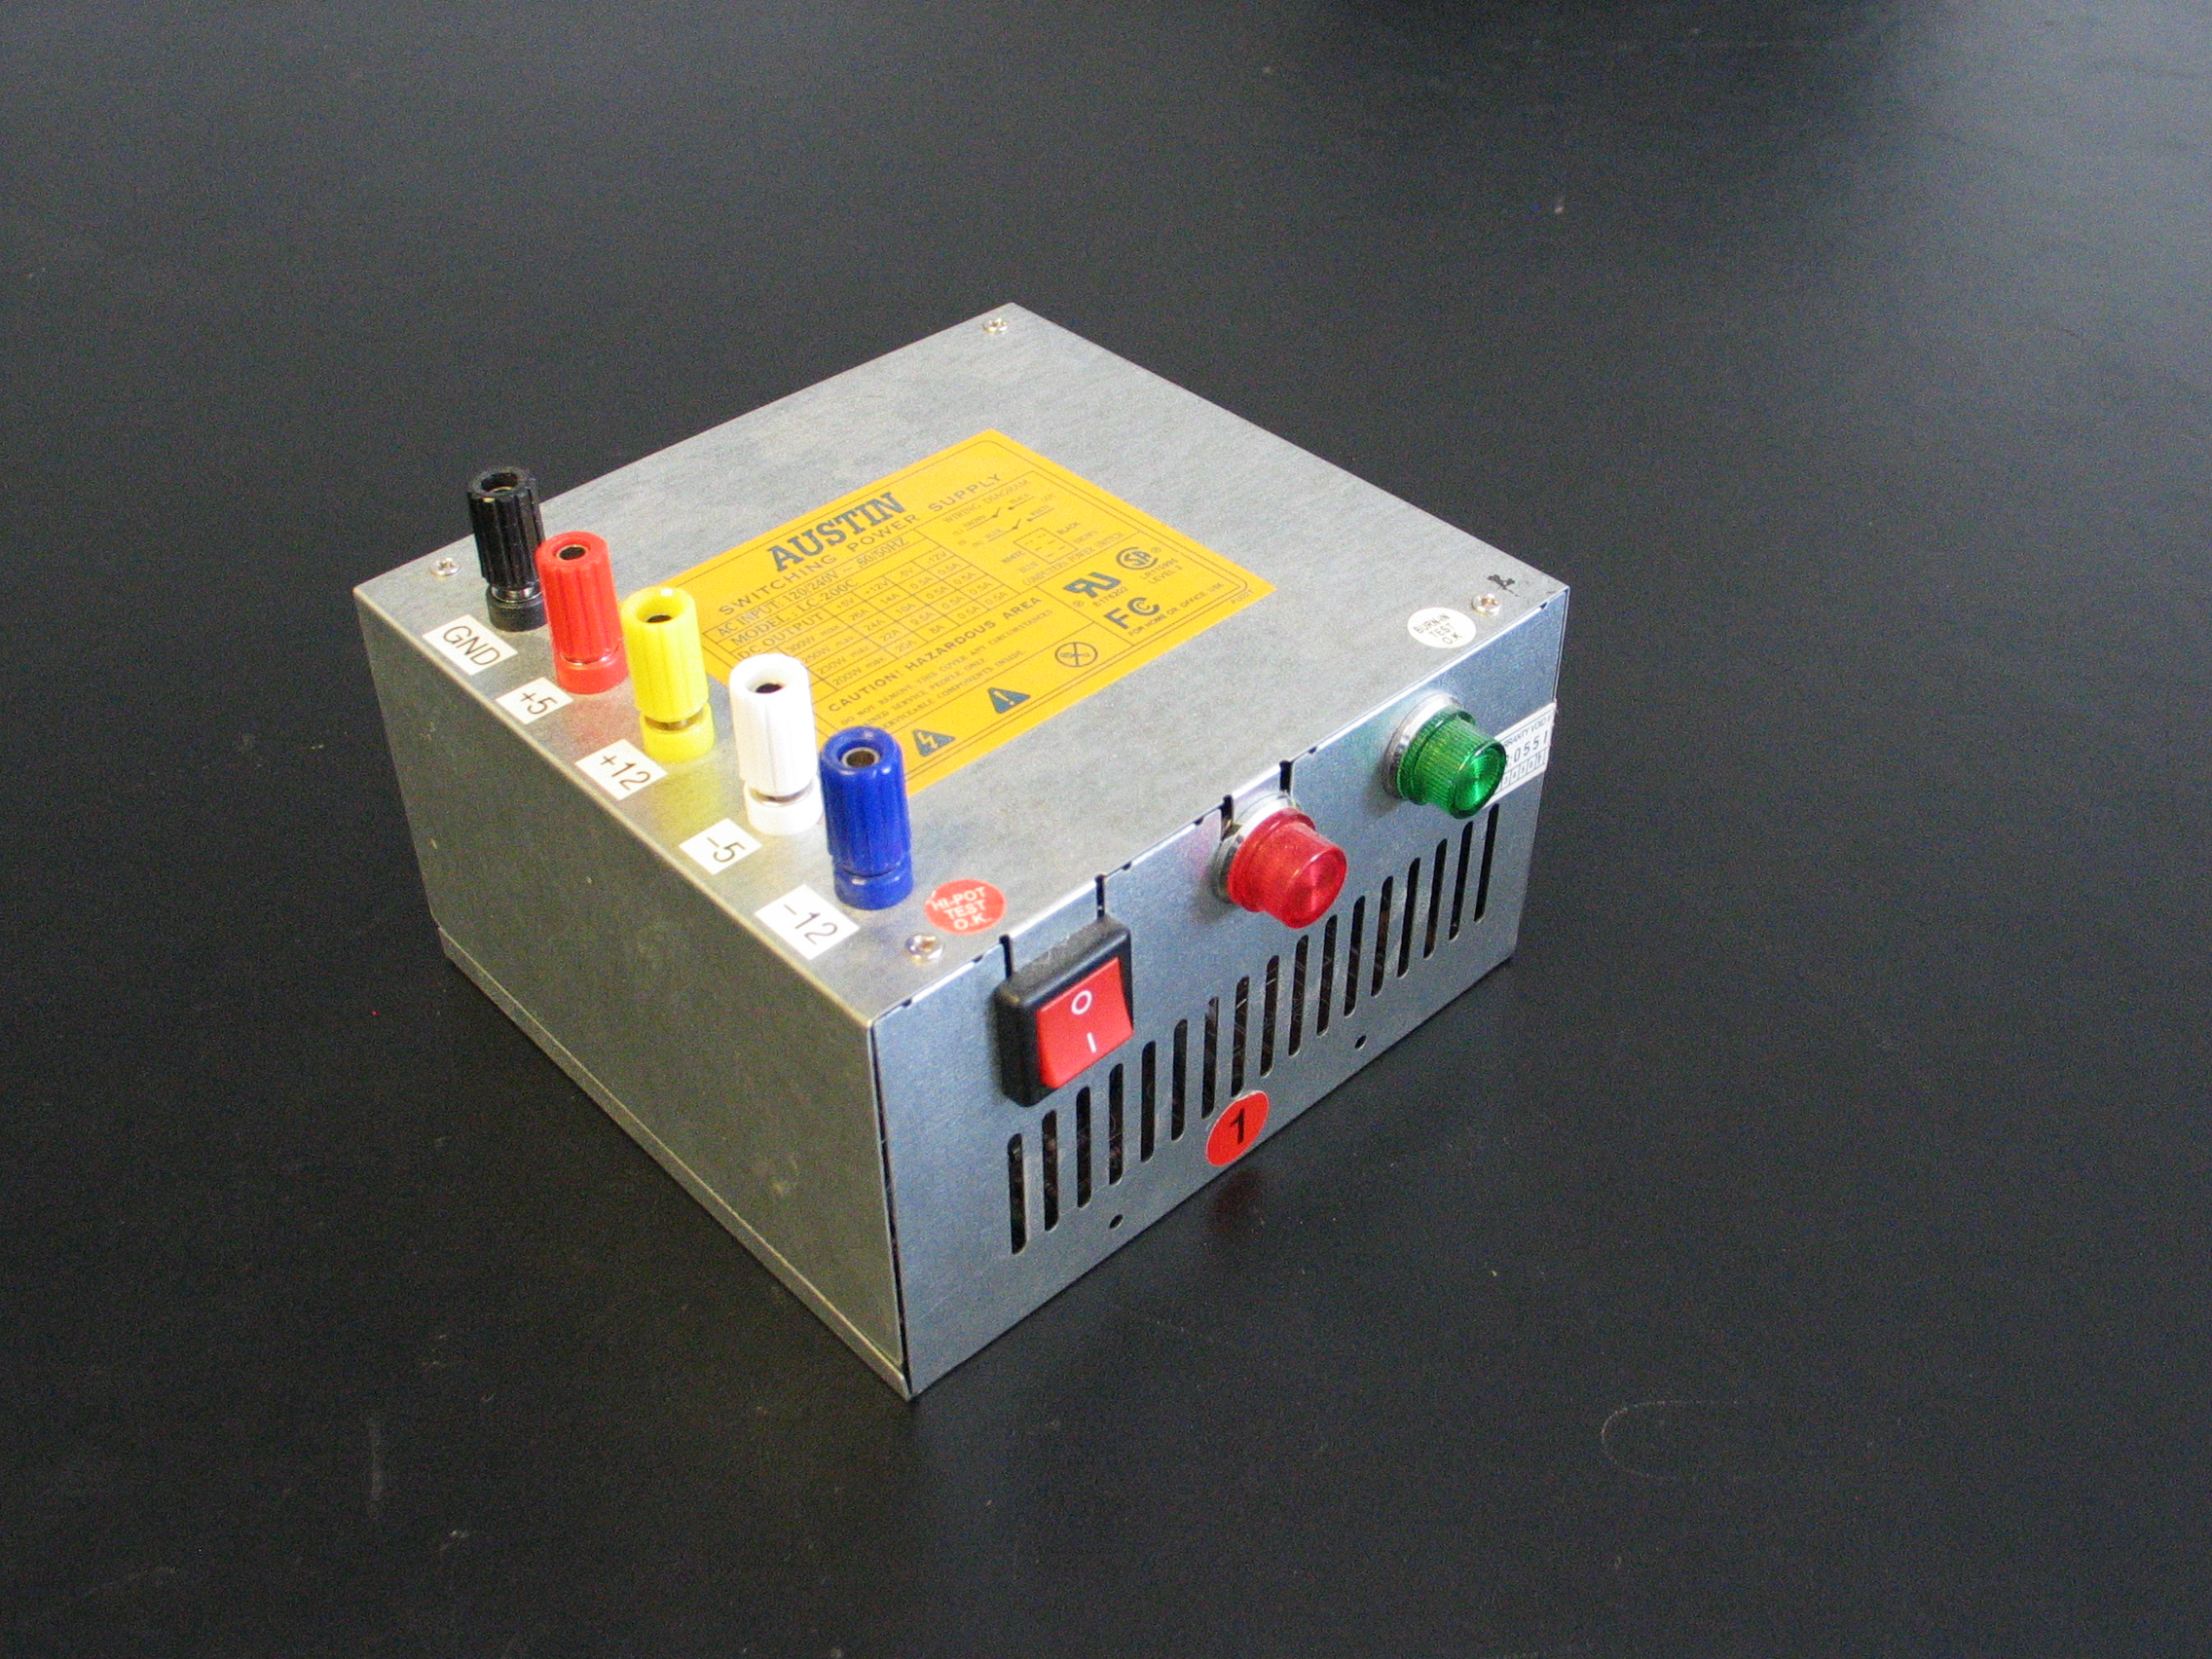 My old AT power supply
My old power supply is a modifed AT power supply. It was easier to work with because of the way the power switch was wired. In fact, after removing the huge bundle of cables, the hole was the perfect size for a switch from Radio Shack. But it was also the last AT supply I had, so if it ever died I wasn't going to easily make another. And if it ever died, I would have to go to a lot of trouble to make a new one. On the old one I opened it up and removed a lot of wires, drilled holes in the sheet metal case, and soldered in new jumpers to the binding posts. The other thing I didn't like was with the binding posts on top, I couldn't exactly stack things on top of it or fit it into a nice bench setup with easy access.
My old AT power supply
My old power supply is a modifed AT power supply. It was easier to work with because of the way the power switch was wired. In fact, after removing the huge bundle of cables, the hole was the perfect size for a switch from Radio Shack. But it was also the last AT supply I had, so if it ever died I wasn't going to easily make another. And if it ever died, I would have to go to a lot of trouble to make a new one. On the old one I opened it up and removed a lot of wires, drilled holes in the sheet metal case, and soldered in new jumpers to the binding posts. The other thing I didn't like was with the binding posts on top, I couldn't exactly stack things on top of it or fit it into a nice bench setup with easy access.
 My new ATX power supply
The new power supply uses an ATX power supply. An ATX supply doesn't turn itself on the same way, it's always in a sort of standby state and you have to short a lead to ground in order to get it on. Not quite as easy to modify, but not too hard either. I also wanted to leave all the wiring intact so that if it should ever die, or I ever wanted to upgrade it, I could swap it out.
My new ATX power supply
The new power supply uses an ATX power supply. An ATX supply doesn't turn itself on the same way, it's always in a sort of standby state and you have to short a lead to ground in order to get it on. Not quite as easy to modify, but not too hard either. I also wanted to leave all the wiring intact so that if it should ever die, or I ever wanted to upgrade it, I could swap it out.
The hardest thing about connecting to the power supply was finding the right connector. After lots and lots of googling, looking at crappy images on electronics sites, and looking at spec sheets from manufacturers, I found something which looked like it was the right connector. It fits perfectly with both a 20 pin and 24 pin ATX connector, but it's not quite right, the little clip on the side isn't in quite the right place. It works though since the friction of all the pins holds it together.
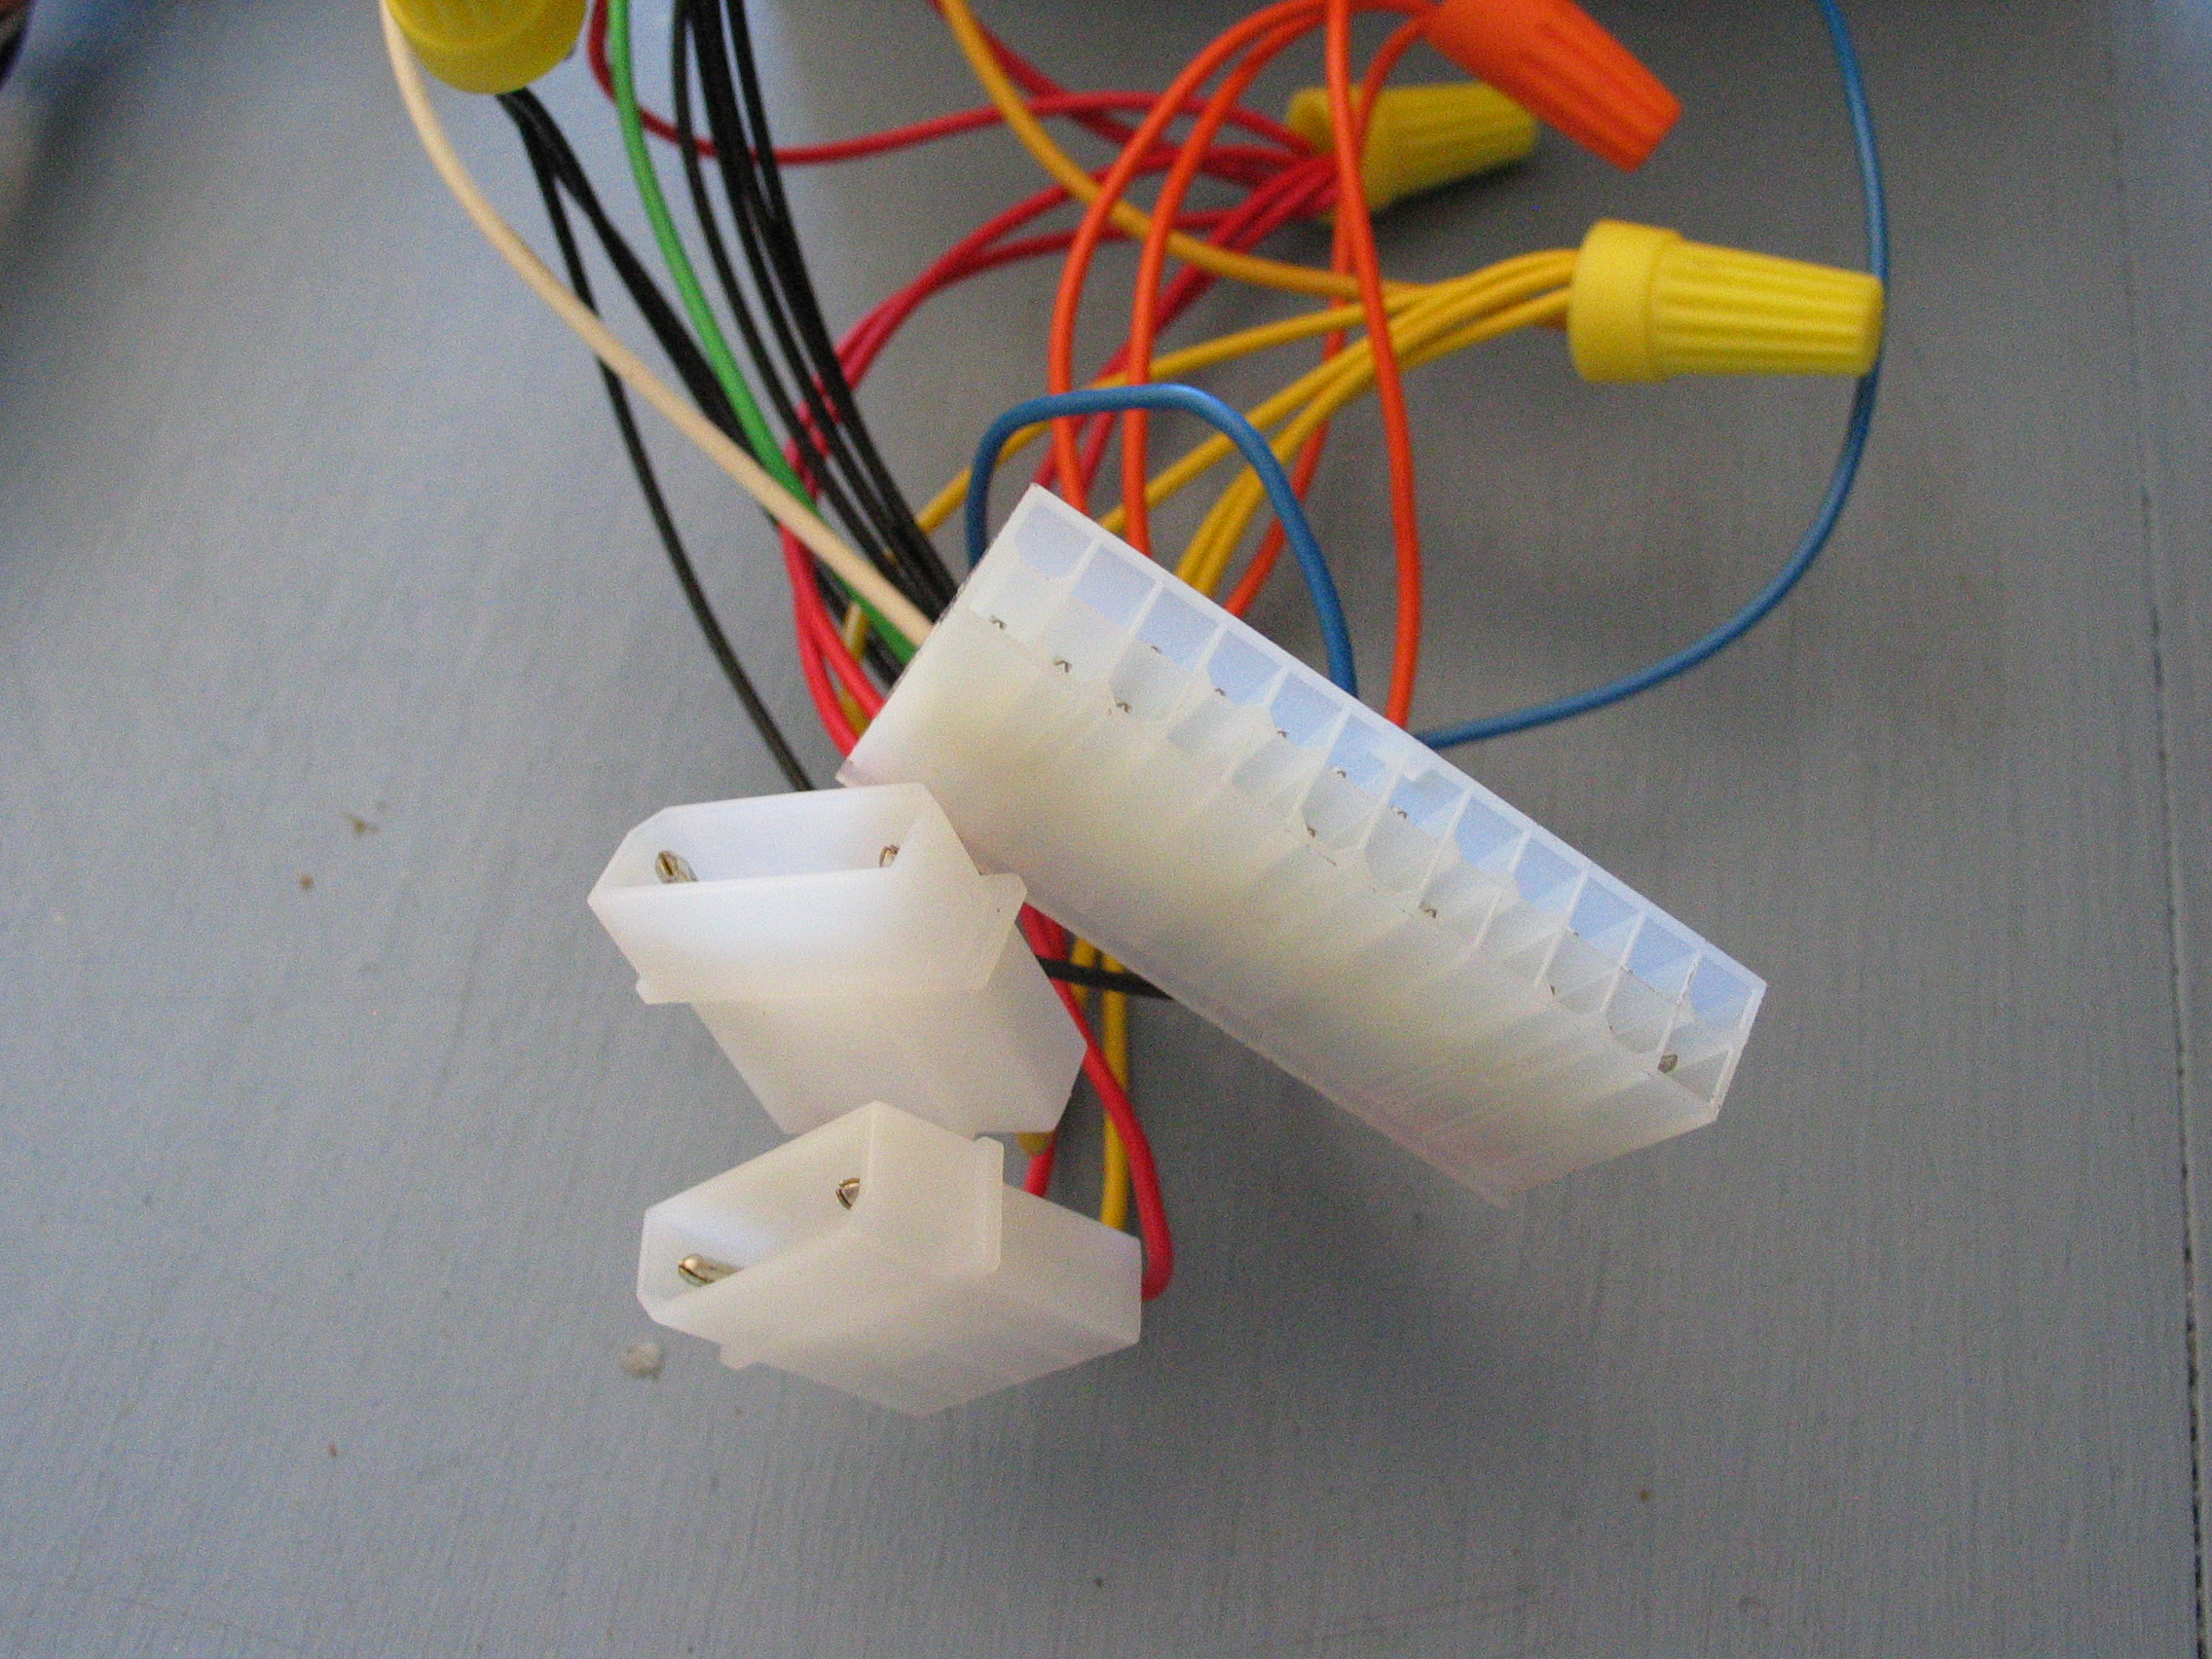 Connectors from the front panel harness
The ATX connector I used is a TYCO/AMP 2-1586000-4 which I got from Allied Electronics. The matching pins are TYCO/AMP 1586314-1, also from Allied. Since there is only one 12 volt pin on a 20 pin, and two on the 24 pin, I decided to also add two connections to the 4 pin molex HD power connectors. I got the molex connectors from Jameco, part 42076, the pins are 42730.
Connectors from the front panel harness
The ATX connector I used is a TYCO/AMP 2-1586000-4 which I got from Allied Electronics. The matching pins are TYCO/AMP 1586314-1, also from Allied. Since there is only one 12 volt pin on a 20 pin, and two on the 24 pin, I decided to also add two connections to the 4 pin molex HD power connectors. I got the molex connectors from Jameco, part 42076, the pins are 42730.
Crimping the pins for the ATX connector makes a nice crunching sound, but you have to make sure to squeeze harder after the sound or else the pins fall off. I ran multiple light gauge leads together to a heavy gauge lead and used wire nuts to connect them. The heavy gauges have little lugs crimped onto them and are screwed down to the binding posts. No soldering involved at all.
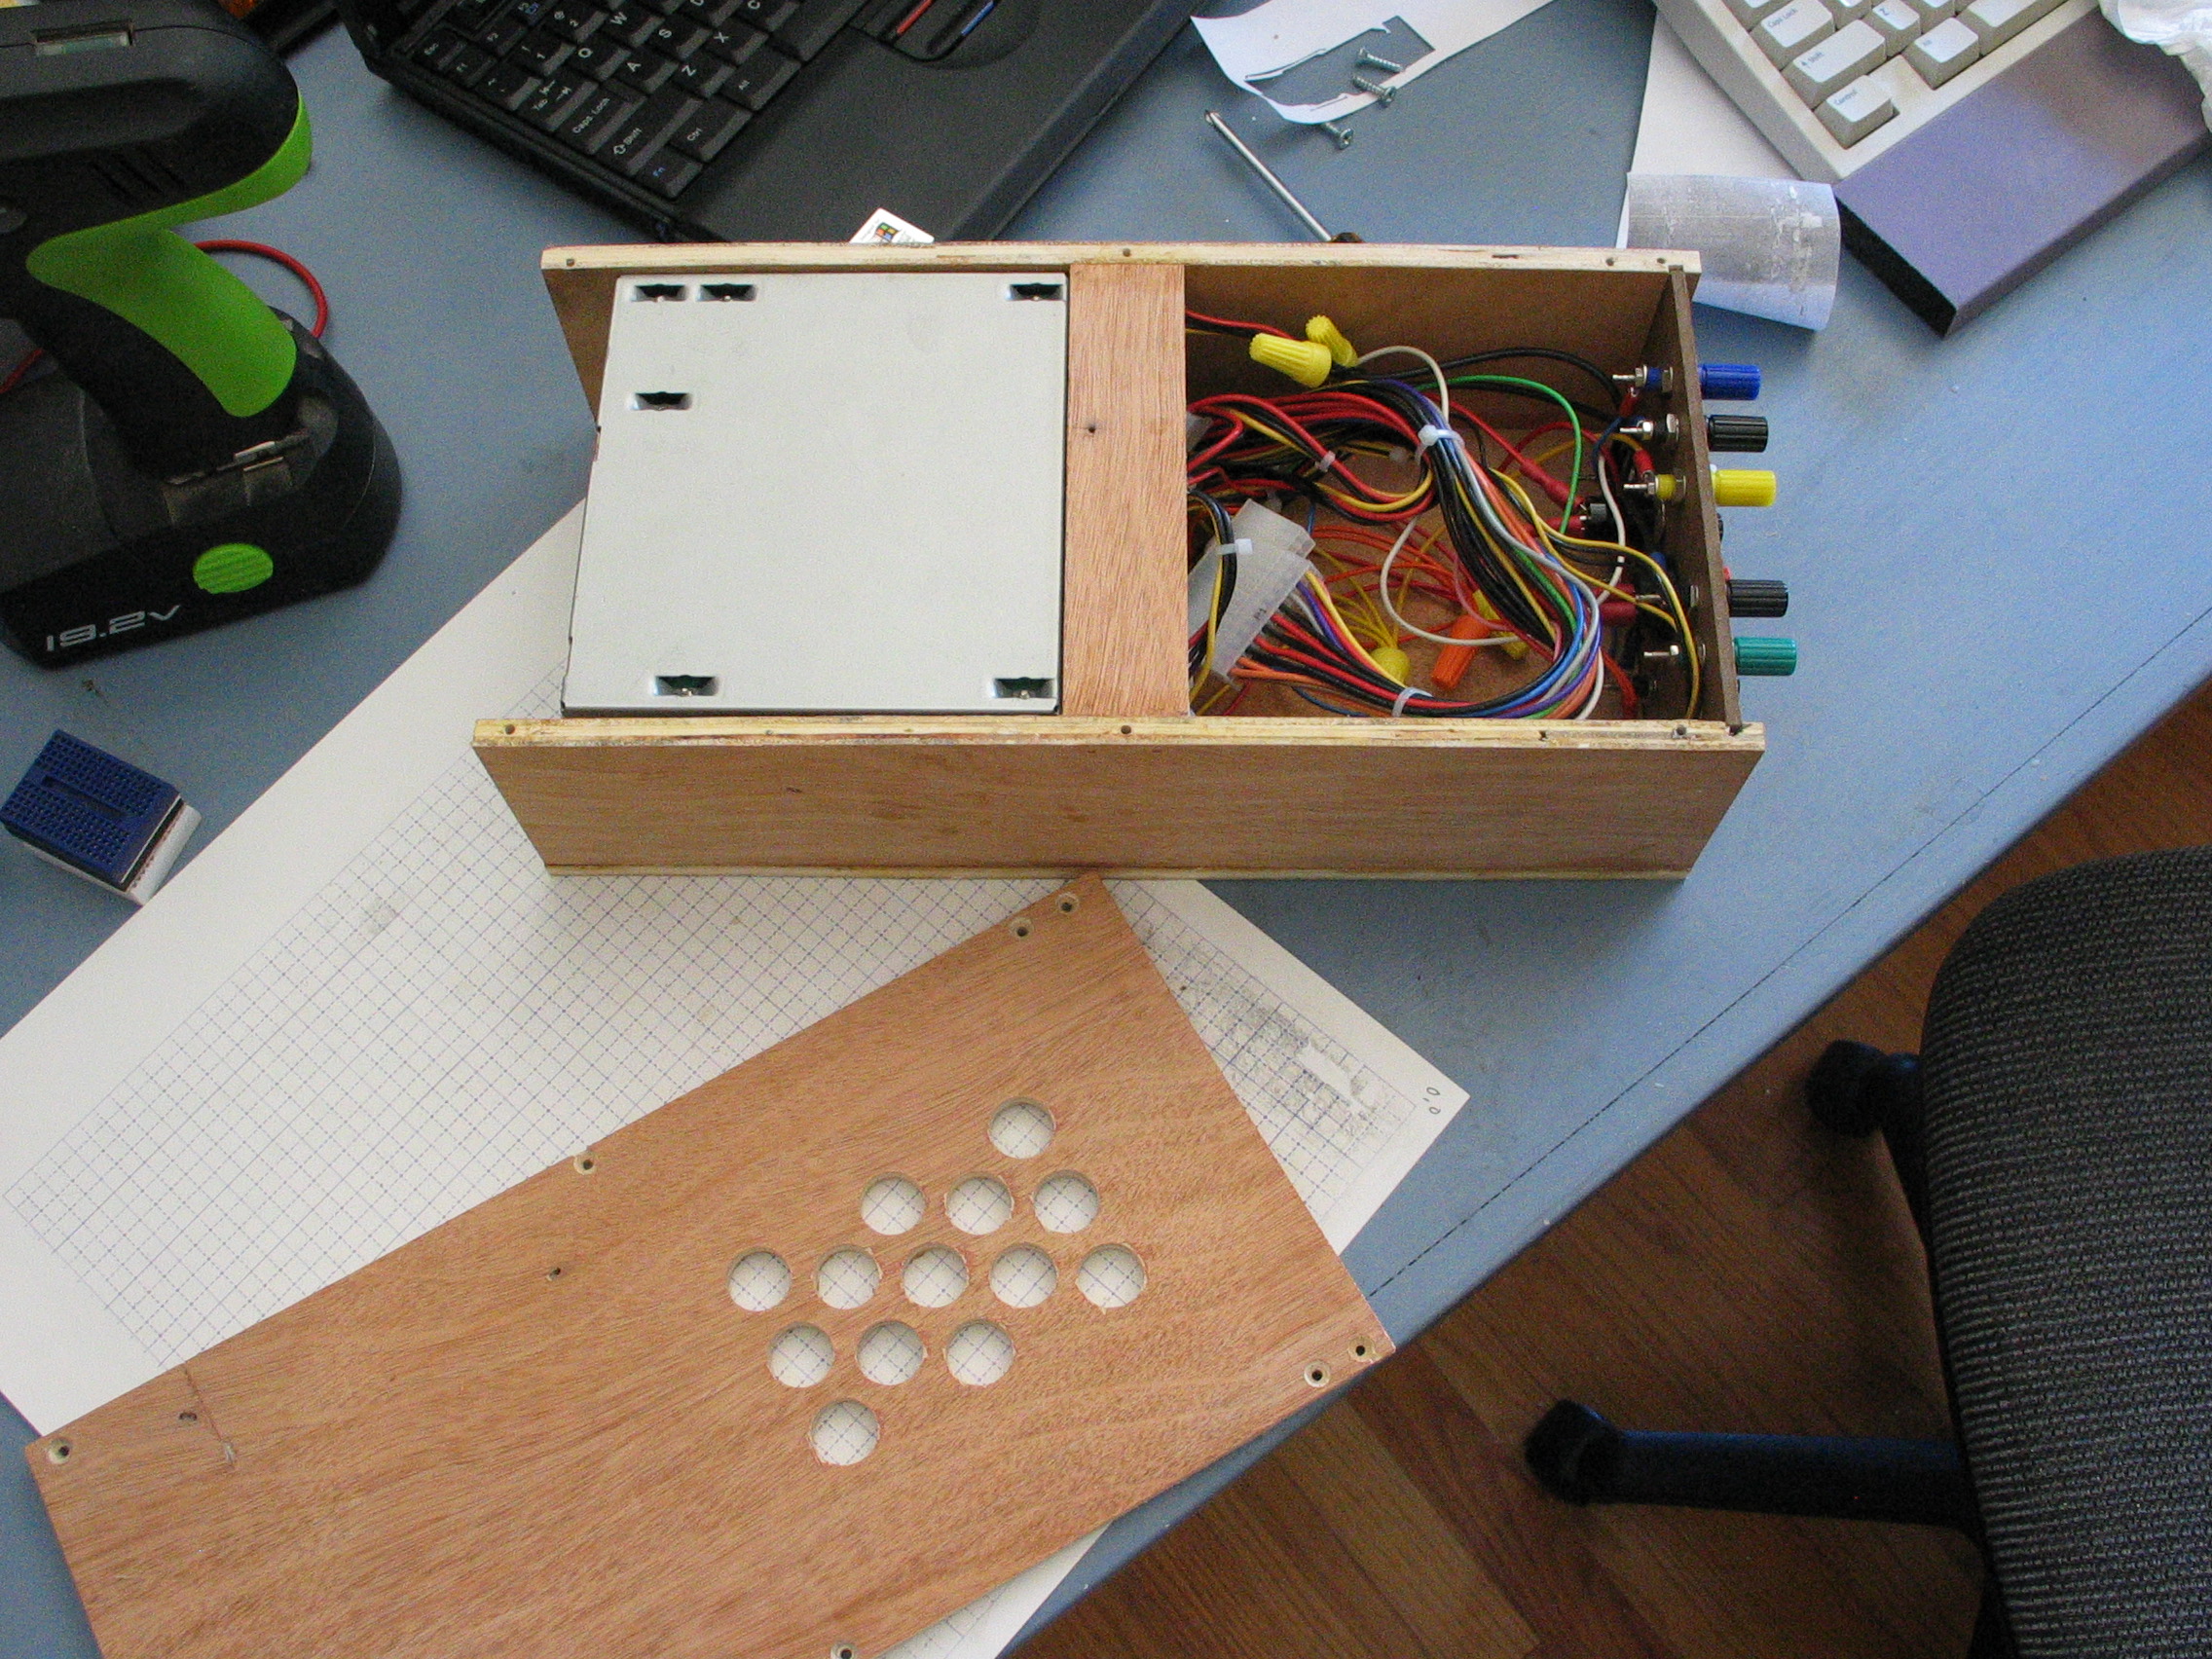 Installed in box
For the box I used some scrap plywood. The front panel is made out of a piece of tempered hardboard. It is inserted into a groove around the front of the box so that later if I want to make some upgrades to it it will be very easy to replace. I already have one upgrade planned which is the green post, I am going to add a 7809 so that I can get 9 volts, something I kept missing on the old supply. For the 3.3 volt I wasn't able to find a 5-way binding post in orange (at least not for reasonable price) so for now I substituted a white one.
Installed in box
For the box I used some scrap plywood. The front panel is made out of a piece of tempered hardboard. It is inserted into a groove around the front of the box so that later if I want to make some upgrades to it it will be very easy to replace. I already have one upgrade planned which is the green post, I am going to add a 7809 so that I can get 9 volts, something I kept missing on the old supply. For the 3.3 volt I wasn't able to find a 5-way binding post in orange (at least not for reasonable price) so for now I substituted a white one.
The ATX supply is held in at the back with a small piece of aluminum L-channel. The bottom of the case is removable and I drilled holes in it for ventilation. I still need to put some labels on the front, but over all I think it turned out very well.


+1 Posted by Woody Woodworker • Jun.26.2012 at 20.43 • Reply
I lost a wood clamp. Have you seen it?
+1 Posted by daddyMacCadillac • Jun.26.2012 at 21.04 • Reply
This is awesome! Do you have a schematic/howto for this? I'd love to make one!
+1 Posted by FozzTexx • Jun.26.2012 at 21.11 • Reply
The only schematic you need is the pinout for the ATX connector. The wires are connected directly from the connector to the binding posts.
+1 Posted by Mike Y • Jun.26.2012 at 21.22 • Reply
Very nice cabinet. You can also use an easier-to-find ATX Power Supply Extension Cable. Amazon, for instance sells them for $3.95. Then you just cut off the 'CPU/Motherboard End' and solder away. Here's mine: http://km5z.us/blog/?p=33
Mike Y Dallas, Texas
+1 Posted by FozzTexx • Jun.26.2012 at 21.25 • Reply
I had considered doing that, but I was on a mission to find those connectors. It took a lot of researching but I was able to find a place where I could get them and not have to order 1000+ at a time.
+1 Posted by Mike Y • Jun.27.2012 at 00.29 • Reply
I can appreciate that too! The hunt is half the fun..!
+1 Posted by Electroalek • Jun.26.2012 at 23.23 • Reply
I thing that you need adjustable one too !!!