

Almost burned my house down a couple times. Had to make this.
 After walking off and forgetting about my soldering iron enough times, I decided I needed to get some kind of timer that would automatically shut it off. I did a lot of searching thinking that something like this should already exist, but I couldn't find anything. I found power strips and little timers where you could set the time of day to turn on and off, but nothing with a simple wind up count down timer.
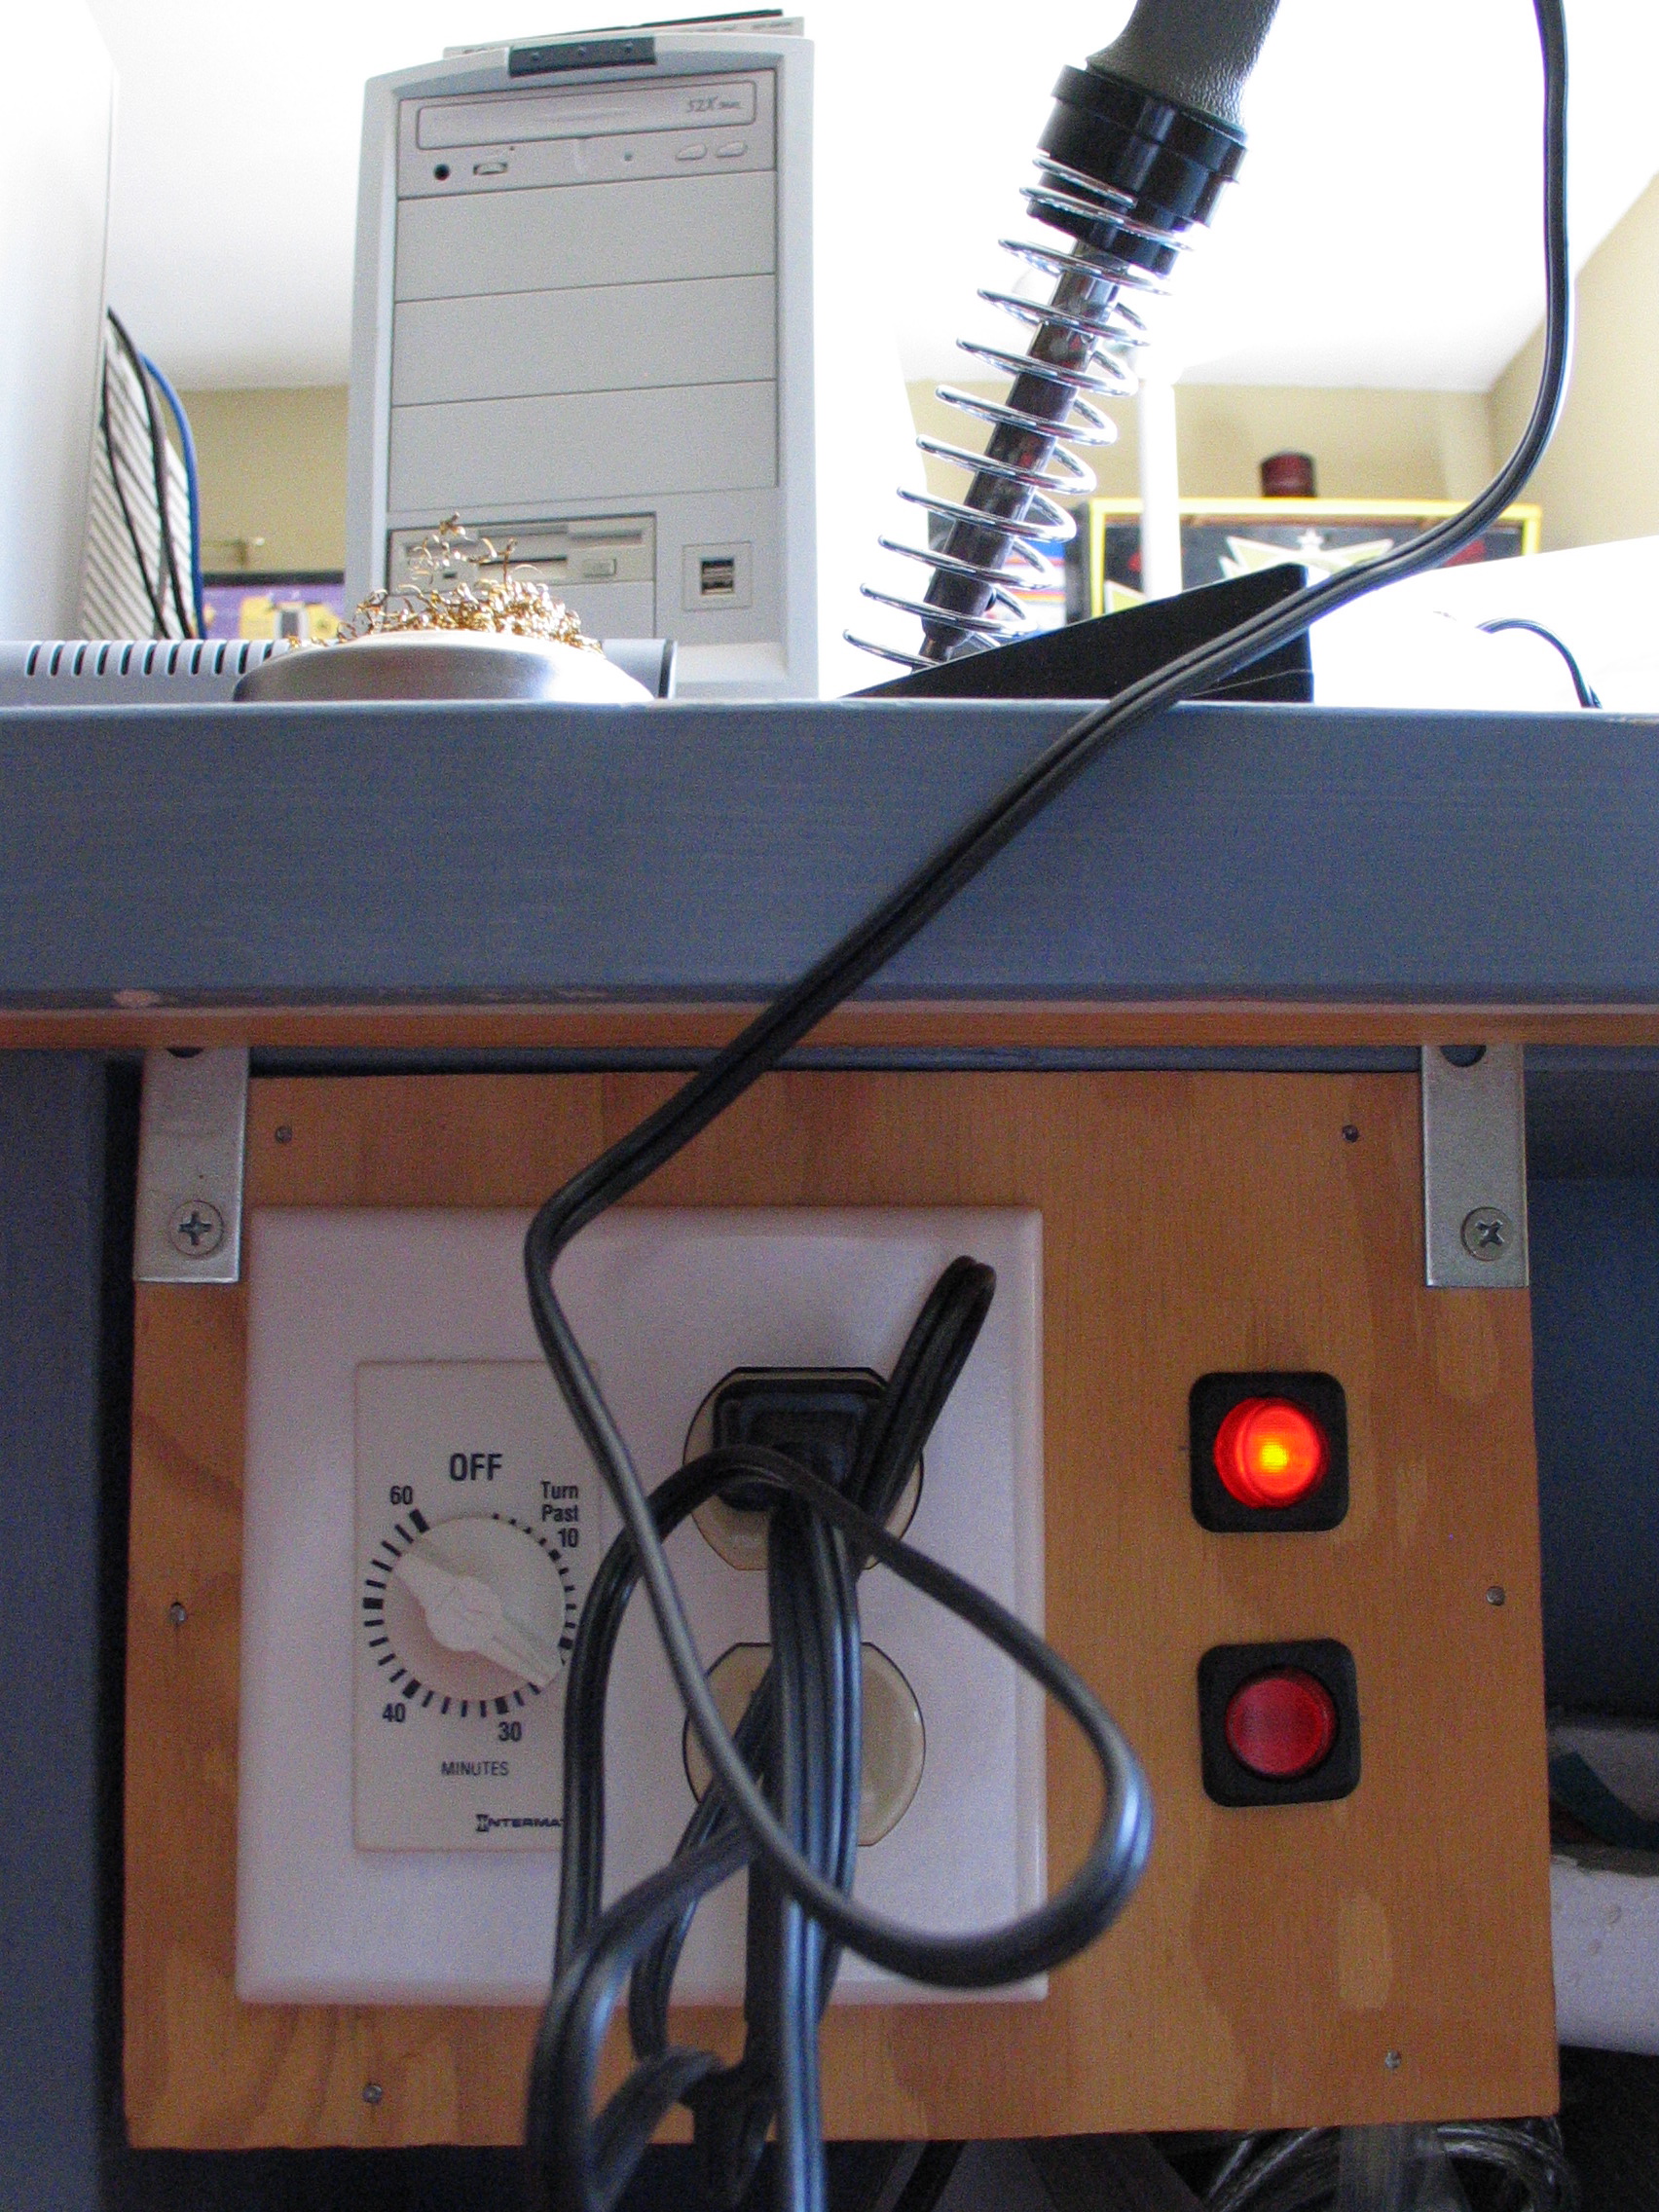
Having seen wind up timers installed in bathrooms I checked the hardware store and found them for sale, and I decided I could build my own timed outlet. The timers are installed like a regular on/off switch, but instead of flipping a switch you turn a knob. Turning the knob winds up a mechanical timer, kind of like a kitchen timer. When the timer winds down, there's a click and the power is shut off.
Since I was going to make it myself I added some bonus features like two outlets, each with their own switch, and a light on each one so I can easily see which outlet is turned on.
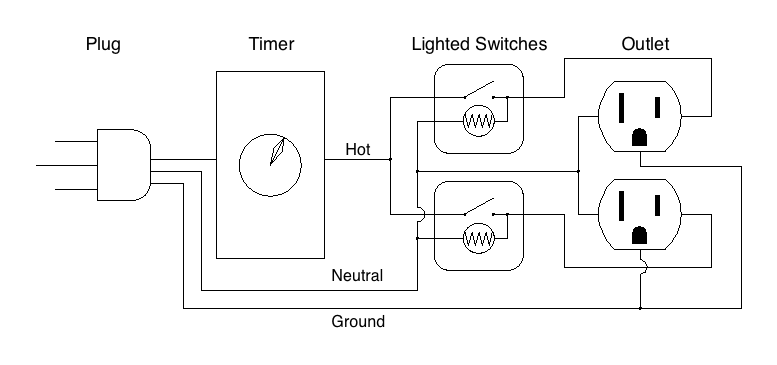
The schematic is pretty simple. The timer acts as the master switch. When the timer is off, everything is off. Power is then controlled by the lighted switches, one for each outlet. When the switches are on they will light up and turn on the corresponding outlet. The duplex outlet has the hot jumper snipped so that each side can be controlled independently.
The box is made from plywood. I installed the timer switch and outlet inside a plastic electrical box inside. All the wiring is done with wire nuts or quick disconnects, there's no soldering. The cord was leftover from an arcade machine and included the spiffy little grommet. The L brackets let me hang it from the shelf under my table and still be able to slide it out and keep it portable.
This box has worked great and having the outlets switched independently is very handy. Having the lighted switches is also nice because I can tell at a glance whether an outlet is still on. Most of the time I'll plug my soldering iron into the top outlet and the desoldering iron into the bottom. Once I'm done removing components I can switch off the desoldering iron and continue using the soldering iron and adding in components. Plus I've even used it for timing other things! It's been very handy for timing a UV light for erasing EPROMs, I just put the light over the EPROM, wind up the timer, and let it go!


+1 Posted by Crash • Jun.26.2012 at 05.16 • Reply
i've been contemplating building one of these for my gf's curling irons...  nothing like coming home to the smell fo burning hair.
+1 Posted by Steve • Jul.02.2012 at 06.49 • Reply
I've been using mine for over a year, love it!
+1 Posted by dosman • Jul.02.2012 at 12.09 • Reply
Good job!! FYI, a small but important point, for this to be "code" you need to have your wire splices inside the blue box to contain potential sparks. Thanks!
+1 Posted by FozzTexx • Jul.02.2012 at 13.50 • Reply
That would be true if it were permanently mounted inside a wall. Since everything is contained inside the box the electrical box is actually not necessary. The only reason I used it was because it had screw holes which made it much easier to mount the timer and outlet.