

Kitchen for the Office
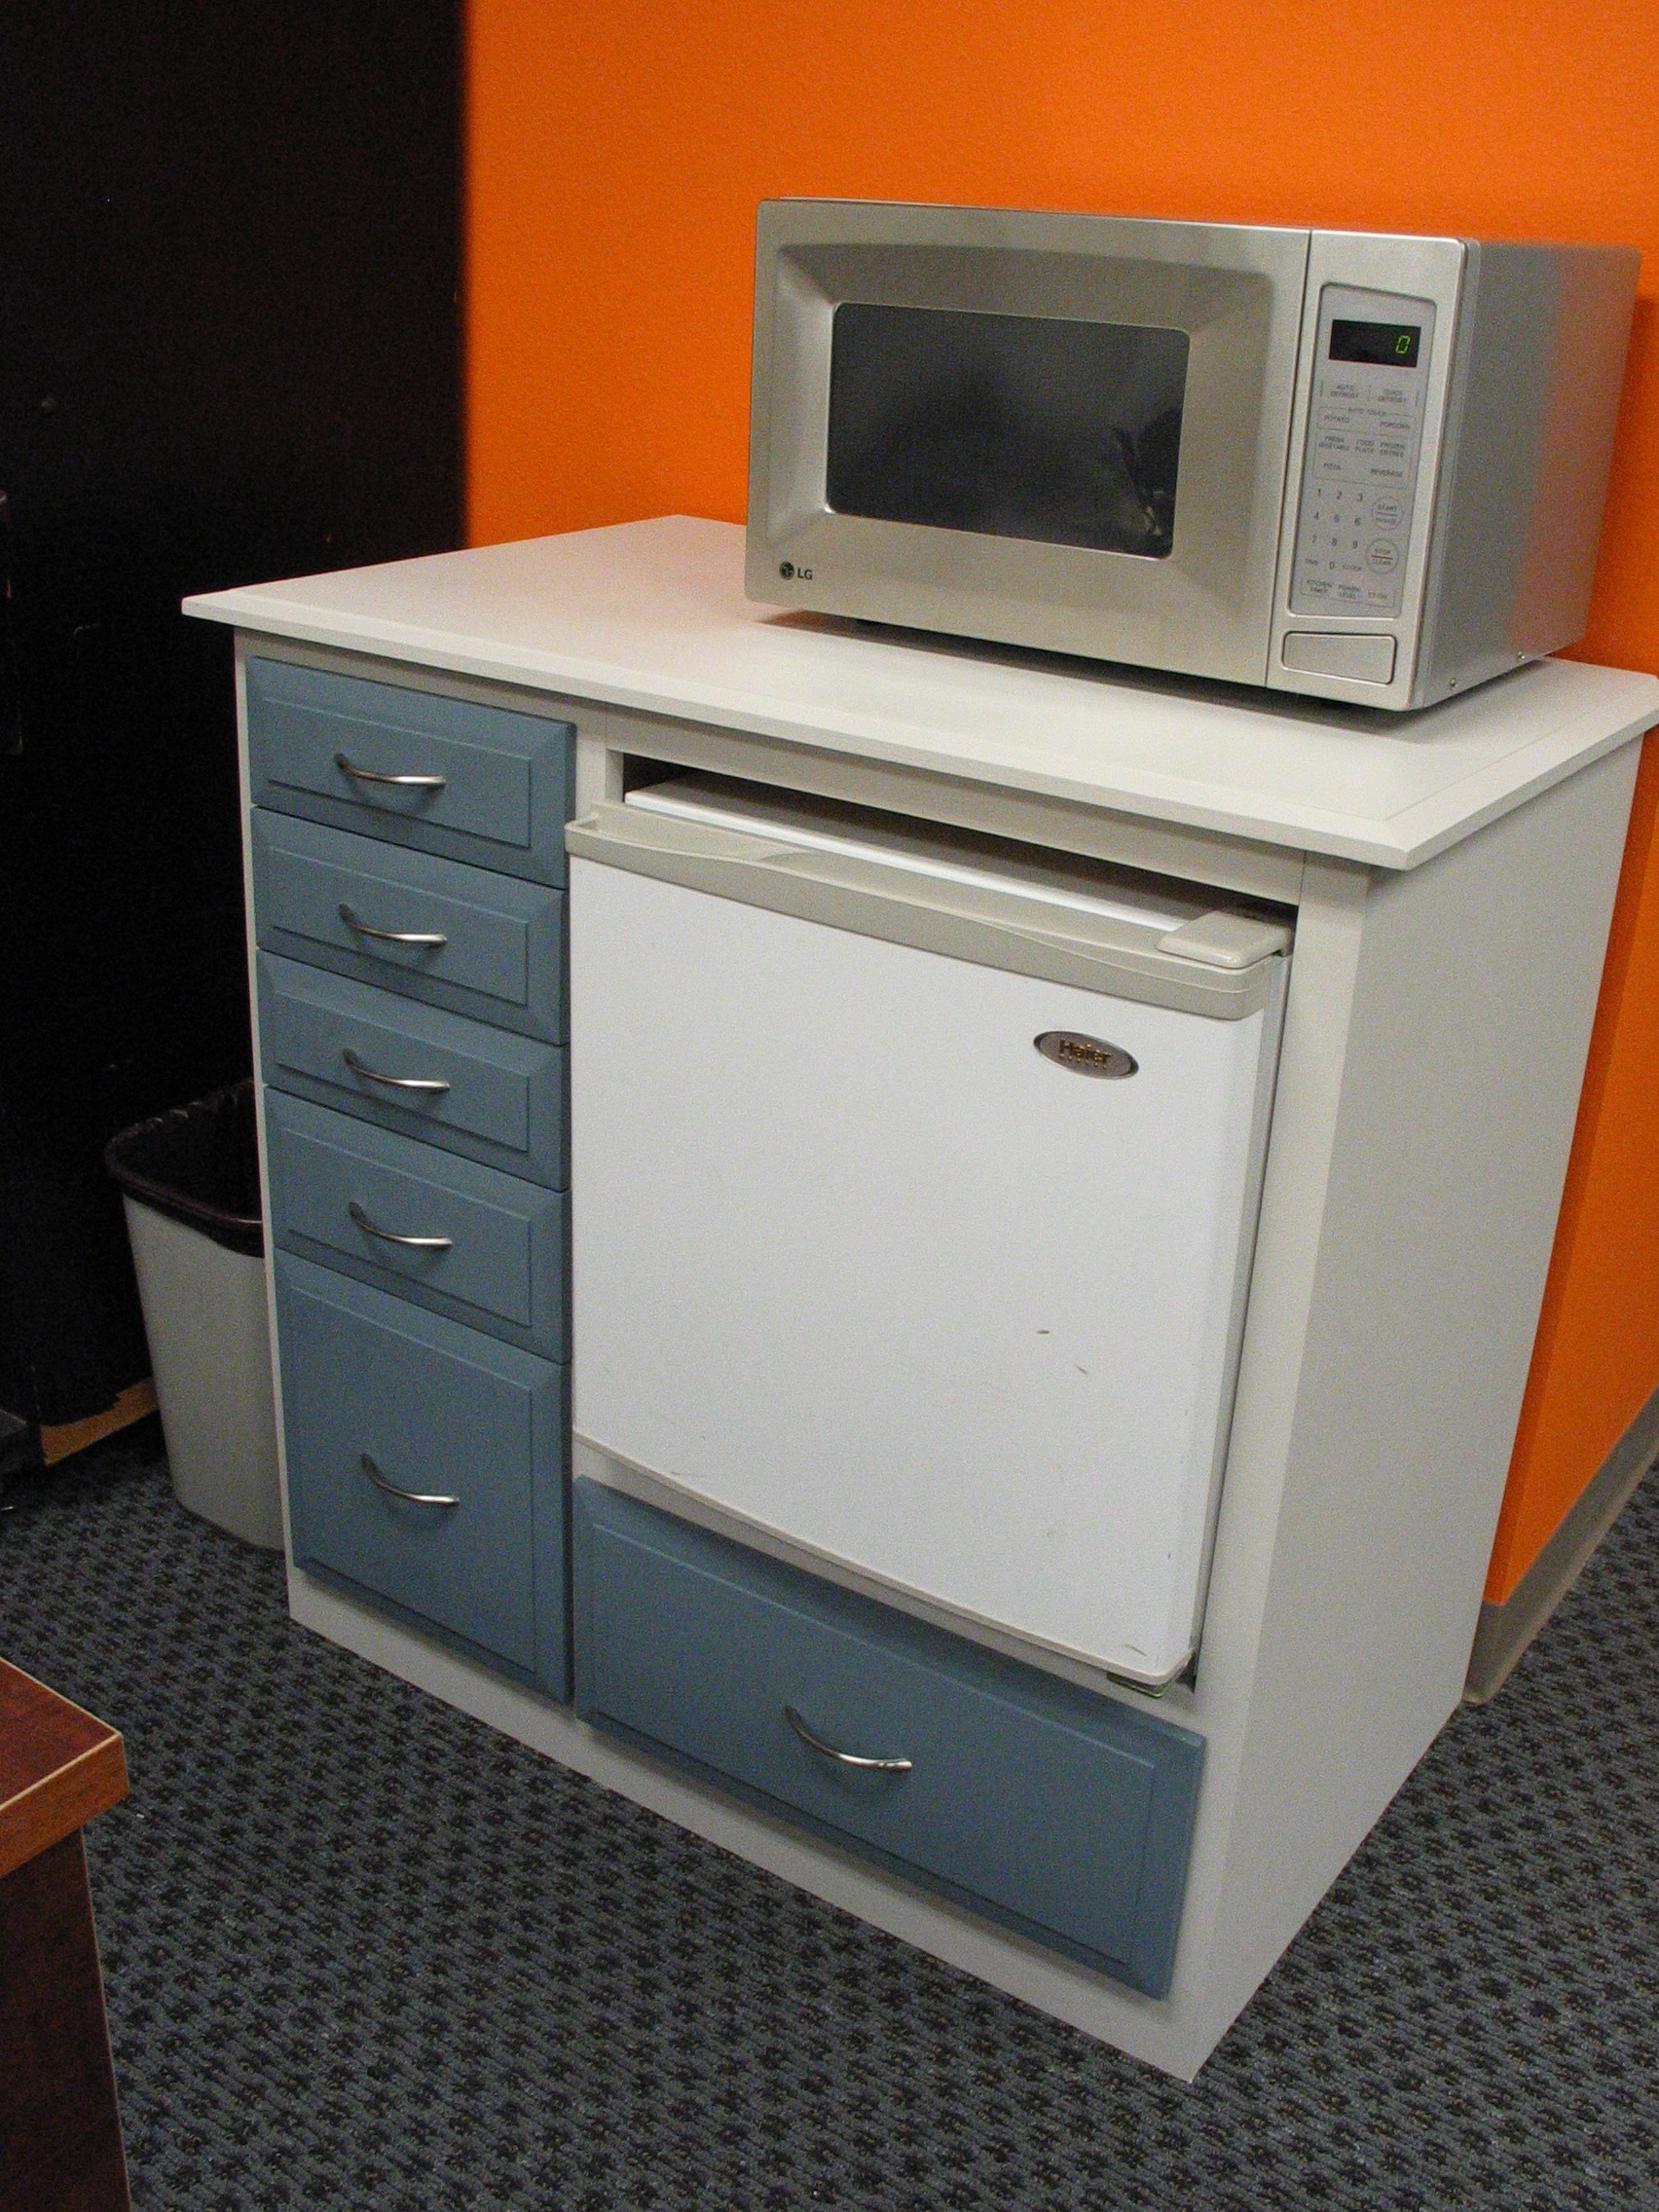 Completed cabinet
After moving into our new office it became clear that we needed a cabinet for our kitchen area. The microwave was balanced on top of the mini fridge, and all the kitchen supplies were piled precariously on top of the microwave. The slightest bump would cause the whole pile to come crashing down, often into the garbage can.
Completed cabinet
After moving into our new office it became clear that we needed a cabinet for our kitchen area. The microwave was balanced on top of the mini fridge, and all the kitchen supplies were piled precariously on top of the microwave. The slightest bump would cause the whole pile to come crashing down, often into the garbage can.
The space available for the cabinet was very limited. I wanted something counter height but as shallow as I could get away with. I made it 3 feet wide to get as much storage as I could but still allow room for the arcade machine and garbage can. I ended up making it about three inches deeper than I wanted because I needed to allow space for the outlets which would end up hidden behind the cabinet.
The other goal was to try to make it as inexpensive as possible by using as much scrap as I could. I still ended up spending almost $200 on it. The drawer slides were $45, they are full extension 100 pound slides that I got from Amazon. I also had to buy poplar for the face frame and the edging on the top, as well as plywood for the drawer boxes and the back of the cabinet. The pullout shelf was an 18" x 20" cutting board I got at Ikea for $10.
The drawer faces are made from scrap MDF I had left from the Racer arcade cabinet I built. The inside plywood is just 3/4" sheathing, and the side and top plywood was leftover from the previous office.
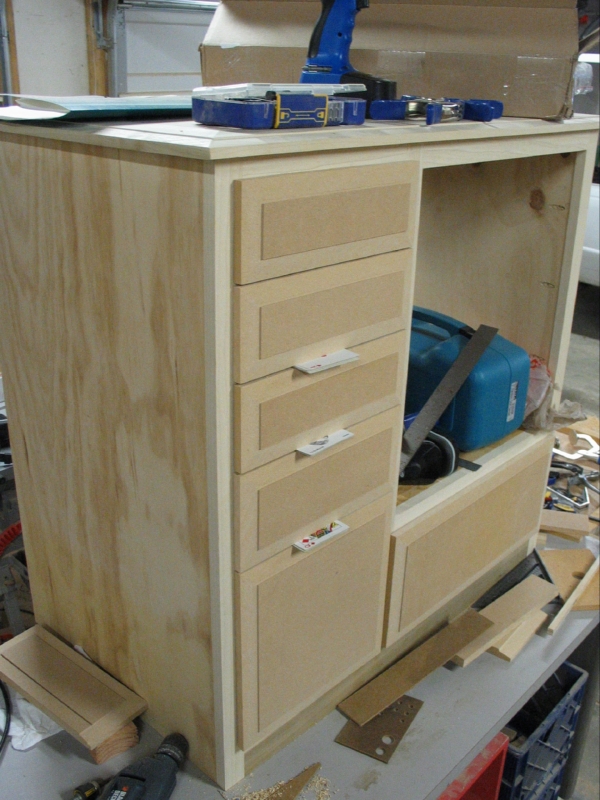
The cabinet was built using pocket screw construction. There is very little glue. The only dados I made were for the drawer boxes to hold the bottoms. The drawer boxes themselves are held together with pocket screws, arranged so that even when open the screws are hidden. The left bottom drawer was made extra deep to allow cleaning supplies like windex to fit.
The slides for the pullout shelf were made with scraps of the flooring that was leftover from the desks we built. It has a great surface that makes the board slide smoothly.
Since the drawer faces were made of MDF all the cut edges had to be sealed. I used a solution of watered down glue and painted it on and then sanded it down. After that they got 2 coats of primer with sanding in between. Only one coat of paint was applied with no sanding and they came out very smooth.
The whole cabinet came out great, and I really love those pocket screws! It made cutting and assembly very fast and easy since I didn't have to calculate for dados or wait for glue to dry.
-

-
Completed cabinet
-
Hidden pull out shelf under the microwave
-
Plywood case parts cut
-
Face frame assembled
-
Pocket screws will be hidden
-
Clamping to get plywood flush with face frame
-
Assembling by using face frame to align the plywood
-
Assembling cabinet
-
Assembling cabinet
-
Face frame and cabinet assembled
-
Face frame and cabinet assembled
-
Face frame and cabinet assembled
-
Top attached
-
Top attached
-
Making the pull out shelf slides
-
Assembled shelf slide
-
Shelf slide in place
-
Shelf inserted and completely hidden
-
Drawer box parts cut
-
Drawer box assembly
-
Drawer mounted
-
Drawer mounted
-
Full extension slides
-
All drawers mounted
-
Saw marks that had to be sanded out of drawer faces
-
Saw marks that had to be sanded out of drawer faces
-
Attaching drawer faces
-
Attaching drawer faces
-
I used playing cards as shims to try to space the faces evenly
-
All faces attached
-
Dividers for utensils in top drawer
-
Handles installed
-
Everything assembled and waiting for paint
-
Back is recessed to allow for outlet behind cabinet
-
Sealing drawer face with glue solution
-
First coat of primer
-
The entire cabinet just fit in my Magnum
-
Primer applied
-
Vitaliy painting cabinet
-
Vitaliy painting cabinet
-
Vitaliy painting cabinet


Media
- Office-kitchen.pdf - Plans [27.62 kB]